| IAP Software ™ |  |
| IAP Software ™ | |
Incident Action Plan Wizard
The IAP Wizard provides a place where users can easily select ICS forms to be included and combined into the Incident Action Plan.
Contents
Create an IAP Using the Wizard
The overview page of the Incident Action Plan Wizard shows all existing plans and characteristics associated to each plan. From this page users can begin the process of creating a new IAP, as well as, Open, View, and Download existing plans.

Click the New button  to begin creating a new Incident Action Plan.
Click the Refresh button  to refresh the list of created plans.
Select an existing plan and click the Open button  to Open the Incident Action Plans (Edit) screen for that plan. Once Open users can also View and Download the plan.
Select an existing plan and click the View button  to view a pdf of that plan.
Select an existing plan and click the Download button  to save that plan to an external location.
If a QR code has been assigned the Print QR Code button  can be used to display and print the associated QR code page.
Click the Add button  to open the Incident Action Plans (Edit) form.
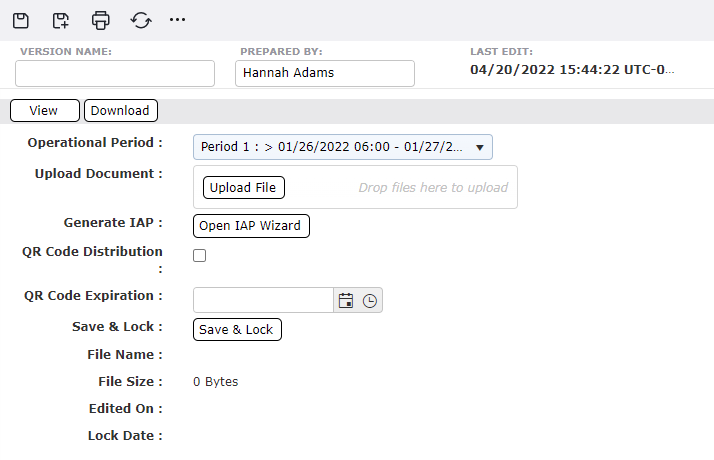
Free type the Version Name into the Version Name field.
The Period field will auto-populate with the current period. Users can select other periods using the dropdown list  .
.
To create an Incident Action Plan, users can either Upload a file or Open the IAP Wizard. See below for more information on both of these options.
After a plan has been created using either method users can choose to assign a QR code for distribution and can also assign an expiration date after which the QR code will no longer be valid. Use the checkbox to assign a QR code. Use the Calendar Control buttons to assign an expiration date. Then use the Save button  to activate the QR code.
NOTE: A QR Code Expiration does is not required when using the QR Code Distribution option.
Once the plan is complete and no further changes will be made use the Save & Lock button  to finalize the plan.
Users may want to upload an already assembled Incident Action Plan. A common reason for uploading an IAP is to include the signed cover sheet or pen and ink changes which may have been written in.
Click the Upload button  .
.
Navigate to the file to be uploaded and then click the Open.
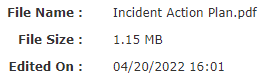
The file will be uploaded and the file information will be displayed.
Users can use the IAP Wizard to view and select from a list of forms available to be included in the Incident Action Plan.
Click the Open IAP Wizard button  to open the Wizard. For more information on options within the wizard see the Wizard Options section below.
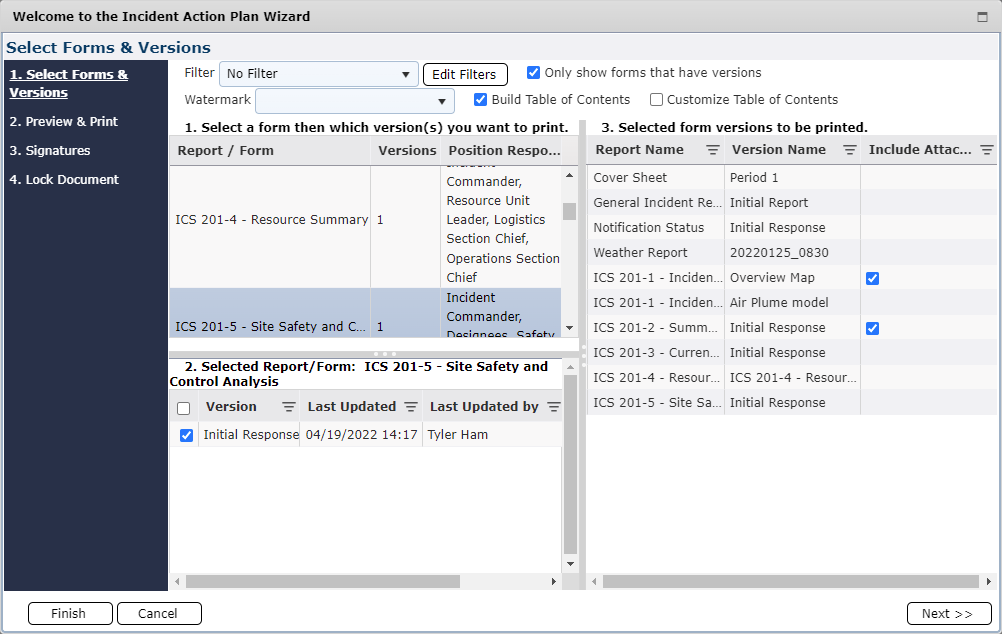
Within section 1 click to select the form and display all versions available.
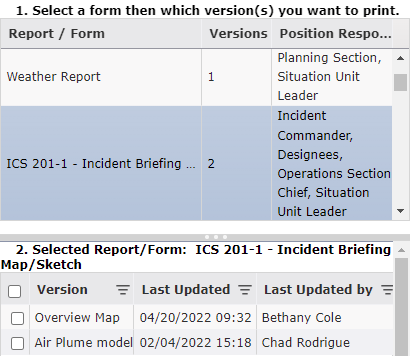
In section 2 use the check boxes to the left of the forms to be included for print. The forms will then appear in the print column on the right side of the screen.
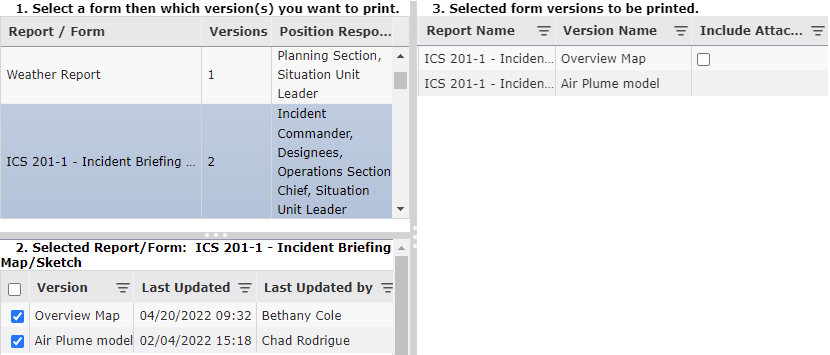
NOTE: Some forms have multiple print layouts available. When one of these forms is selected the user will be prompted to choose which print layout will be applied to the included version.
In section 3 verify the chosen forms and the order in which they will be printed. Click to drag and drop the forms to rearrange the order in which they will print. If a selected form contains an attachment this will be indicated by a checkbox withing the Include Attachments column. If the attachment is to be included in the compiled Incident Action Plan check the box.
Note: If you choose customize Table of Contents the system will not be able to determine proper page numbering. As a result, no overall page numbers will be applied.
Once all the desired forms have been selected click the Next button  to generate a compiled pdf of the IAP.
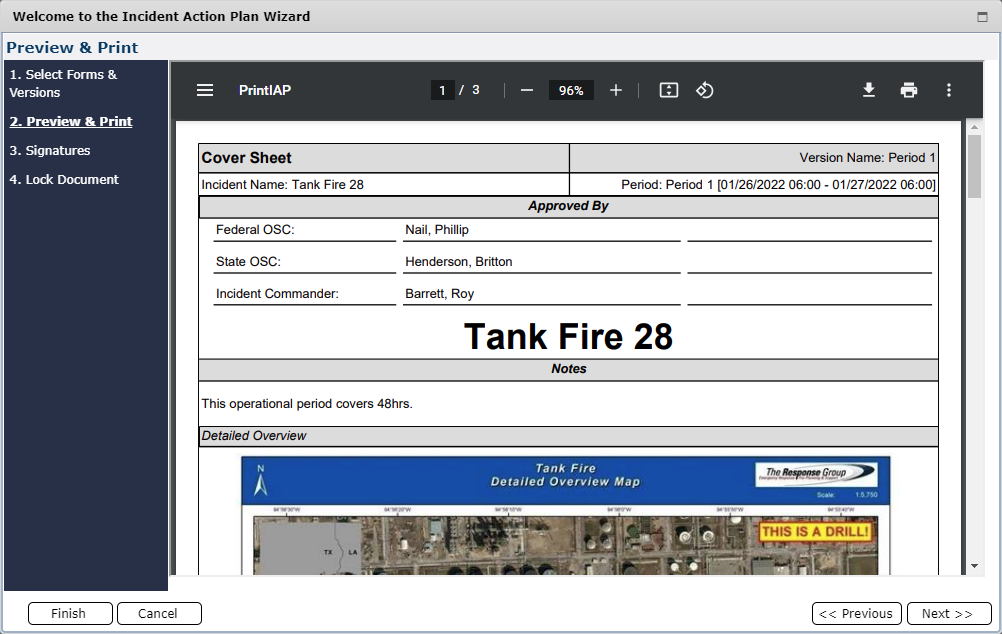
Preview the complied IAP document for completeness then click the Next button  to move to the coversheet options page.
Use the radio buttons to select from the available options provided for the IAP coversheet.
Use current selection (no change) will utilize the currently selected cover sheet. If a coversheet has not been selected when composing the IAP and this option is selected, no cover sheet will be included
Upload a Signed Cover Sheet will allow the user to find a cover sheet document from an external source and add it to the current IAP. When this radio button is selected the Upload button  appears. Users are also provided with the option to replace a selected page with the uploaded cover page.
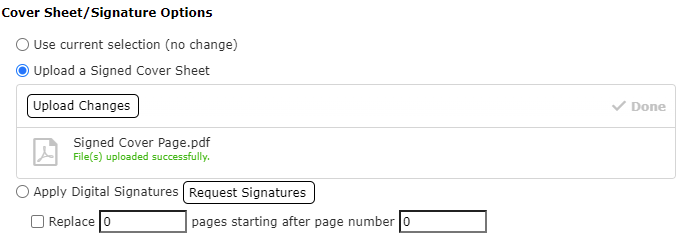
Apply Digital Signatures will provide the user with options for adding digital signatures to the IAP. Use the Request Signatures button  to generate an ICS 213 General Message to all required signees.
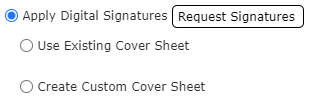
Selecting Use Existing Cover Sheet will allow the user to select a cover sheet from the IAP Software. And will display the Approved By section from the form allowing digital signatures to be added. When the Sign button  is clicked the user will be asked to provide their username and password to add a digital signature.
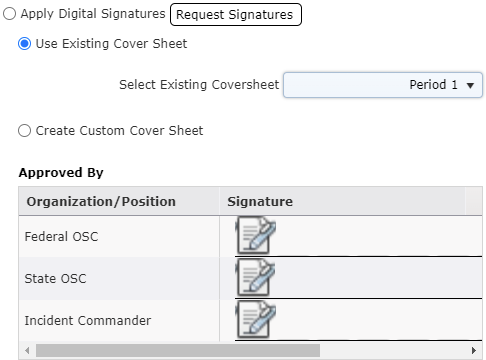
Selecting Create Custom Cover Sheet enables the user to add new signature lines to the form using the Add button  . Users can then type the Position and select the approver from the dropdown list before having the form signed. When the Sign button
  is clicked the user will be asked to provide their username and password to add a digital signature.

Once a cover sheet has been selected and signatures added as desired click the Next button  to finish creating the IAP.
To complete compilation of the Incident Action Plan users have two options:

Clicking the Finish button  will save the IAP and close the IAP Wizard window but will not lock the IAP.
Clicking the Lock and Close button  will save the IAP, lock it from further editing, and close the IAP Wizard window. When this option is chosen users will be asked to confirm locking the IAP before proceeding.
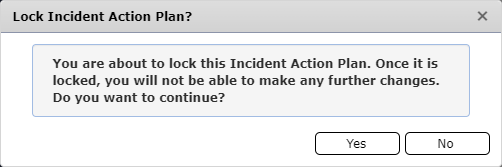
Note: After locking the IAP users can still view or download a copy of the completed document.
The IAP Wizard has several features that aid in selecting a series of documents to include in the IAP.

Filters can be applied to narrow down the list of forms displayed to be added to the Incident Action Plan.

Use the Filter dropdown 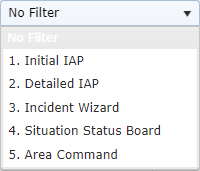 to select a filter option which will narrow the list of forms to a predefined set. The forms included in each predefined filter can be edited using the Edit Filters button
  . When no filter is applied the Only show forms that have versions checkbox
  will omit forms without an existing version.
Use the Watermark dropdown 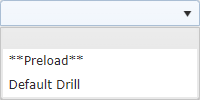 to select which watermark to appear on all forms. If no watermark is selected none will be applied. The Default Drill watermark will be automatically applied to any incident with an Incident Type of Drill or Training.
The Build Table of Contents option is automatically checked by default. This feature builds a table of contents of the forms as they are selected for inclusion in the compiled plan. Unchecking this option will remove the table of contents. Select Customize Table of Contents to make additional needed changes.

© 2024, TRG The Response Group LLC., All rights are reserved.
No part of this web site, and the information which it contains, may be reproduced, stored in a retrieval system or transmitted in any form or by any means, electronic, mechanical, photocopying, recording or otherwise, without prior written permission of TRG.