| IAP Software ™ |  |
| IAP Software ™ | |
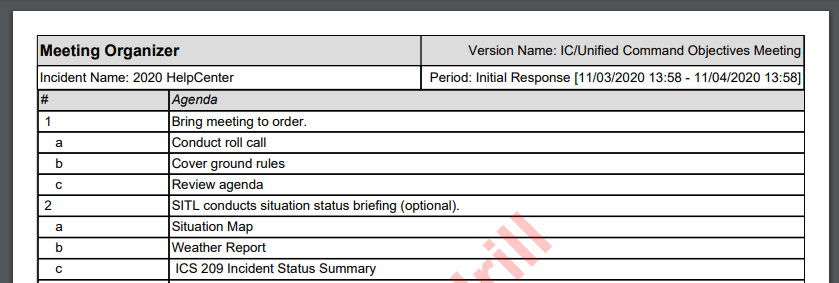
Meeting Organizer
The Meeting Organizer is a useful tool that helps facilitate each meeting during an incident. It allows users to build an attendee list, agenda, tasks, and the option to present each form discussed in the meeting(s).
Contents
Each meeting can be customized to include attendees, an agenda, tasks, and the forms to be displayed during the meeting.
Select the appropriate meeting from the version window.

NOTE: The list of available meetings is auto-populated using meetings included on the ICS 230 Meeting Schedule form. If the desired meeting is not available on the list, it will need to be added to the ICS 230 Meeting Schedule first.
By default, forms that have a Tabbed view will open in that view, separating the different sections into individual tabs. The form can also be displayed in Classic view, separating the different sections on one page. To switch between the views, click the Display Mode button  at the top of the form.
The user can modify or add/delete an existing item on the agenda.
To modify the items listed on the agenda, click on the Edit button  . The user now can select individual fields for modification. Once selected, the field text will be highlighted grey and will be editable. Select the Save button
  after the desired changes are made. There is also an option to refresh or reload the meeting data using the refresh button
  .
.
To add an agenda item, first select the row that the new agenda item should follow, and then click the Add button  .
.
Note: The Indent button  will change the # column to an alphabetical child character of the agenda item above it.
Fill out all cells in the newly created agenda item and click the Save button  .
.
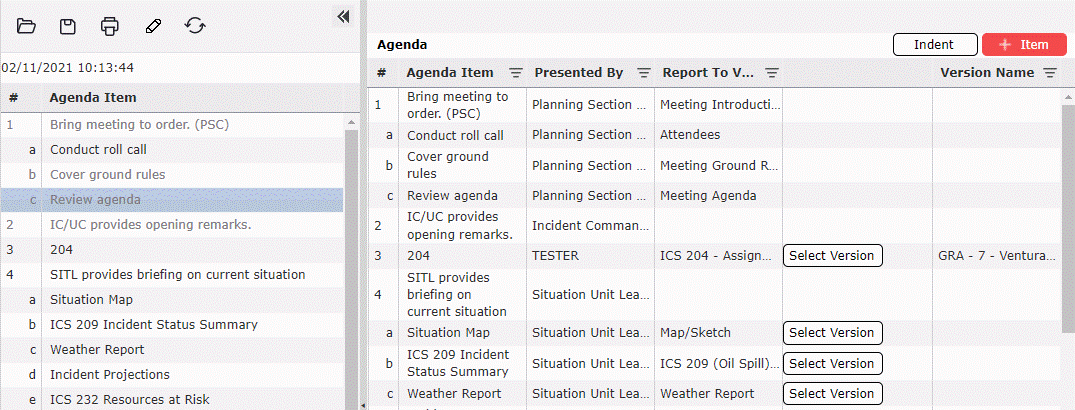
Agenda Item is a free type field used to add agenda item text.
Presented By is a drop-down list used to select the positions responsible for presenting the agenda item.
Report To View is used to select which (if any) form will be viewed when presenting the agenda item.
The Select Version button  is used to select the specific version of the designated form to be viewed when presenting the agenda item.
Version will display the version name of the form selected to be displayed.
To delete an item, hover over the desired item for a moment and the Delete button  will appear, then click on the Delete button
  to remove the item. If you remain hovering over the item without clicking the delete button, it will disappear after a couple of seconds.
Print: Click the print button to generate a pdf version of the meeting agenda.
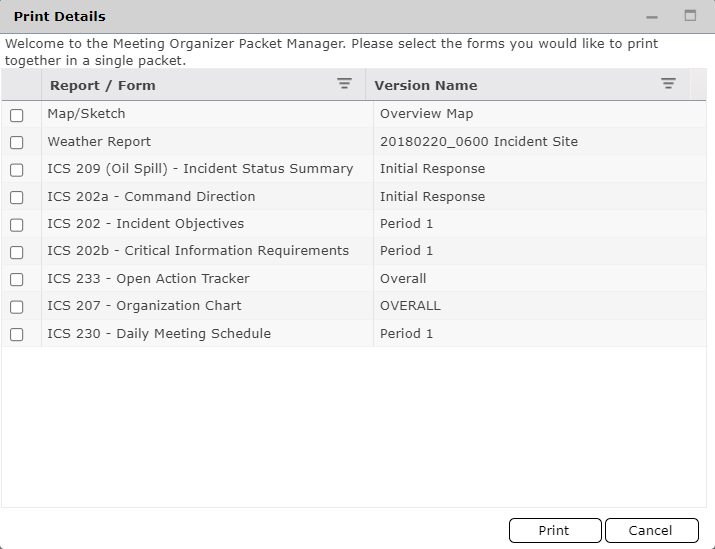
Print Forms Packet: The forms that are attached to the Meeting Organizer can be printed after they are attached to the agenda items by clicking the Print Forms Packet button  .
.
Refresh: Click the refresh button to refresh the agenda.
To minimize the agenda, click on the Minimize Arrow  . The agenda will shrink to show the agenda bullets.

To expand the agenda again, click the arrow.
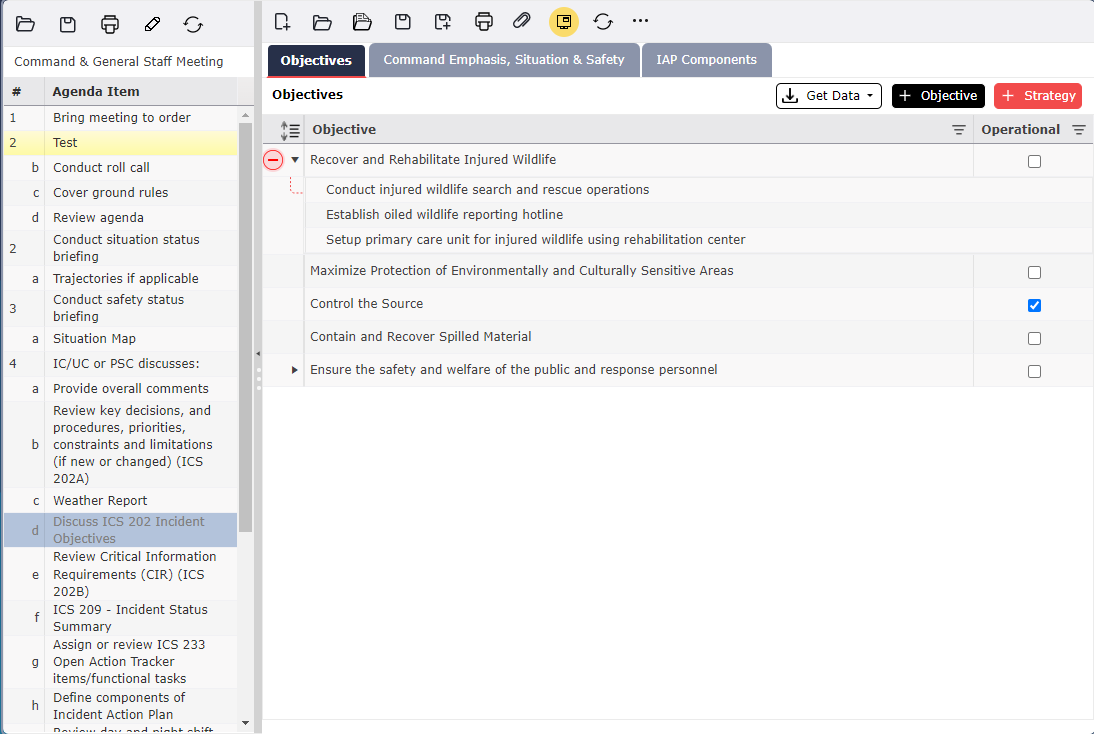
The meeting organizer is a useful tool to conduct an efficient meeting with the ability to display reports. The agenda is displayed along the left-hand side of the screen while individual agenda items are highlighted on the main display.
Click to select the agenda item to be displayed. The item and details will appear on the main display.
Proceed though each agenda item to display the form/information associated with it.
Make updates to each form/report directly from the Meeting Organizer.
NOTE: If there is more than one version of a form, you must select the one you want to view. The best practice is to set up the forms to display prior to the meeting under the Edit option  .
.

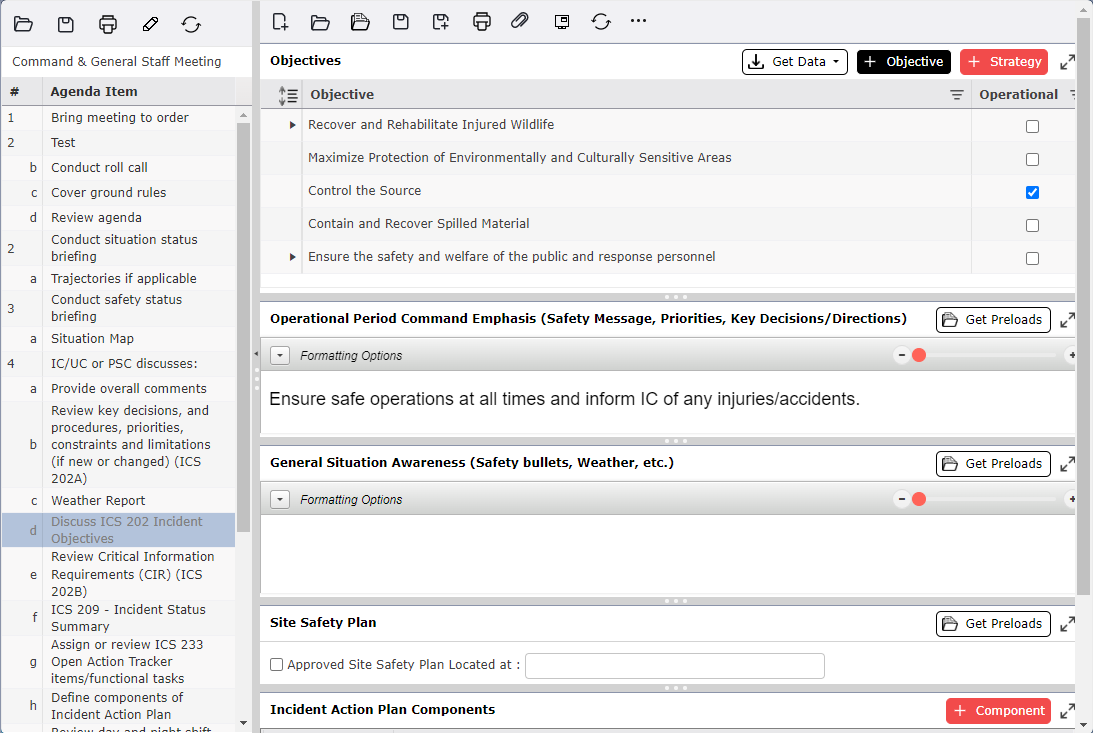
Select the topic being covered and its corresponding form will appear in the window.
Make any necessary updates to the form, then click the Save button  within the main display window.
NOTE: Changes made to a form and saved within the Meeting Organizer will be saved within the form itself.
NOTE: Some forms will have the header and cluster of buttons hidden when opened from the meeting organizer. This option can be toggled on or off using the Hide Header button  in the form dropdown menu
  .
.
NOTE: When an associated form has more than one version, and has not been pre-selected, users will be prompted to select which version or area they wish to open.
© 2024, TRG The Response Group LLC., All rights are reserved.
No part of this web site, and the information which it contains, may be reproduced, stored in a retrieval system or transmitted in any form or by any means, electronic, mechanical, photocopying, recording or otherwise, without prior written permission of TRG.