| IAP Software ™ |  |
| IAP Software ™ | |
The Role Permissions screen, found in the Administration Section, allows users to edit and maintain permissions granted to users for all forms in the Incident Action Plan.
Contents
The administrator may grant access to certain forms by assigning permissions per role selected in the By Role tab, or by assigning forms to roles in the By Permission tab. Most permissions can either have read only, (Access), or ability to read and edit the form, (Full Control), granted per role and then that specific role can be assigned to a user by their administrator.
Administrators can assign permissions per form to roles. These roles can then be assigned to personnel within the database per incident.
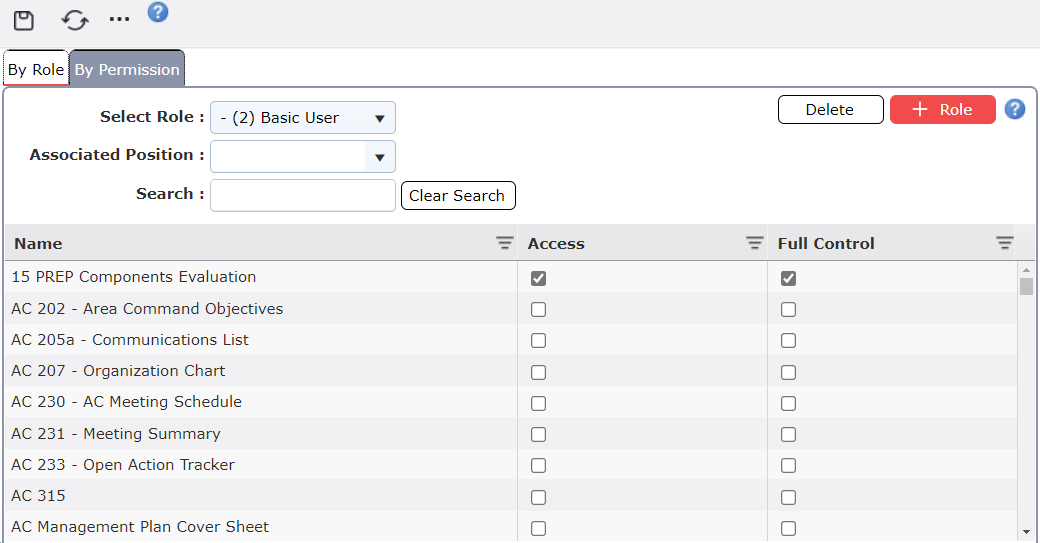
Select the By Role tab  .
.
Click the drop-down next to Select Role  in the top left corner of the form.
Scroll through the list and select the role.
Click on the Role to assign permissions to from the list. 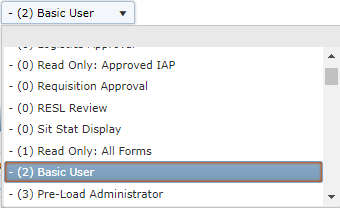
The selected role will show the permissions that are assigned to it.
Scroll through the list of forms and select the checkbox under the Access column to assign view only permissions for that form. To assign read and edit abilities, click the checkbox in the Full Control column for that form.

NOTE: Selecting checkboxes under the Full Control column will automatically select the checkbox under the Access column for that form. Most forms can be granted only Access and not Full Control.
Click the Save button  to keep the changes.
Administrators can assign permissions per form to each role and then assign the roles out to personnel for each incident.
Select the By Permission tab  in the top left corner of the form.
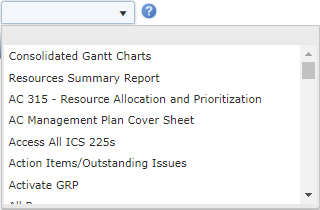
Click the drop-down next to Select Permission  and choose the form to be assigned.
Scroll through the list and select the form.
Click on the Form to assign permissions to from the list.
The selected form will show the permissions that are assigned to it.
Scroll through the list of roles and select the checkbox under the Access column to assign view only permissions for that form. To assign read and edit abilities, click the checkbox in the Full Control column for that form.
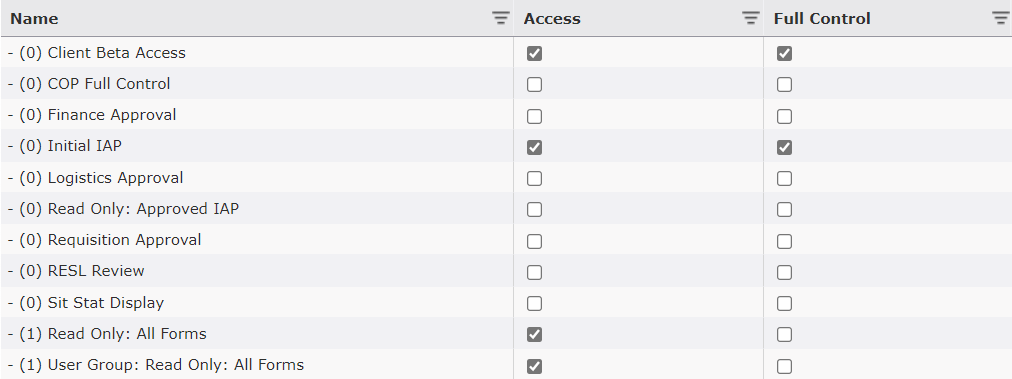
NOTE: Selecting checkboxes under the Full Control column will automatically select the checkbox under the Access column for that form. Most forms can be granted only Access and not Full Control.
Click the Save button  to keep the changes.
Users can deny permission to view any form by unchecking the box under the Access column.
While under the By Role section, the administrator can create a new role or copy from another role.
Administrators can create new roles by adding a role in this screen.
Click on the Add Role button  , and click the Create Blank radio button
  .
.
In the field provided, free type the title of the new role being added.
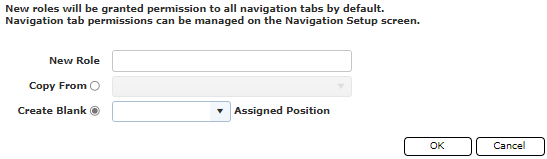
Click the OK button  and the newly created role will appear as a choice in the drop-down menu.
Administrators can create new roles similar to another role by choosing to copy from that role.
Click on the Add Role button  , and click the Copy From radio button
  .
.
In the field provided, free type the title of the new role being added and select a role from the drop-down choices to copy from.
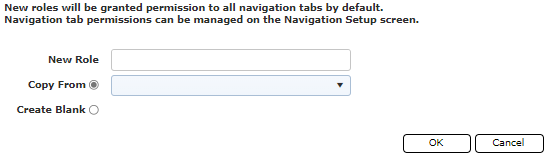
Click the OK button  and the software will copy all the same permissions granted to the copied role into the newly created role.
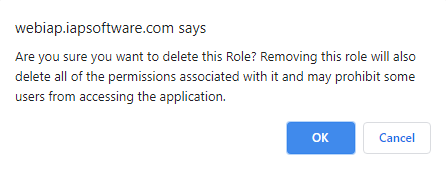
Administrators can delete roles no longer needing to be in that database.
To remove a role, click on the Delete button  .
.
Confirm the removal by clicking OK in the dialog window that pops up or click Cancel to cancel the deletion.
© 2024, TRG The Response Group LLC., All rights are reserved.
No part of this web site, and the information which it contains, may be reproduced, stored in a retrieval system or transmitted in any form or by any means, electronic, mechanical, photocopying, recording or otherwise, without prior written permission of TRG.