| IAP Software ™ |  |
| IAP Software ™ | |
Navigation Setup
Navigation Setup allows users to modify and maintain the availability and order of forms within the Navigation Pane tabs. For help using general form functions (e.g. Create/Open Version, Save, etc.) and accessing preloaded versions, see the General Form Functions page.
Contents
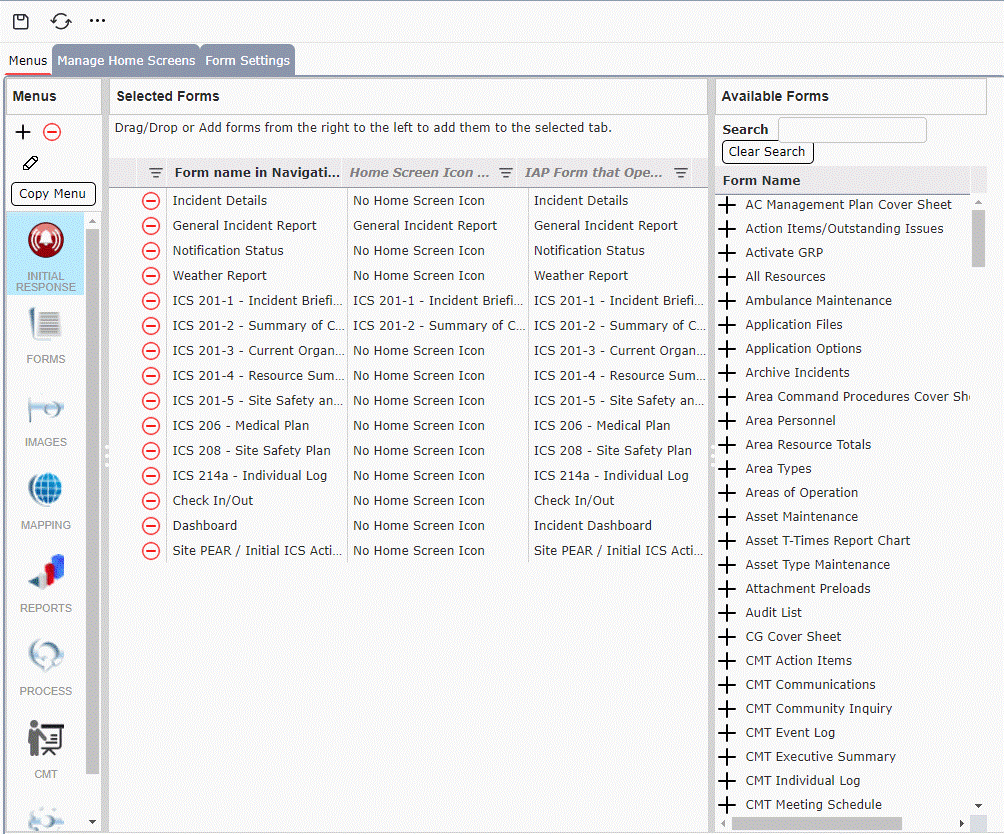
The Navigation Menus section allows administrators to create new Menus tabs, assign forms, and update form names.

The first step when making updates within the Navigation Menus area is to select the Menu to be edited using the Select Menu tab on the left side of the form.
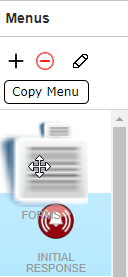
The Menus column is used to add, delete, edit, or copy menus.

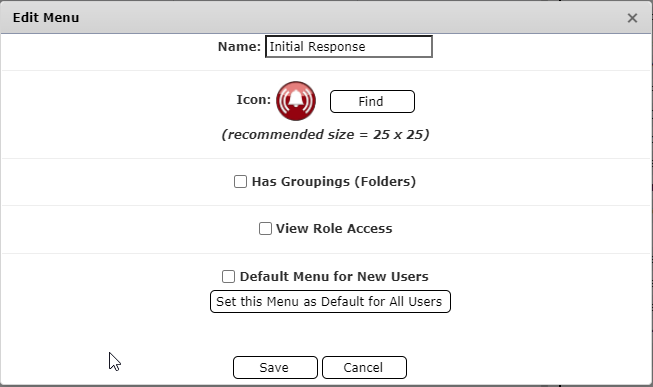
Click the Add button  to begin creating the new Menu. The Edit Menu window will open.

Free type to add the Name of the menu which will be displayed.
Use the Find button  to add an icon for the menu. This icon will be displayed within the Navigation Pane.
If the menu will have subsections check the box for Has Groupings (Folders) box  .
.
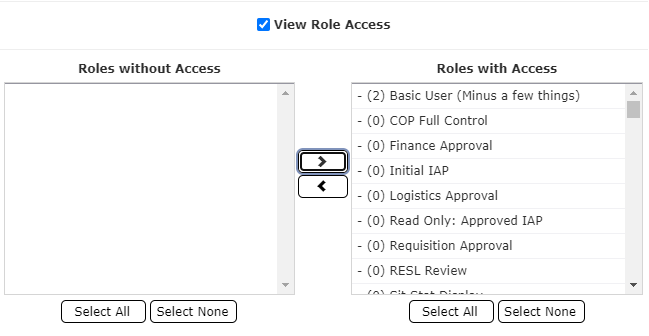
Check the View Roll Access box  to review and edit which role permissions can access the menu.
Then use the Add/Remove arrows  to assign the roles with or without access.
Check Default Menu for New Users to make it a default for any new users.
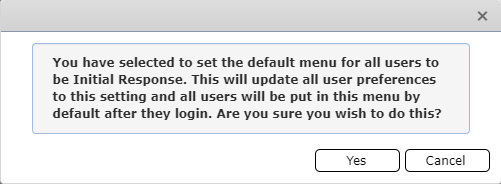
Click Set this Menu as Default for All Users button  to make this Menu the default for everyone who logs in.
Click Yes on the following popup.
Press the Save button  to save all changes made and close the window.
Drag and drop to sort the order of the Menus.
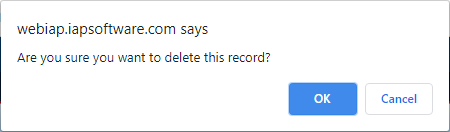
Click to select the menu, then click the Delete button  . Confirm the deletion by clicking Yes. The screen will refresh, and the menu will be removed.
Click to select the menu, then click the Edit button  . The Edit menu window will open. Make the changes to the fields, as necessary. For more information on each of the fields see the Add a New Menu section above.
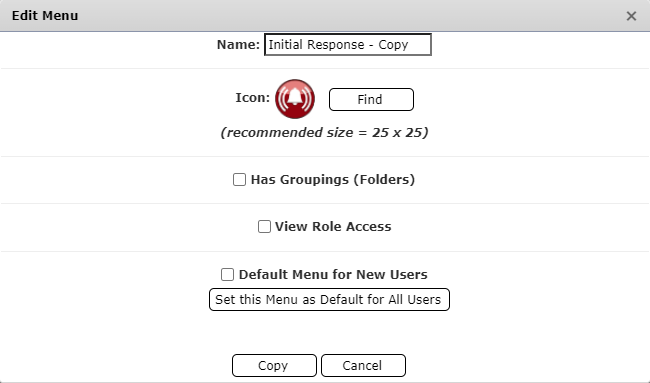
Click to select the Menu, then click the Copy Menu button  . The Copy Menu window will open.
Click the Copy button  to finish copying the Menu.
The Selected Forms section displays the forms assigned to each Menu and allows the user to sort the order of those forms. The display name of the forms can also be updated.
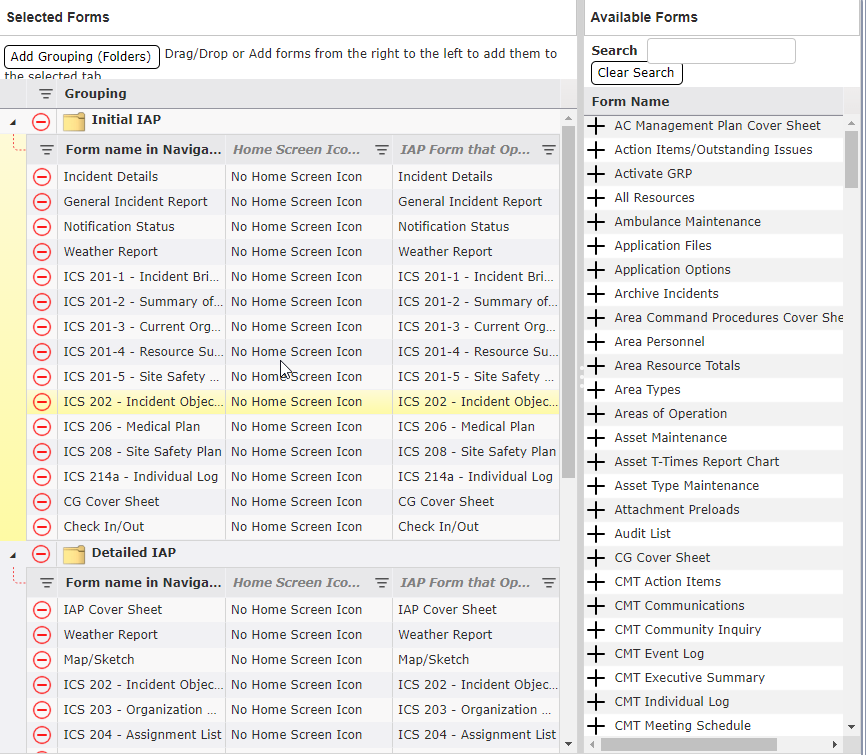
For each Menu users can view the forms that have been assigned. Click the Menu to display the associated forms. If Grouping exists for the Menu the Expand carrot  can be used to show the forms in each grouping.
Within each Menu forms can be grouped by common function, responsible position, or other desired groups. Click the Add Grouping (Folders) button  to add the Grouping Name. Free type to add the chosen name.
The Available Forms section provides a list of forms available to be assigned to a Menu or Menu Grouping. There are several ways that available forms can be added to the Selected Forms section. Users can search the list of Available Forms using the Search field  to filter the list results.
Select the Menu then click the Add button  to add the form to the bottom of the Menu.
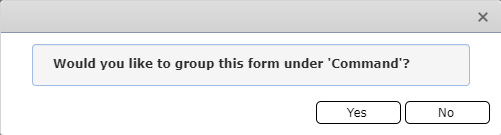
Select the Menu, select the Grouping, then click the Add button  to add the form to the bottom of the grouping. When prompted, confirm the grouping.
Drag and Drop the Available Form to the preferred location within the Selected Forms section.
After forms have been added to the Selected Forms section, they can be rearranged by dragging and dropping to the chose location within the Menu or Menu Grouping.
The display name of a form within the Navigation Pane can be changed, as desired, by double clicking on the form name and free typing the new name.
NOTE: Changing the form name in the Selected Forms section will only change the name of the form which is displayed with the selected Menu, and Grouping. To change the default form name, see the Form Settings section below.
Forms or Groups can be removed from the Selected Forms section, and therefore, from the Navigation Pane using the Delete button  located to the left of the Form or Grouping name. After clicking the Delete button the user must confirm the deletion by clicking OK on the confirmation popup window.
All changes made must be saved by clicking the Save button  . Click the Refresh button
  within the Navigation Pane to view and use the updated navigation.
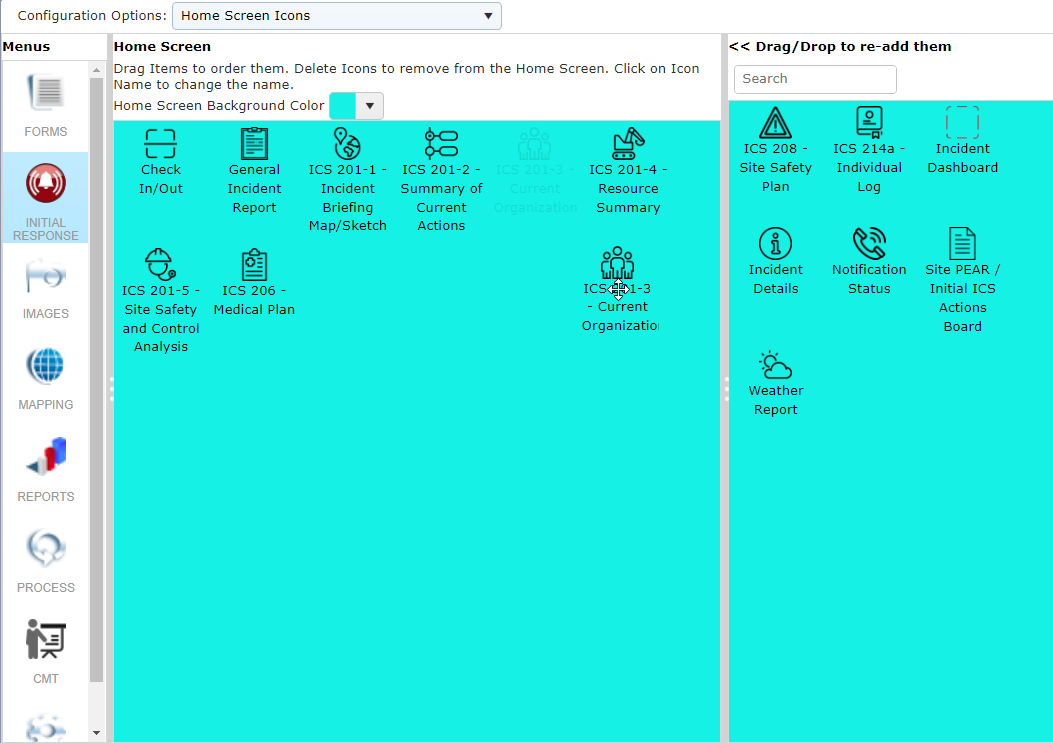
The Manage Home Screens tab allows administrators to setup the layout and icons available for use within the modes home screens.
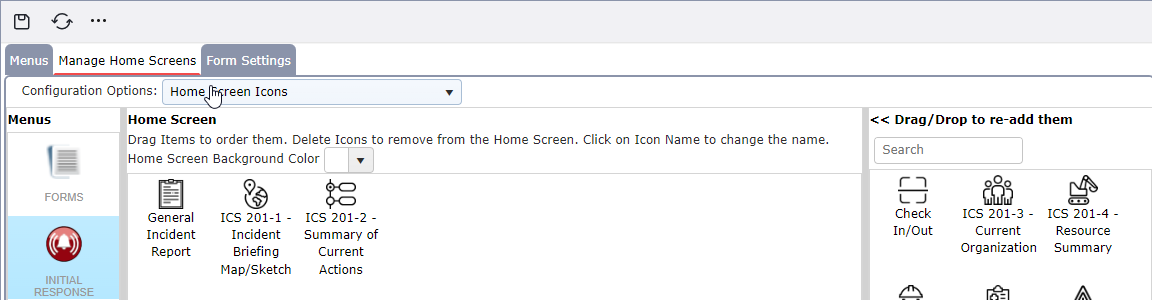
The first step when making updates within the Manage Home Screens tab is to select the menu to be edited using the Menu tab to the left of the page.
Form Tabs: Will open all forms assigned in a new tab when the mode is selected.
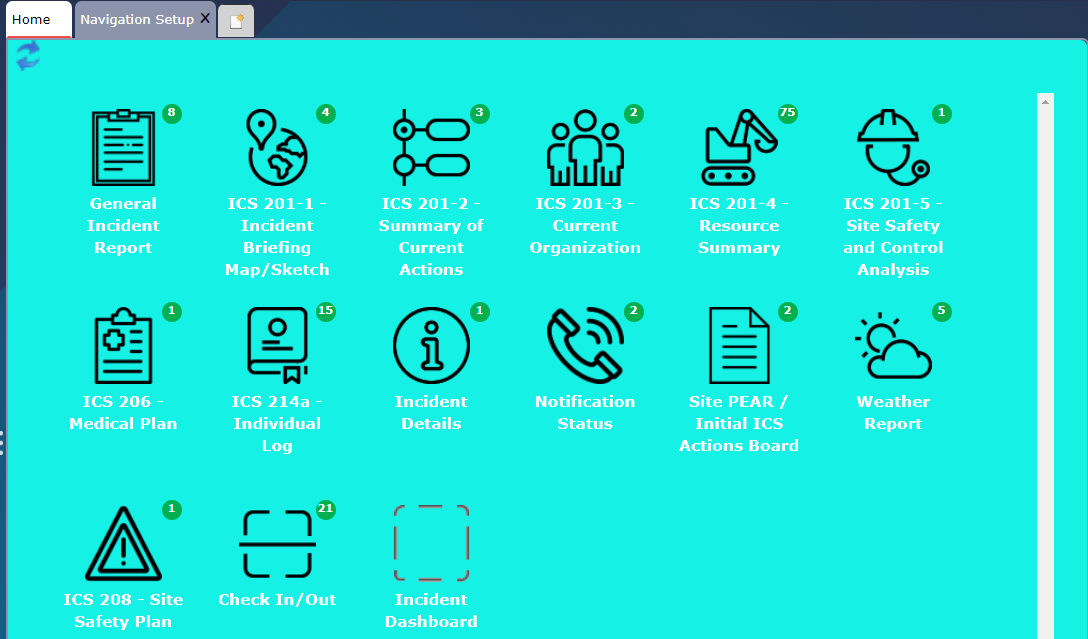
Home Screen Icons: Will display an icon for each form assigned to the mode.
Standard Home Screen: Will display the standard IAP home screen containing the Launch Dashboard feature and The Response Group’s contact information.
Use the Home Screen Background Color drop-down  to choose the background color displayed on the home screen of the selected mode.
To add an item for use on the home screen, drag and drop the item from the Drag/Drop to re-add them section to the Home Screen section. Conversely to remove and item from the home screen drag and drop the item from the Home Screen section to the Drag/Drop to re-add them section. The arrangement of items within the Home Screen section can also be adjusted by dragging and dropping into the preferred order.
The Form Settings tab allows administrators to change the default form name displayed within the software and assign an icon to each form to be used in the mode home screens.

The Form Name column shows the default display name of the form. Updating the Form Name will change the name of the form displayed across all assigned locations within the Navigation. To change the display name of a form, click in the Form Name field then free type to update the name of the form. To reset the names of all forms which have been changed, click the Reset All Form Names button  . All form names will revert to the default form names.
The Original IAP Default Form Name (for reference) column is used strictly for reference purposes and shows the original IAP Default form name.
The Form Icon column allows users to assign an icon to each form. These icons are utilized within the modes Home Screens. Click the Find button  to navigate to the icon for the form.
© 2024, TRG The Response Group LLC., All rights are reserved.
No part of this web site, and the information which it contains, may be reproduced, stored in a retrieval system or transmitted in any form or by any means, electronic, mechanical, photocopying, recording or otherwise, without prior written permission of TRG.