| IAP Software ™ |  |
| IAP Software ™ | |
ICS 210 - Change Status
The ICS 210 Change Status is used by operations to record status changes on resources assigned to the incident. This information is received from Task Forces, Strike Teams, Division/Group Supervisors and Staging Area Managers. For help using general form functions (e.g. Create/Open Version, Save, etc.) and accessing preloaded versions, see the General Form Functions page.
Contents
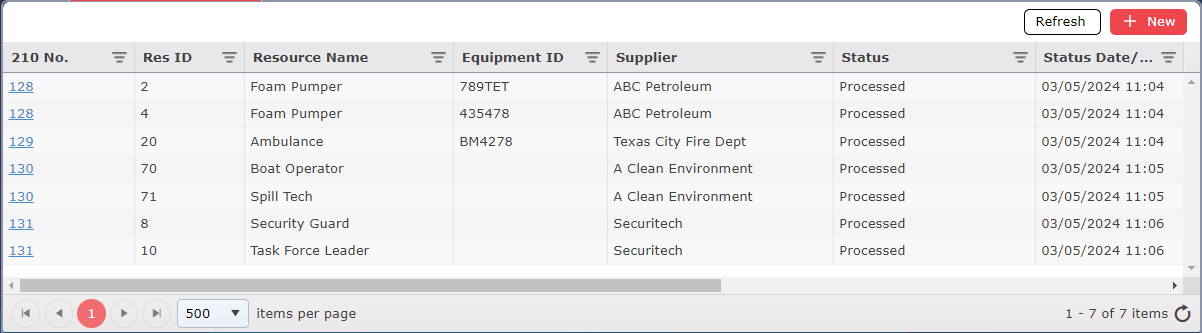
The ICS 210 Dashboard gives users an overview of changes to resources already made.
To open an already existing ICS 210, click the blue hyperlink number in the first column.
To create a new ICS 210, click the Add New  button.
To refresh the page, click the Refresh  button.
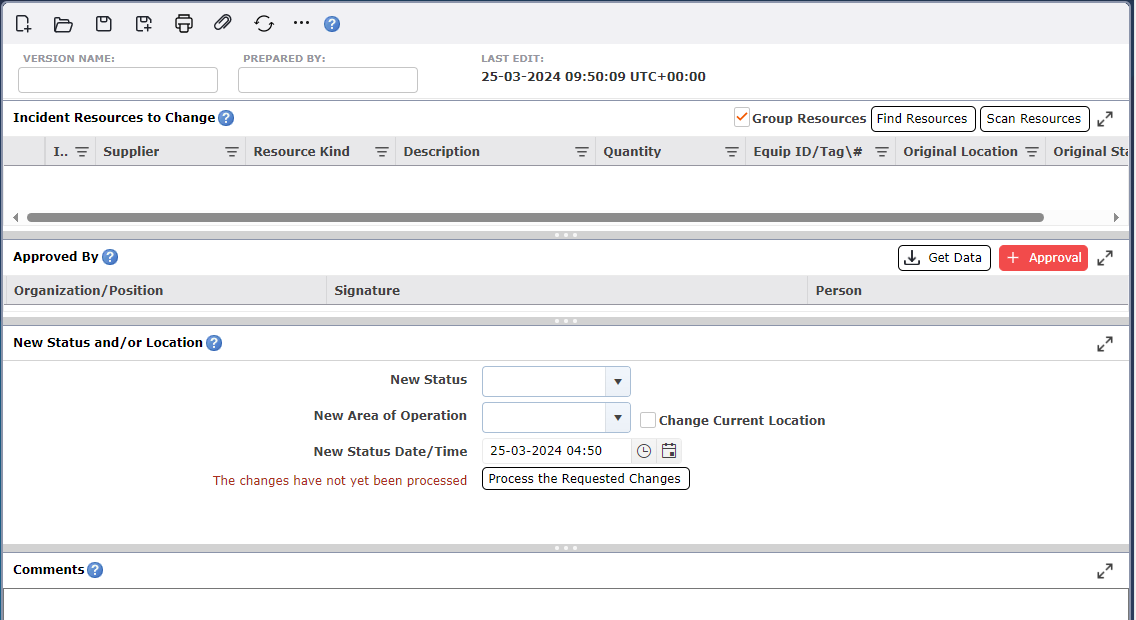
The Status Change form is connected to the Resource Summary. Users can find specific equipment resources listed on the Resource Summary as well as their statuses.
Click the Find Resources button  to locate specific equipment to change status. A window will appear with a list of resources from all areas of operations to choose from. Use the
 option at the top of the window to filter the list of resources only at the staging areas.
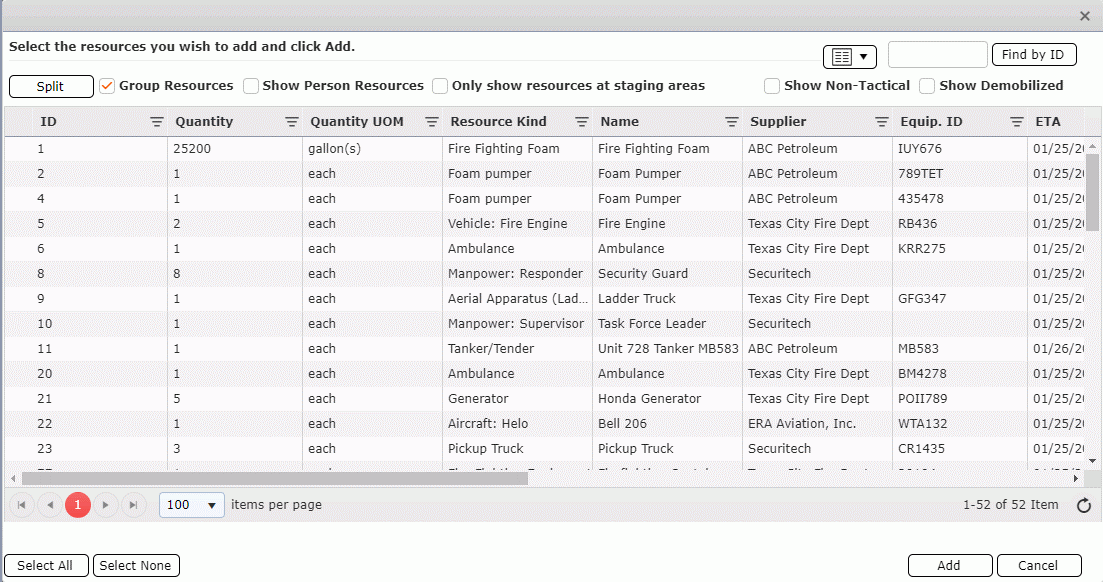
NOTE: if the resource ID is known, enter the ID in the field to the left of the  button and click Find by ID to quickly locate and add.
Select the resources and click the Add button  to bring the selected resources into the form.
To search for a resource by its ID number, enter the digits into the field and click the Find by ID button  .
.
Click the Select All button  to highlight all resources, Select None button
  will remove the highlight.
The Split button  allows the user to divide a resource into multiple line items in order to demobilize a certain quantity.
NOTE: If any resources selected are grouped, a window will appear to confirm if changes apply to the status of all grouped resources.
The Status Change form is connected to the Resource Summary. Users can find specific personnel resources listed on the Resource Summary as well as their statuses.
Click the Find Resources button then ensure to click the check box for Show Person Resources
 to locate a specific person to change status. A window will appear with a list of personnel to choose from. Use the filter options in the column headers to filter the list of personnel to select.
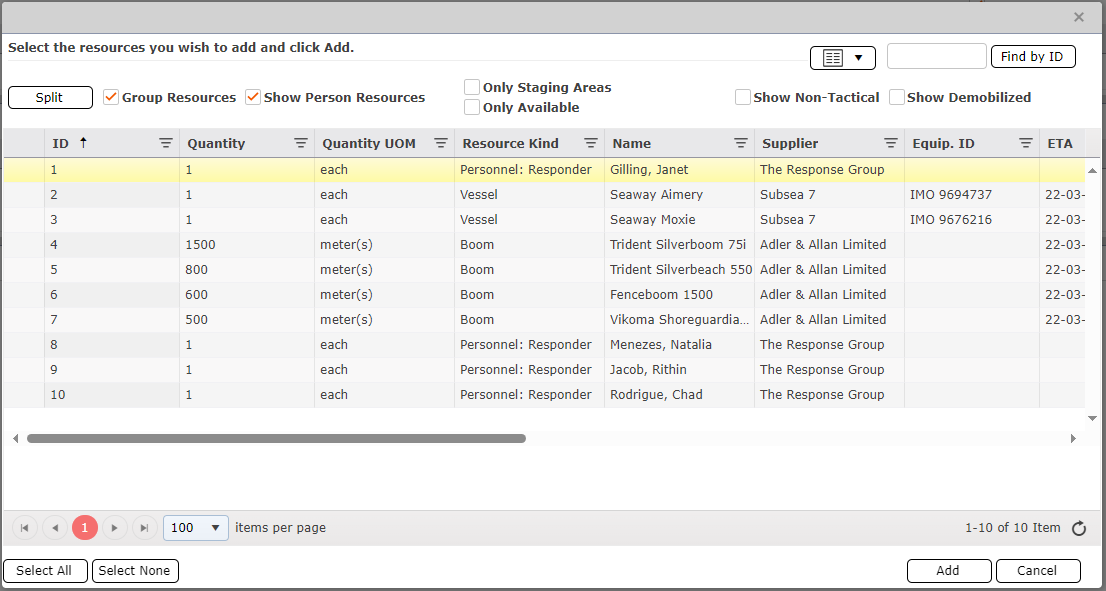
NOTE: You can quickly search by first or last name by clicking on the filter  in the Name column and use the search feature or use the filter in the Supplier column to search by organization.
Select the personnel and click the Add button  to bring the selected personnel into the form.
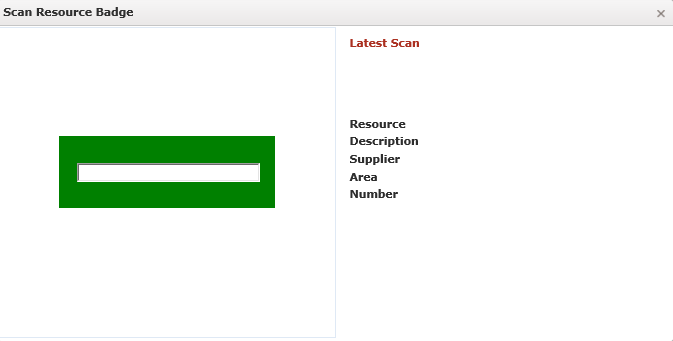
To enter resources by scanning a badge, click the Scan Resources button  . This will enable the user to scan a badge that is associated to a resource and it will appear on the 221-demobilization form.

Add approvals if necessary. Use  to add manually or use
  to choose from other forms such as ICS 201-3 Current Organization, ICS 207 Organization Chart , ICS 211 Check-In List or ICS 214a Individual Log. Click ‘Yes’ on the following message. Note, you may have to add the Organization/Position if it is not pulled from the particular form you get data from.

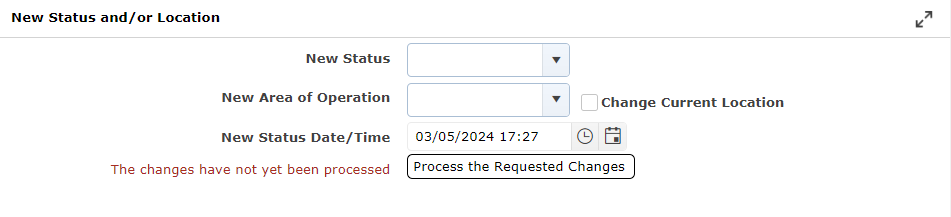
The status and location of resources are tied to the Resource Summary and will update once the ICS 210 is processed. After selecting resources to change, you will need to select their new status and/or location.
Select the New Status from the drop down.
Select the New Location from the drop down.
Check the box next to Change Current Location to change the location of the resource to the same as the resources assigned area.
Select the New Status Date/Time using the Calendar Control.
Click the Process the Requested Changes button  to update the status of selected resources.
The comments section is where the Staging Area Manager and/or Check-In/Check-Out Recorders can document any notes related to the resource such as condition of the resource, model number, and serial number. Simply click in the blank area and free type.
Double click in the white area to expand the window..
Once complete, the version name will update as ‘Processed’ and a lock icon  will be visible at the top of the form and users are no longer able to modify this version of the form.
© 2024, TRG The Response Group LLC., All rights are reserved.
No part of this web site, and the information which it contains, may be reproduced, stored in a retrieval system or transmitted in any form or by any means, electronic, mechanical, photocopying, recording or otherwise, without prior written permission of TRG.