| IAP Software ™ |  |
| IAP Software ™ | |
Personnel
The Personnel window allows an administrator to enter and maintain data for all personnel involved in an incident or an exercise. For help using general form functions (e.g. Create/Open Version, Save, etc.) and accessing preloaded versions, see the General Form Functions page.
Contents
Consolidate Duplicate Personnel
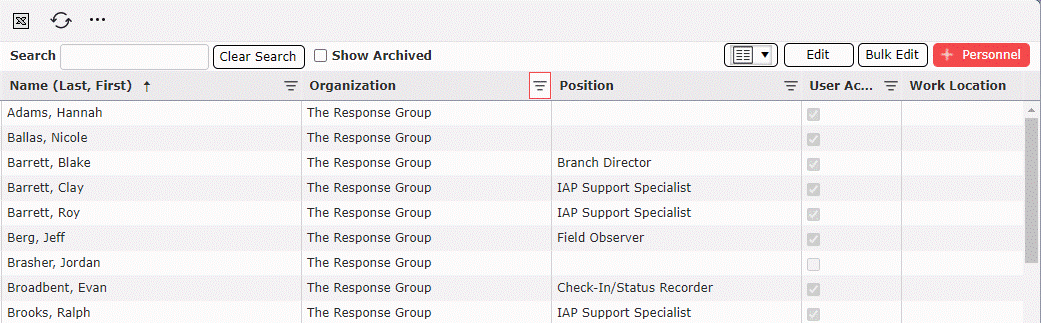
A user can search through existing personnel records to locate an individual quickly.
Type the individual’s first or last name into the Search box. Upon typing the name, the results will continuously be narrowed based on the input.
NOTE: Users can also search by organization, position, or phone number to find individuals. Spelling and formatting of names, numbers, positions, and organizations does affect the results when using the search box.
Click the Clear Search button  to quickly erase the previously searched data and start a new search.
NOTE: Users can select which columns to show or hide by checking/unchecking the checkbox within the Show/Hide Columns  drop-down options.

Users can add personnel which do not already exist within the database or update personnel which have previously been entered into the database.
NOTE: It is recommended to search for personnel before adding them to avoid duplication of entries, this includes nicknames or potential misspells.
Click the Add button  to open the Edit Person window.
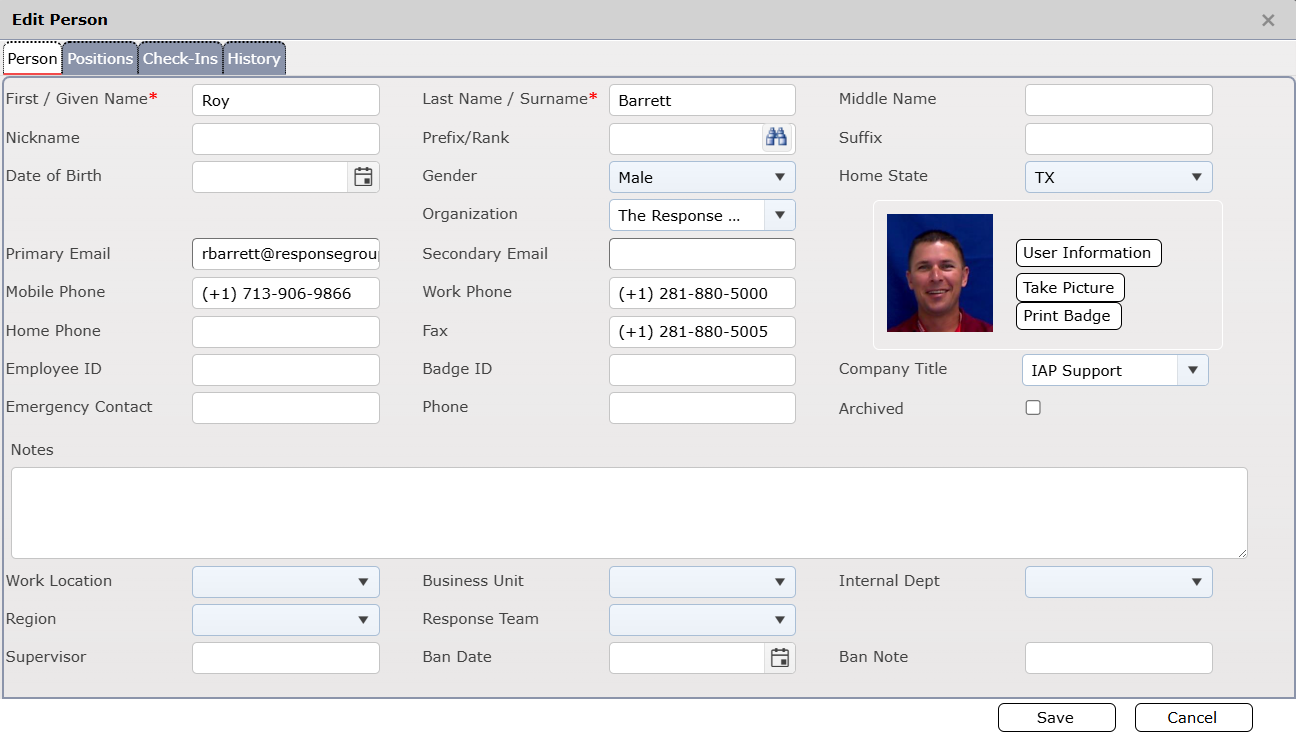
Enter the applicable information for the individual being added in the fields provided.
Click the Save button  to save data entered and close the Edit Person window.
Users can modify existing personnel records.
Select the desired individual and double click or use the Edit button  to view detailed personnel information.
Update the applicable information in the fields provided.
To add or update the personnel photo, click the Take Picture button  to open the update picture window.

Using a webcam users can capture a new image to be added to the personnel record. A preview of the image will be displayed within the update picture window. When the image is aligned as desired click the Take Picture button  to capture and save the photo.
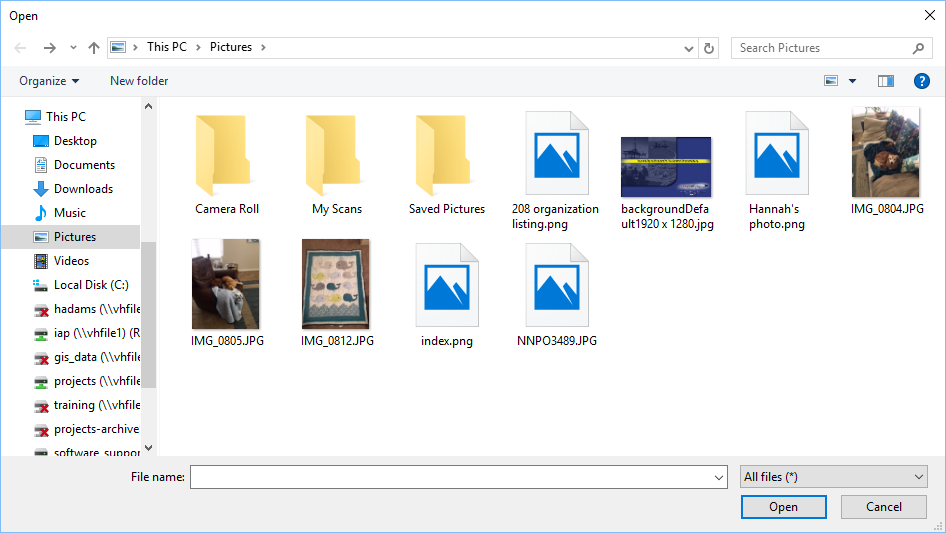
Users can select a pre-existing image to be added to the personnel record. Click the Upload Image button  , then navigate to and select the image file desired. Click Open to view the newly selected image in the Current Picture side of the update picture window.
Click the Save button  to keep the updated image.
To create and print a personnel badge, click the Print Badge button  . For more information on creating and printing badges see the Check In/Out page.
Click the Save button  to save data entered and close the Edit Person window.
Click the Cancel button  to discard changes and return to the listing of personnel.
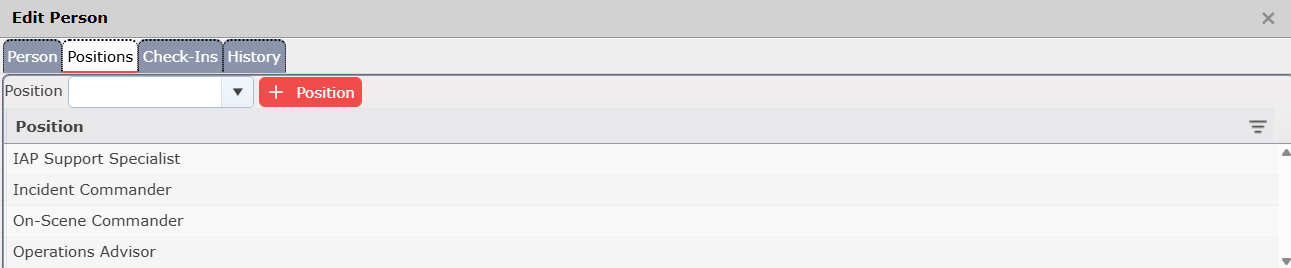
The Positions tab of the Edit Person window will display Positions data for personnel. You can add as many positions as a person is qualified to fulfill in events.
To add a position, click the Position dropdown arrow  and type the name of the position you need to add. Search results will be adjusted as you type.
Once selected, click the Add Position button  .
.
Click the Save button  to save data entered and close the Edit Person window.
To delete a Position, hover over the desired line item for a moment and the delete button will appear, then click on the Delete button  to remove the line item. If you remain hovering over the line item, the delete button will disappear after a couple of seconds.
The Confirm Delete dialog box will appear. Click Yes.

Note: Positions can also be added automatically if there is also a subscription to The Response Group’s Personal Qualification Standard (PQS) Responder software.
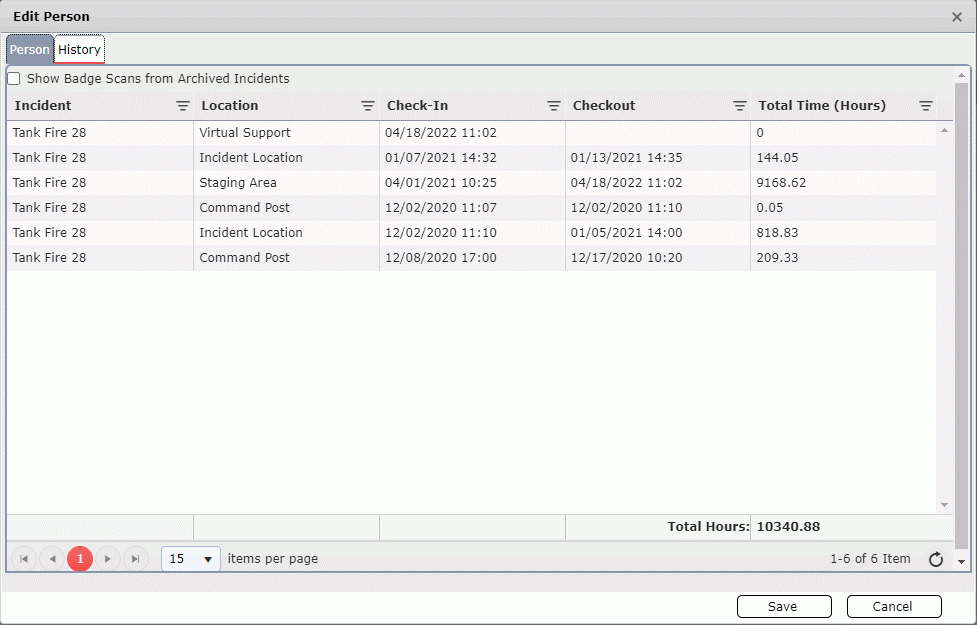
The Check-Ins tab of the Edit Person window will display Check-In data for personnel. The default view shows data only for active incidents. To view data for archived incidents, check the Show Badge Scans from Archived Incidents box .
.
The History tab of the Edit Person window will display historical data for personnel. Designed to keep track of changes in the primary information of the person.

After a person has been added from within Personnel, login credentials can be assigned to create a new user. From the Edit Person window click the User Information button  . For more information on creating users, see the User Setup page.
Select the desired individual to be deleted.
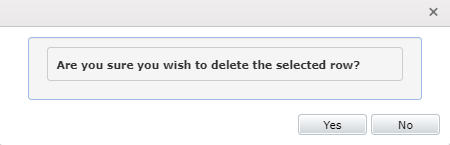
To delete personnel, hover over the desired line item for a moment and the delete button will appear, then click on the Delete button  to remove the line item. If you remain hovering over the line item, the delete button will disappear after a couple of seconds.
The Confirm Delete dialog box will appear. Click Yes.
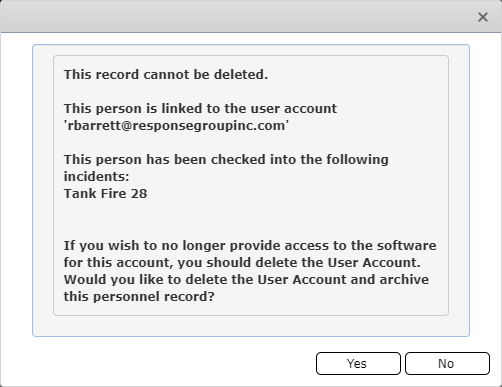
NOTE: Personnel who have a user account or who have checked in to any incidents within the database cannot be deleted. When a user attempts to delete a person with a user account or who has checked in a dialog box will be displayed indicating that the record cannot be deleted and why.
Personnel who cannot be deleted but are no longer required within the database can be archived to be hidden from view.
Select the desired individual to be archived.
Click the Edit button  to open the Edit Person window.
Check the box next to Archived  on the right-hand side of the window.
Click the Save button  to save changes and close the Edit Person window.
To view personnel who have been archived within the database click the Show Archived checkbox  within the personnel search screen. The Personnel list will refresh.
NOTE: To show only Archived personnel, use the filter option  at the top of the Archived column.
To unarchive personnel:
With the Show Archived checkbox selected, click on the desired individual to be unarchived.
Click the Edit button  to open the Edit Person window.
Uncheck the box next to Archived  on the right-hand side of the window.
Click the Save button  to save changes and close the Edit Person window.
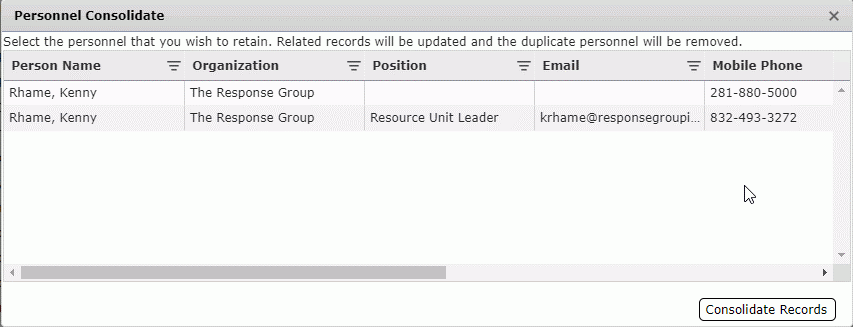
It may be necessary to combine duplicate records into one personnel entry without deleting either of the duplicate entries because the individual has checked into incidents using both personnel records. To preserve historical data for both entries follow these steps to consolidate into one entry:
Using the drop-down menu at the top left, select the Consolidate option  . This will activate the ability to multi-select. The Consolidate Selected Personnel button
  will appear to the right of the search field.
Select the personnel records from the list to be consolidated and then click the Consolidate Selected Personnel button  .
.

The Personnel Consolidate dialog box will appear containing only the selected records. Select the record to remain active and then click the Consolidate Records button  . The record which is not selected will be archived.
Bulk Edit allows users to edit multiple personnel records simultaneously.
1. Use the search field to narrow the list of personnel records to display only those to be edited.
2. Click the Bulk Edit button  .
.
3. Use the drop-down provided to select the column to edit and enter the new value for the column.

Click OK to apply the changes.
© 2024, TRG The Response Group LLC., All rights are reserved.
No part of this web site, and the information which it contains, may be reproduced, stored in a retrieval system or transmitted in any form or by any means, electronic, mechanical, photocopying, recording or otherwise, without prior written permission of TRG.