| IAP Software ™ |  |
| IAP Software ™ | |
Users
The Users screen can be used to edit and maintain a list of users in the IAP software as well as set individual access levels. For help on using general form functions (e.g. Create/Open Version, Save, etc.) and accessing preloaded versions, see the General Form Functions page.
Contents

Before a user can be created there must be an existing personnel record. For help adding and updating personnel records see the Personnel page.
To create a user in IAP:
Click the Add  button to bring up the Create User window.
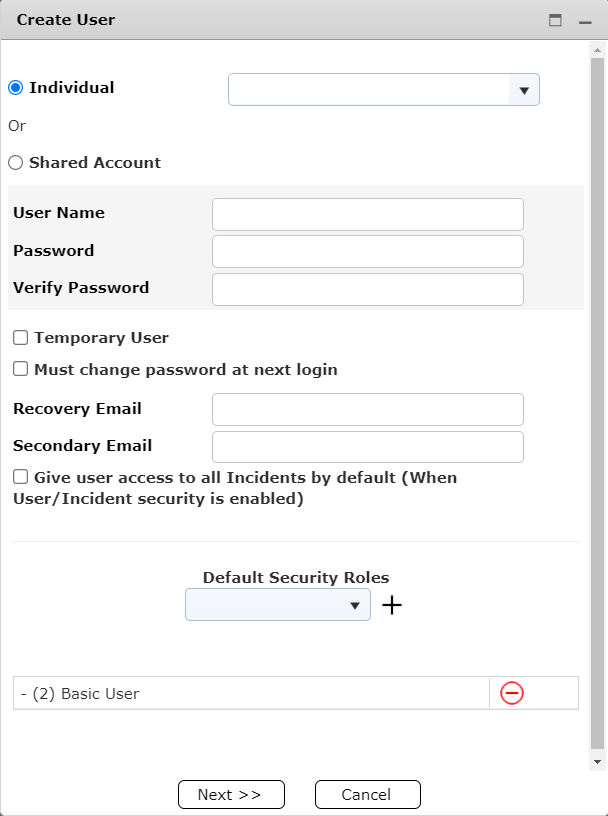
Within the Create User window, first select whether the account will be an Individual or Shared Account.
If the account is an individual account, use the drop down to select a person already entered into Personnel, or create a new person using Create New  button at the top of the drop down.
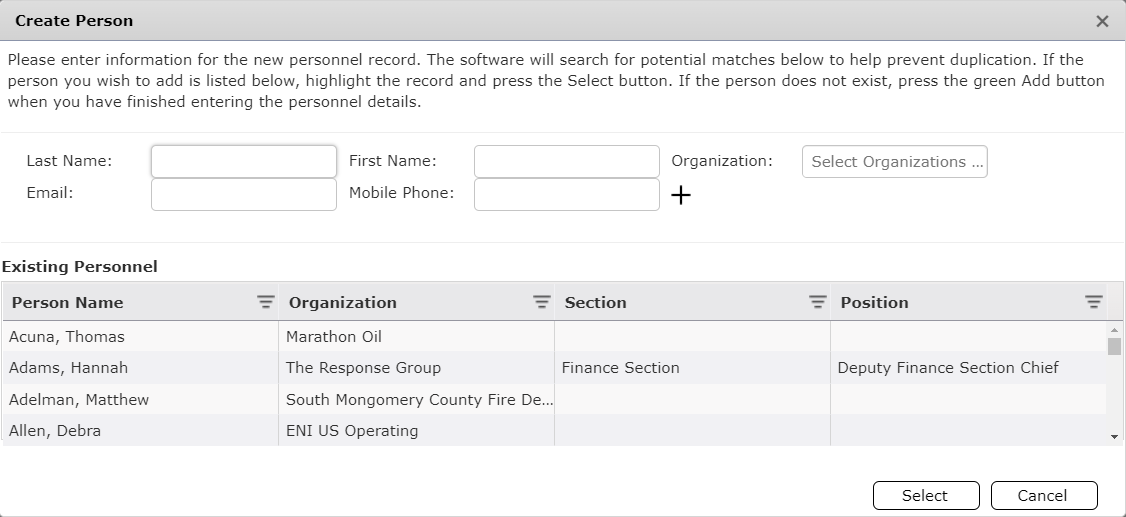
To create a new person, enter their last name and first name must be entered in order to add them to the personnel listing. Fields are also available for Organization, Email, and Mobile Phone.
To add them to the list, click the Add  button.
Type in a User Name for the account. If a name was selected for an individual account, a default user name is the email address (type in the information); unless otherwise agreed upon.
Enter in a password into the Password and Verify Password fields.
The password must be 6 characters in length, contain two of the following three: Upper- and Lower-Case letters, Numbers, and Special Characters.
The passwords must match exactly.
If the account password should be changed by the user at first login, check the box next to Must change password at next login.
If it is a Temporary User place a checkmark in the box and select the date in which the password will expire.
For Individual accounts, a Recovery Email should be entered in case of password loss. A Secondary Email can be entered as well for redundancy and to ensure a User can recover their password.
Note: For shared accounts, this option will not be available. Should a Shared Account need to be changed or recovered, it will need to be done by a user with the necessary permissions.
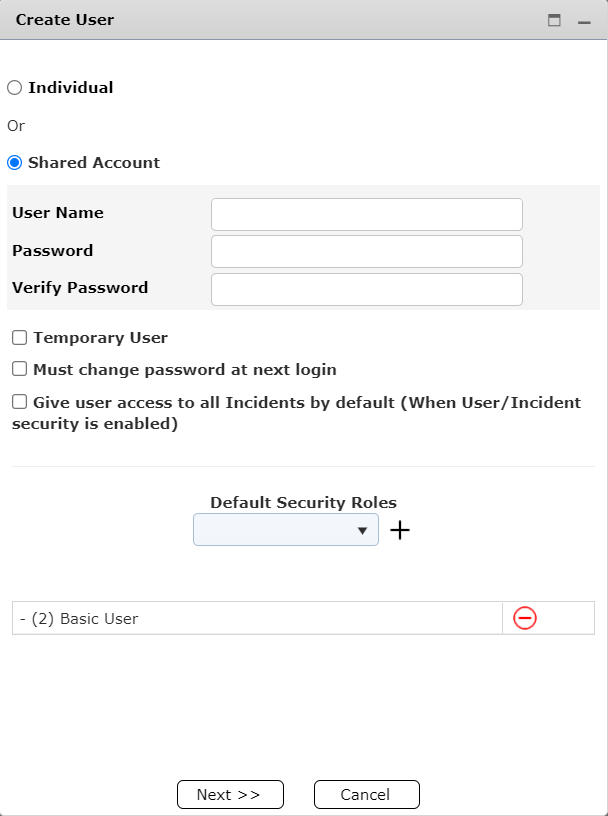
If the user will need access to all incidents, check the box next to Give user access to all Incidents by default (When User/Incident security is enabled).
Under Default Security Roles, use the drop down to select the type of role the user will be and click the Add button. Multiple roles can be applied to one user.
Click Next.
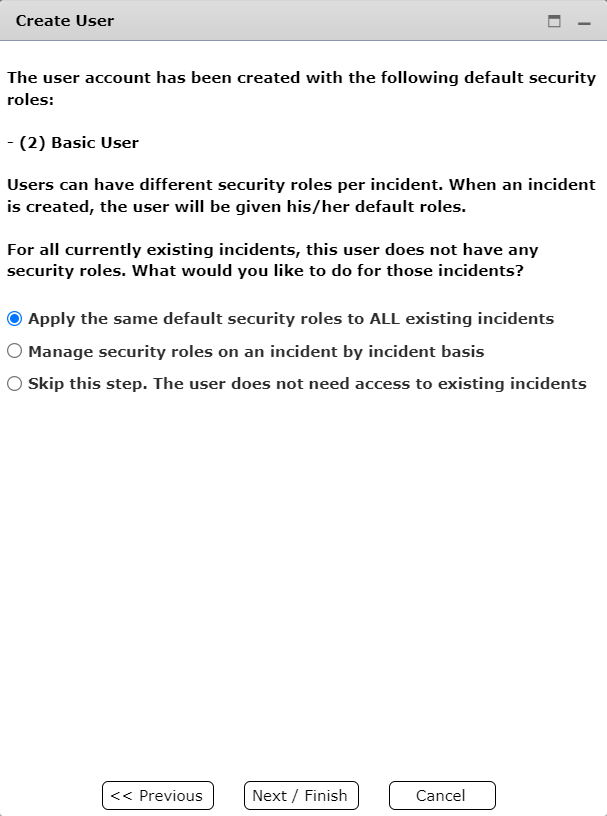
On the next screen, select whether the user will have access to all existing incidents, only future incidents, or if it will be on an incident by incident basis what roles the user will have.
Click Next/Finish  .
.
If the first or third option was selected, the user will be created and will be able to log in.
If the second option was selected, another window will appear to manage which roles for what incidents the new user will have.
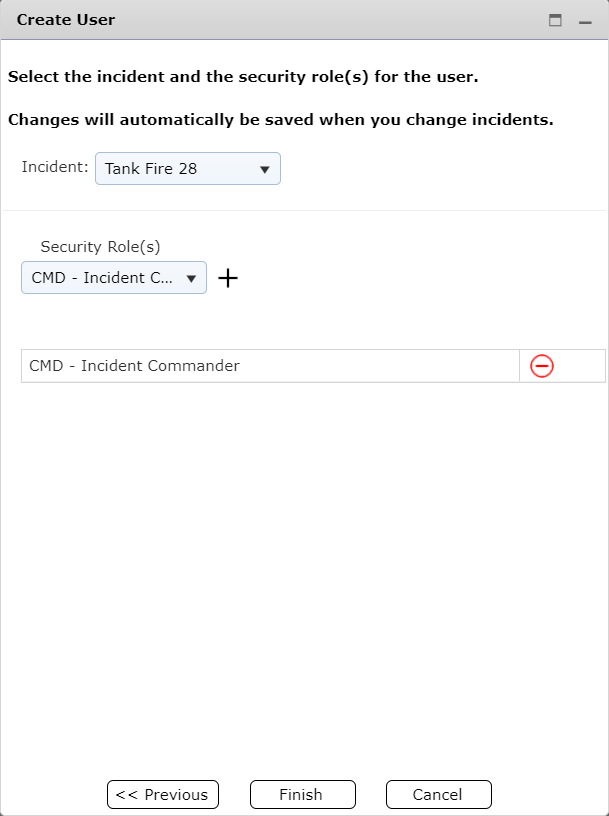
To manage the incident roles, first select an incident from the drop down.
Using the next drop down, select the user roll for that incident and click the Add  button.
Click Finish  .
.
This section explains how users can be found using the search function and then edited as needed.
On the Users screen the search pane can be used to search for an existing user to be edited.
Click on the row containing the user, then press the Edit button  located in the upper right-hand corner of the form.
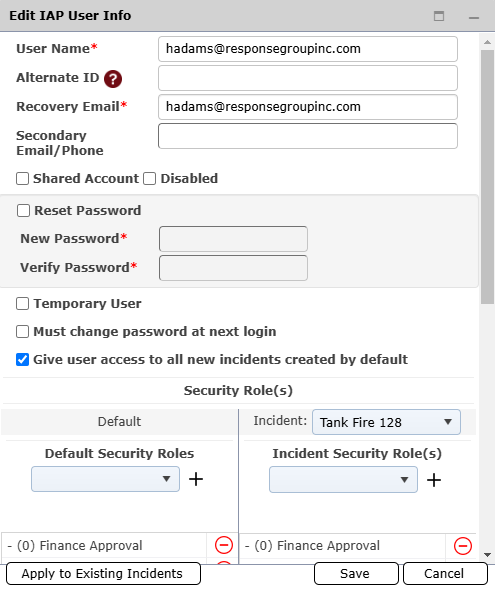
From this screen advanced user options can be edited as shown above. For instructions on how to set up and manage user roles, refer to the Role Permissions help file.
To disable a user account, follow the steps above to get to the Edit User window. On the Edit User window select the checkbox next to Disabled  . Click the Save button
  to save changes.
© 2024, TRG The Response Group LLC., All rights are reserved.
No part of this web site, and the information which it contains, may be reproduced, stored in a retrieval system or transmitted in any form or by any means, electronic, mechanical, photocopying, recording or otherwise, without prior written permission of TRG.