| IAP Software ™ |  |
| IAP Software ™ | |
Sections and Positions
The Sections and Positions screen provides a list of the positions in the Incident Command System and custom positions. This list is used to populate the drop-down lists used on many forms where Sections and Positions are assigned such as the ICS 203 Organization Assignment List and ICS 207 Organization Chart forms. There are two viewing and editing tabs within the Sections and Positions form; the process to make updates from either tab is the same.
Contents
Update a Position and Role Description

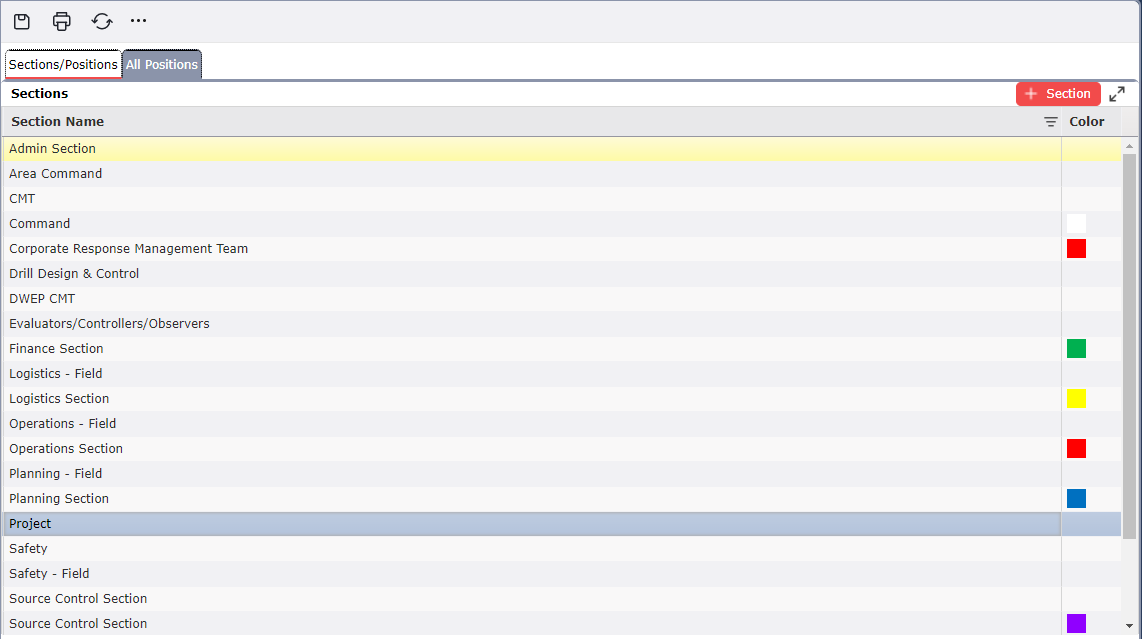
There are two viewing options; users can toggle between the Sections/Positions tab and the All Positions Tab. The Sections/Positions tab shows a listing of Sections available on the top half of the screen, when a user selects a Section the Positions listed in that section populate on the bottom half of the screen. The All Positions tab shows a listing off all positions within the database.
Custom sections can be added to the database.
Click the Add button  . A blank entry will appear within the Sections pane of the form.
Click in the blank line in the Section Name column and type the name of the Section to be added.
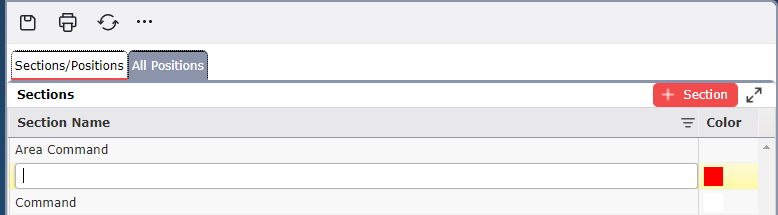
Click the Save button  to save changes.
To update a Section Name and/or Notes double click in the field to be edited and free type the desired updates. Users can also assign a designated color to each section.
To delete a Section, hover over the desired row for a moment and the Delete button  will appear, then click on the Delete button
  to remove the item. If you remain hovering over the row without clicking the delete button, it will disappear after a couple of seconds.
Positions can be added and associated with an existing section.
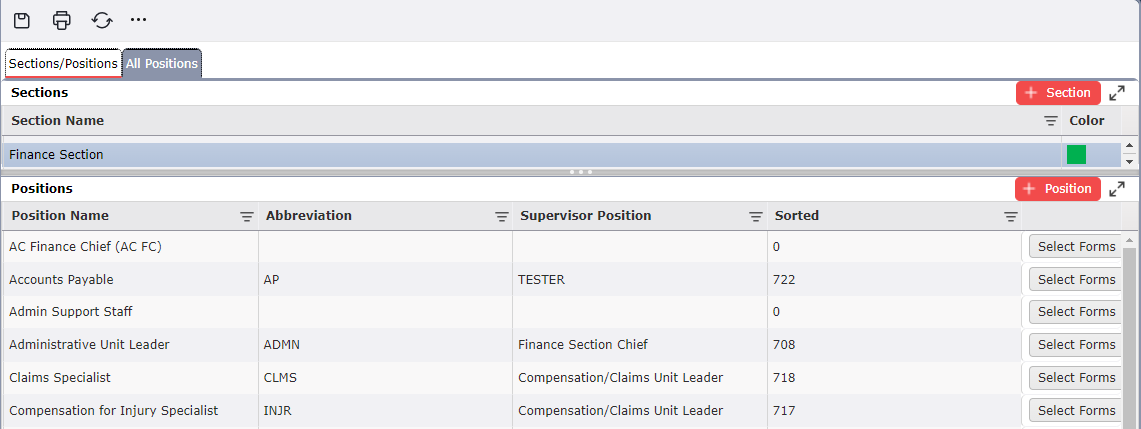
Click the Add button  . A blank Position line will appear.

Click in the blank line in the Position Name column and type the name of the Position to be added.
Click the corresponding blank line in the Abbreviation column and type the standard acronym of the position.
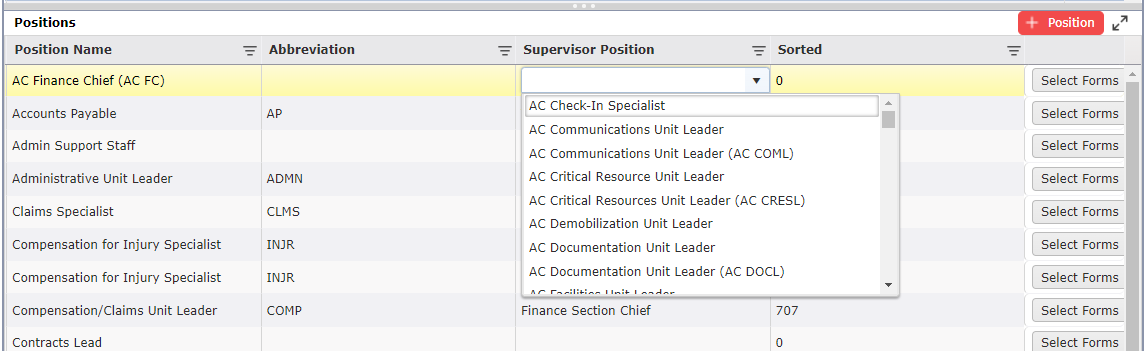
Click the corresponding blank line in the Supervisor Position column and select position from the drop-down list to assign a supervisor.
Final column there is a Select Forms button  . That position will only have access to those forms.
Click the Save button  to save all changes.
To update Position information, click in the field to be edited and free type the desired updates. The Supervisor Position can be added/updated by choosing a position form the drop-down list provided.
To delete a Position, hover over the desired row for a moment and the Delete button  will appear, then click on the Delete button
  to remove the item. If you remain hovering over the row without clicking the delete button, it will disappear after a couple of seconds.
© 2024, TRG The Response Group LLC., All rights are reserved.
No part of this web site, and the information which it contains, may be reproduced, stored in a retrieval system or transmitted in any form or by any means, electronic, mechanical, photocopying, recording or otherwise, without prior written permission of TRG.