| IAP Software ™ |  |
| IAP Software ™ | |
ICS 206 – Medical Plan
The Medical Plan documents medical facilities, medical aid stations, and transportation services that are available within proximity of an incident. It also contains information about how special medical emergency procedures will be handled. Multiple versions of this form may exist for different locations if the incident is of a sizable magnitude. For help on using general form functions (e.g. Create/Open Version, Save, etc.) and accessing preloaded versions, see the General Form Functions page.
Contents
Transportation (Ground and/or Air Ambulance Services)
Special Medical Emergency Procedures
Add Preloaded Special Medical Emergency Procedures
Add Special Medical Emergency Procedures Manually
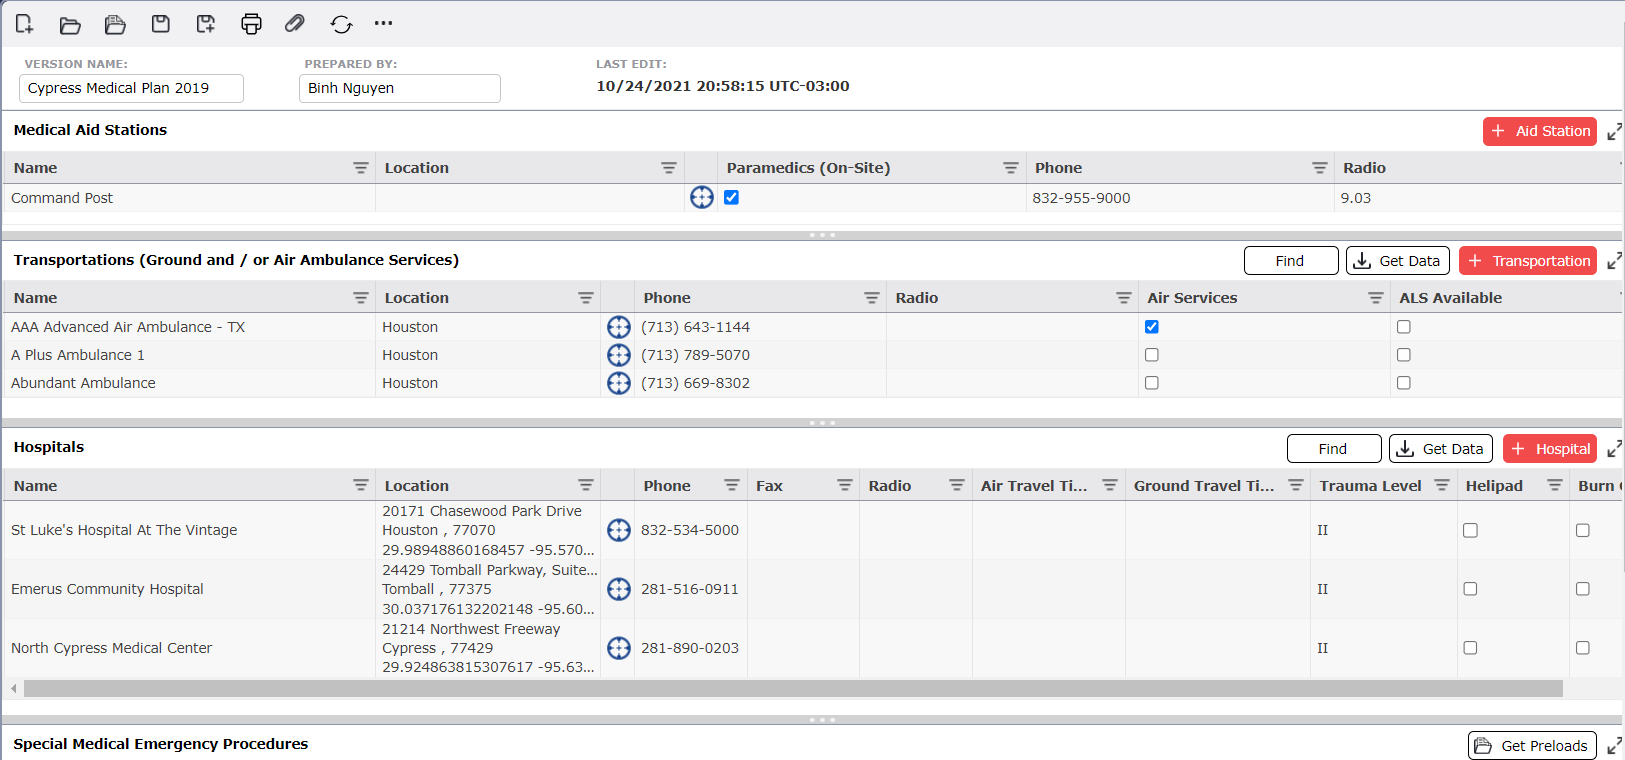
This section contains locations of medical aid stations that are available throughout the response.

Enter a new medical aid station by clicking the Add button .
.
Fill in the name by free typing into the Name field
Use the Edit Location button  to enter the Location for that medical aid stations. For more information see the Edit Location page.
Next, check the box  to indicate whether Paramedics can be found on-site
If there is a phone number for the medical aid station, enter it in the Phone field
Finally, if there are radio communications designated for that medical aid station enter applicable channels, frequencies, etc. in the Radio field
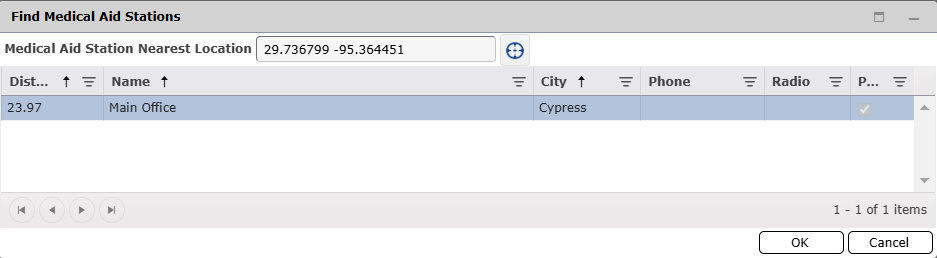
If there are near aid stations preloaded into the database, they can be accessed and added into the list by clicking on Find  . The software lists all aid stations near the incident coordinates as to present the nearest options. Click in the station(s) to be added and click OK.
This section contains a list of Ground and/or Air Ambulance Services that will be utilized on the incident response.


Click the Find button  .
.
Within the find window, search by name for the ambulance service desired, or filter by City or State
Click on the desired ambulance service, or hold Ctrl (or Shift) while clicking to multi-select
Click OK  when finished
Click on the Add button  to add a new line.
Type in the name of the ambulance service in the “Name” field
Click on the Edit Location  button to set the location from which the ambulance service is based. For more information, see the Edit Location page.
Type in the phone number in the “Phone” field
If there are radio communications designated for that ambulance service, enter applicable channels, frequencies, etc. in the “Radio” field.
Indicate whether the Ambulance has Air Services available by checking the box  .
.
Indicate whether the ground or air ambulance service has ALS (Advanced Life Support systems) by checking the box  .
.
Users can also Get Data  to select Web Plans and add them to the list. Follow the steps described on the Accessing Web Plans topic.
This section contains locations of hospitals in the area surrounding the incident.
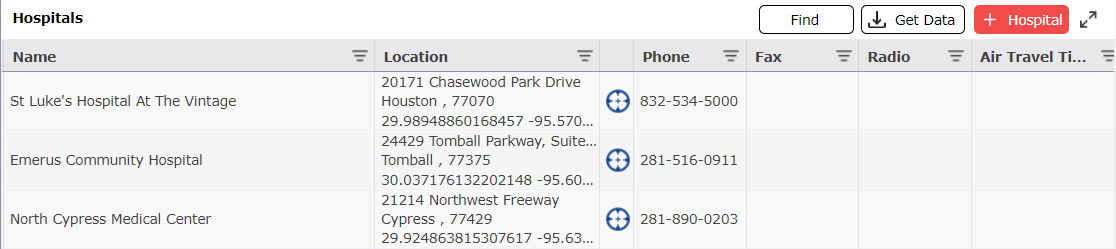
The user can search for hospitals near the incident using the search function.
Click on the Find button  .
.
The system will retrieve the information of the 25 nearest hospitals including a map view of the closest locations.
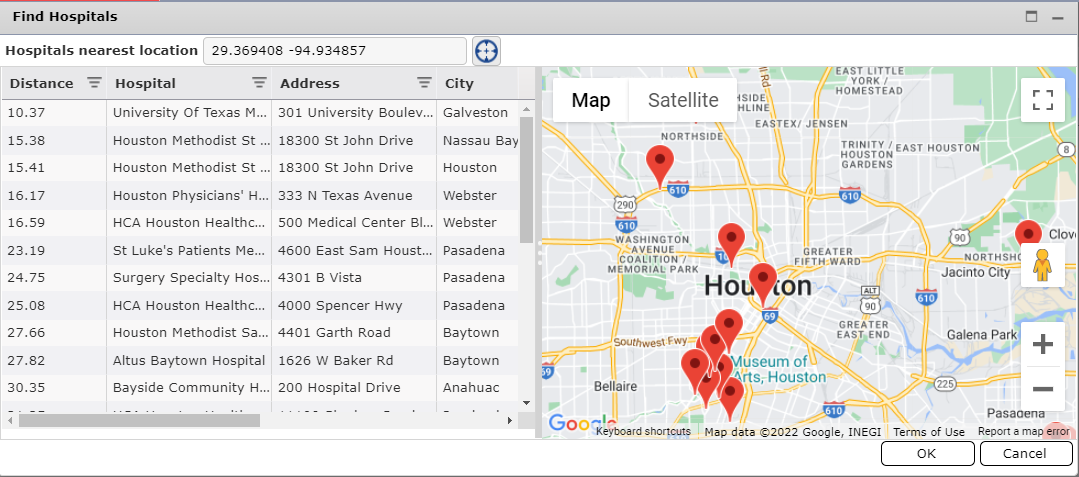
The user can select the hospitals to include in the ICS 206, then click the OK  button.
To remove any hospitals, select the item to be deleted then click on the Delete button  . Then click OK
  to confirm the removal.

To enter a new hospital, click the Add button  .
.
Free-type hospital name into the “Name” field.
Click on the Edit Location  button to enter the location for that hospital. For more information see the Edit Location page.
Type in phone number in the “Phone” field and “Fax” number if available.
If there are designated radio communications for that hospital, enter that info into the “Radio” field.
Indicate travel time by air in the “Air Travel Time” field and travel time by ground in the “Ground Travel Time” field.
Indicate trauma center level into the “Trauma Center” field.
Indicate whether the hospital has a “Helipad” or “Burn Center” by checking the box  of their respective columns.
Users can also Get Data  to select Web Plans and add them to the list. For help on using this feature, see the Accessing Web Plans topic.
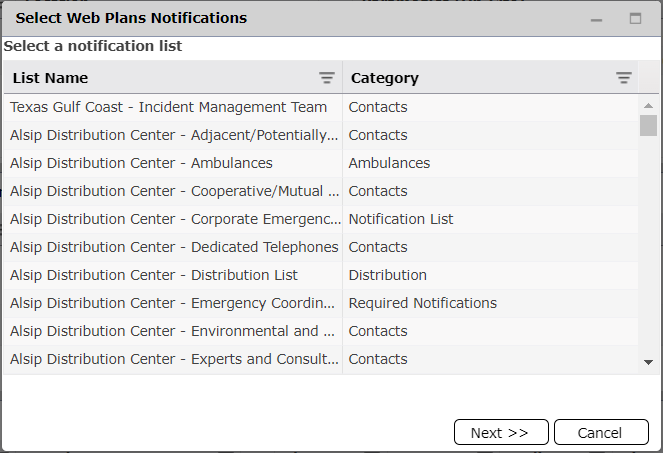
If the company has its emergency plans and support documents uploaded on Web Plans, users can access these preloaded files with Get Data  . The IAP Software is linked to clients’ Web Plans sharepoint and will display all company’s notifications.
Click on the Get Data button 
Select the notification lists needed and click “Next”  . Users can filter lists by “Name” and “Category”.
The screen will show all documents within the selected lists under the Type “Ambulance”. If user decides to change or clear filters, click the button  and make the changes wanted.
To select all groups, click Select All  .
.
To clear all selected groups, click Clear All  .
.
If the user wants to go back to select a Notifications list, click Previous button  .
.
Click Add  to add all selected groups to Transportation Section.
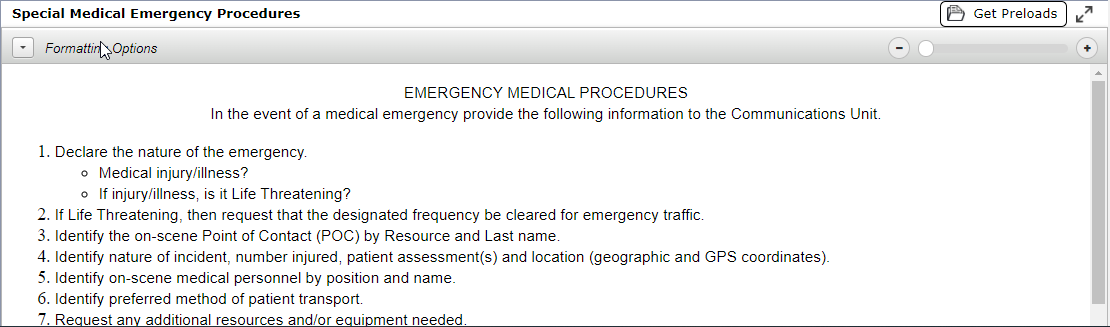
Click on the Get Preloads button  . The Special Medical Emergency Procedures Preloads dialog box will appear.
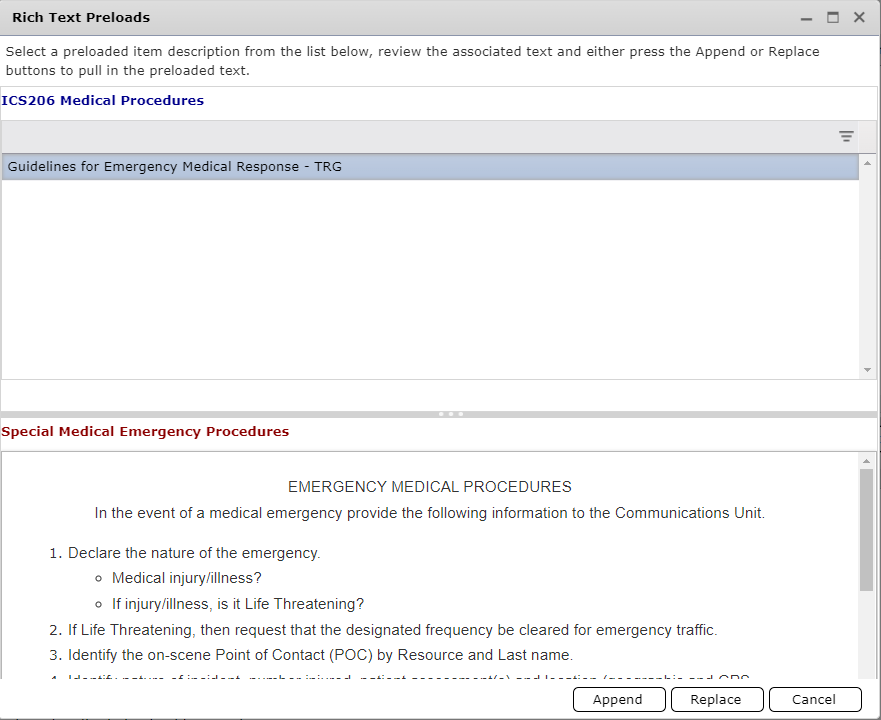
Select the desired preload from the list.
Click the Append button  to add the selected preloaded information to information previously entered INTO the Special Medical Emergency Procedures field. Click the Replace button
  to delete all information previously entered and replace it with the selected preloaded information.
Type to add Special Medical Emergency Procedures. Text entered into this field can be formatted. For more information, see the Formatting Toolbar page.
© 2024, TRG The Response Group LLC., All rights are reserved.
No part of this web site, and the information which it contains, may be reproduced, stored in a retrieval system or transmitted in any form or by any means, electronic, mechanical, photocopying, recording or otherwise, without prior written permission of TRG.