| IAP Software ™ |  |
| IAP Software ™ | |
ICS 232 – Resources at Risk
The ICS 232 – Resources at Risk Summary allows users to compile information for responders about areas in the incident which are sensitive due to environmental, archeo-cultural, or socio-economic resources at risk, and identify incident-specific priorities and issues. The ICS 232a – ACP Site Index is one of the printing options for this form. The ICS 232a is designed to be a key to the site numbers or site names used in the Area Contingency Plan (ACP), and displayed on the Situation Map. For help using general form functions (e.g. Create/Open Version, Save, etc.) and accessing preloaded versions, see the General Form Functions page.
Contents
Update Site Status and Date Completed
Site information may be added either by using the Get Data function, or by manually typing in the information. Sites are designated as either Environmentally Sensitive Areas and Wildlife Issues or Archeo-cultural and Socio-economic Issues within the incident response area.
Click the Get Preloads button .The Get Preloads dialog box will appear with two options at the top of the window, Map View and By Region.
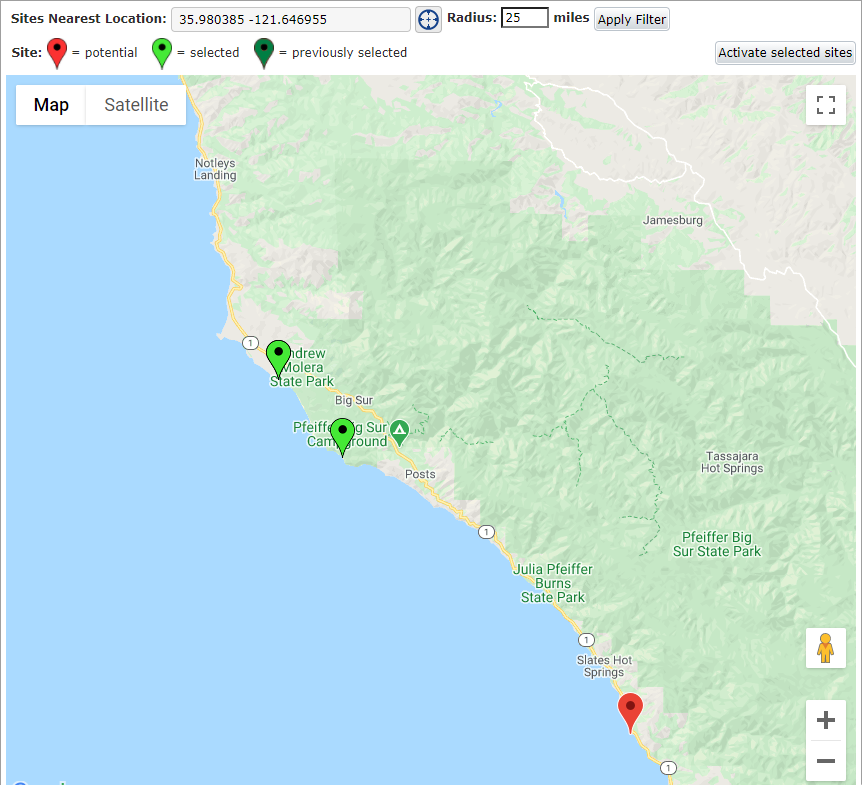
Map View brings up a visual depiction of the incident location and identified sensitive sites within a specified radius.

Sites Nearest Location will populate with the incident location by default but can be adjusted to another set of coordinates using the Edit Location button  . For more information see the Edit Location page. Radius allows users to select a distance within which to perform a search for GRP sites. After updating the location and radius click the Apply Filter button
  to view sites within the established parameters.
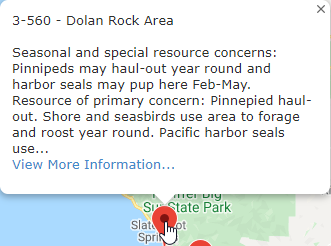
To view a summary of site information, hover the mouse point over the map point  . A dialog popup will be displayed.
NOTE: When users select a site on the map point the site will be highlighted in green  . Click the map point to select an individual site.
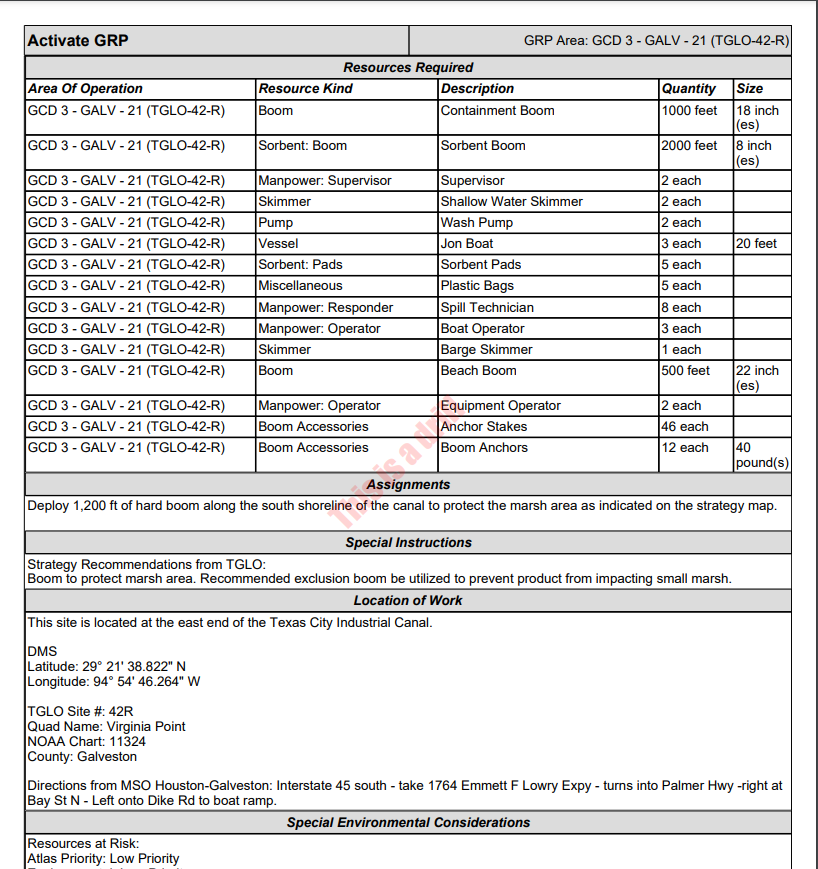
Before activating a GRP site users can preview associated ICS 204 information and maps. Hover over the map point  to display the summary popup. Within the popup click on the View More Information link. In a new tab a preview of the ICS 204 will be opened.
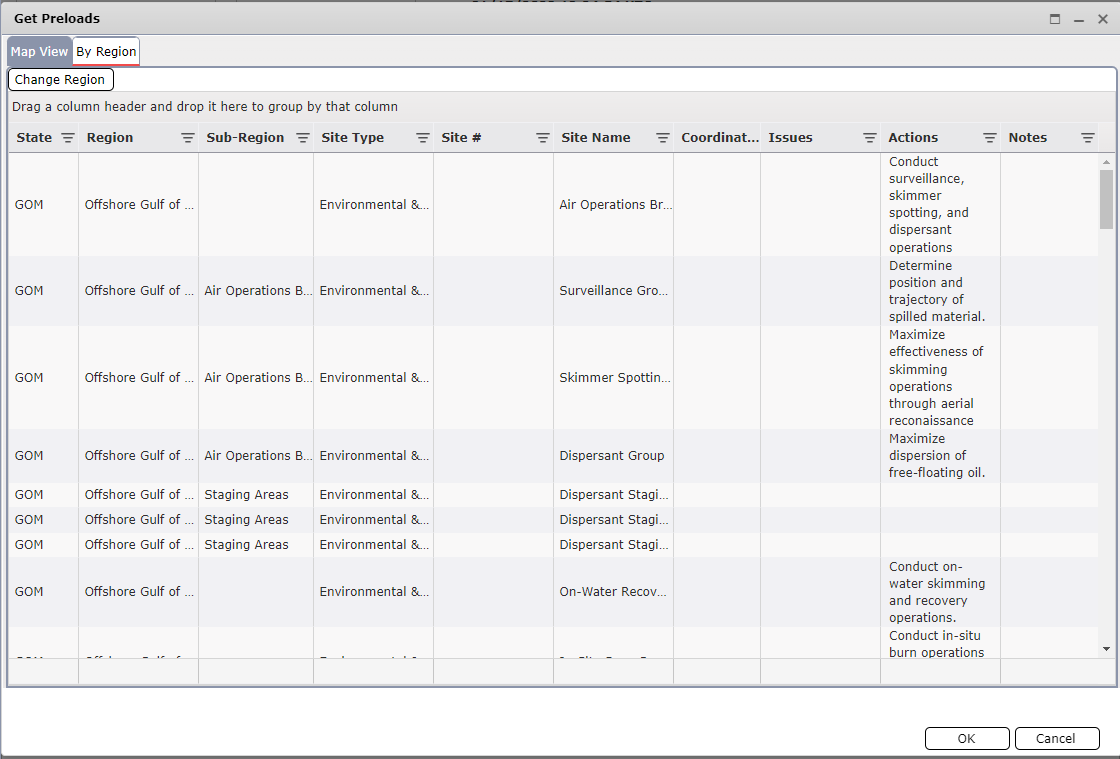
The By Region view allows users to select from available Geographical Response Plans (GRP). The list can be used to easily select sites that are already known or identified.
NOTE: Many of the GRPs are offered for an additional fee within the IAP Software.
Select the GRP Region and click OK.
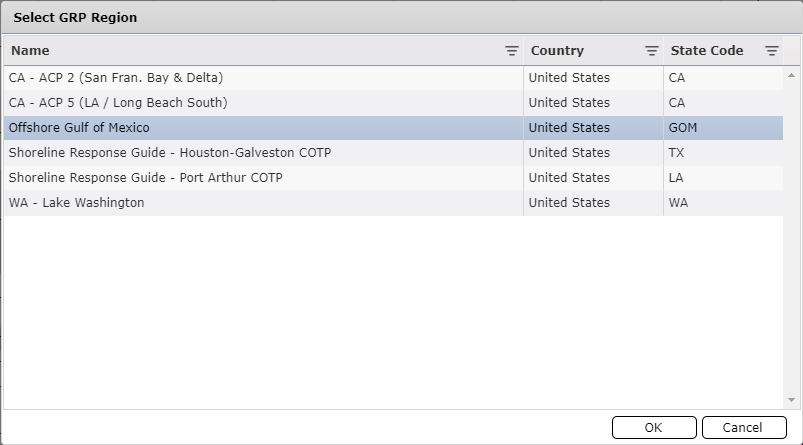
NOTE: Clicking the Change Region button  will open the Select GRP Region window so users can select another/additional regions.
Click to select an individual site. The site will be highlighted on the list.
The list can be filtered by clicking on the filter  next to each column header then selecting from the available options.
To Group by a Column drag and drop the column header into the grey bar above the columns that says “Drag a column header and drop it here to group by that column.” This can be useful when there are multiple sites in each Region or Sub-Region.
Click OK to bring the selected GRP sites into the ICS 232 Resources at Risk form.
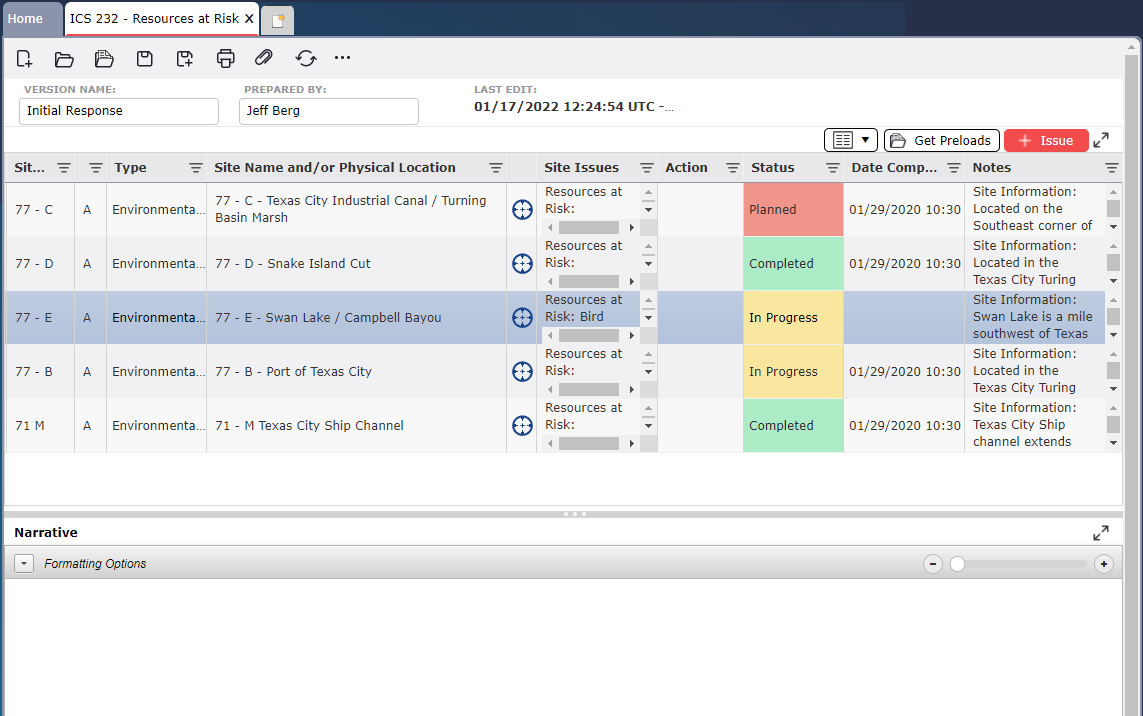
After site information has been entered into the form the Status will need to be populated. Other fields can be updated, as necessary.
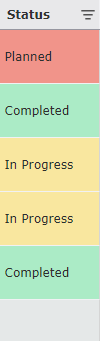
Click into the Status field to activate the Status Drop-down Menu  . Select the appropriate status for the site. The Status field will become color coded depending on the Status selected.
As items are marked as Completed the Date Completed field also needs to be populated. Use the Calendar Control buttons  to enter the Date/Time the site strategy is completed. For more information see the Calendar Control page.
NOTE: Information in any of the fields can be updated by clicking in the field and free typing.
Click on the Add button  to add a blank line.
Click in the Site # field and free type to add the appropriate information.
Click in the Priority field and free type to add the appropriate information.
Click in the Type field to activate the Type Drop-down Menu  and then select the appropriate site type.
Click in the Site Name and/or Physical Location field and free type to add the appropriate information.
Click on the Edit Location button  to select the site location. For more information, see the Edit Location page.
Click in the Site Issues field and free type to add the appropriate information.
Click in the Action field and free type to add the appropriate information.
Click into the Status field to activate the Status Drop-down Menu  . Select the appropriate status for the site.
Click into the Date Completed field to activate the Calendar Control button  . Select the Date Completed for the site, as appropriate. For more information, see the Calendar Control page.
Click in the Notes Field and update by free typing.
Environmental sensitivity information that applies to all sites can be added by free typing in the Environmental Narrative section. For information on using the Formatting Options see the General Form Functions page.

General sensitivity information that applies to all sites can be added by free typing in the Socio-Economic Narrative section. For information on using the Formatting Options see the General Form Functions page.

© 2024, TRG The Response Group LLC., All rights are reserved.
No part of this web site, and the information which it contains, may be reproduced, stored in a retrieval system or transmitted in any form or by any means, electronic, mechanical, photocopying, recording or otherwise, without prior written permission of TRG.