| IAP Software ™ |  |
| IAP Software ™ | |
User Access Requests
Personnel can request access to the IAP Software. Requests must be approved by an administrator and a user account established. Once approved the user will be notified by email.
Contents

When someone uses the online form to submit a request for access the software generates an email which is sent to the database administrator. The administrator must then take action to approve or deny the request. For more information on creating a request see the Getting Started in IAP Software page.
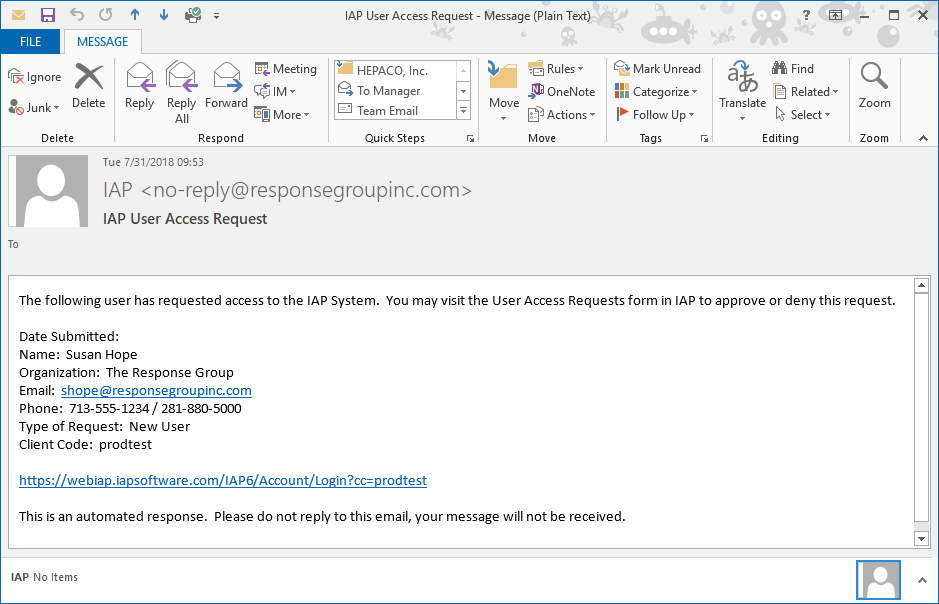
Use the link provided or navigate to the IAP Software to login and review the request.
After logging in to the IAP Software database administrators can review and approve or deny access requests.
The User Access Requests overview page displays a list of all requests. To review each request individually and take further action select a request and then click the Edit button  .
.

NOTE: The Filter By Status drop-down can be used to filter the list of requests being viewed.
User access requests are approved or denied in the Edit Access Request window.
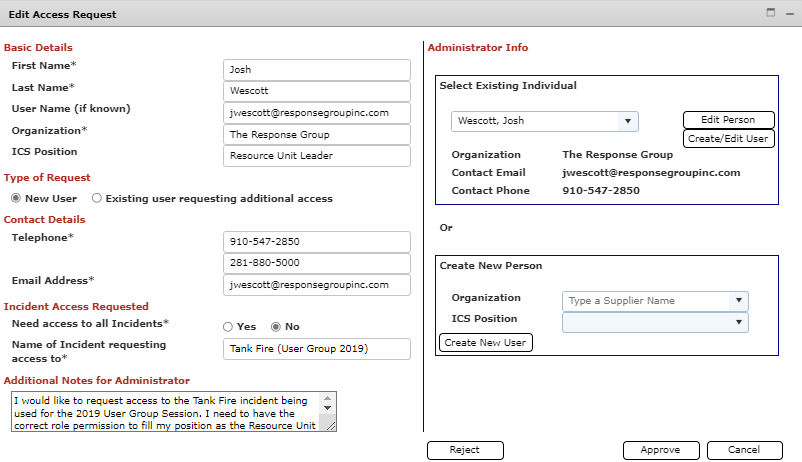
Review the information provided by the requestor.
Determine if the request is for a new or existing person.
If the person requesting access already exists in the database their name will be available in the Select Existing Individual drop-down list.
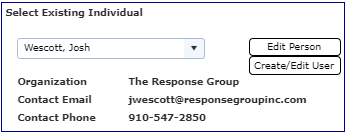
Use the drop-down list to select the name of the person from the database.
Click the Edit Person button  to update the Personnel details for the user. For more information see the Personnel page.
Click the Create/Edit User button  to create or update the details for the user. For more information on creating users see the Users page.
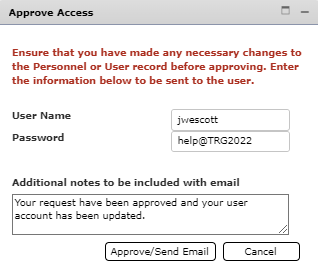
Click the Approve button  .
.
Enter the requestor’s User Name and Password (if known). Then enter any notes or details to be included in the approval notice email.

Click the Approve/Send Email button  .
.
The user will be sent an email notification that the request has been approved.

If the person requesting access is not available in the Select Existing Individual drop-down list, they will need to be created.

Manually type to search for the person’s organization. Select the organization from the drop-down list of choices provided.
Manually type to search for the person’s assigned position (if known). Select the position from the drop-down list of choices provided.
Click the Create New User button  to enter the details for the user. For more information on creating users see the Users page.
Click the Approve button  .
.
Enter the requestor’s User Name and Password. Then enter any notes or details to be included in the approval notice email.
Click the Approve/Send Email button  .
.
The user will be sent an email notification that the request has been approved.

Review the information provided by the requestor.
Click the Reject button  to deny the request.
Use the Deny Access window provided to include details around why the request has been denied.
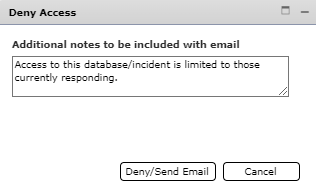
Click the Deny/Send Email button  to finish the request.
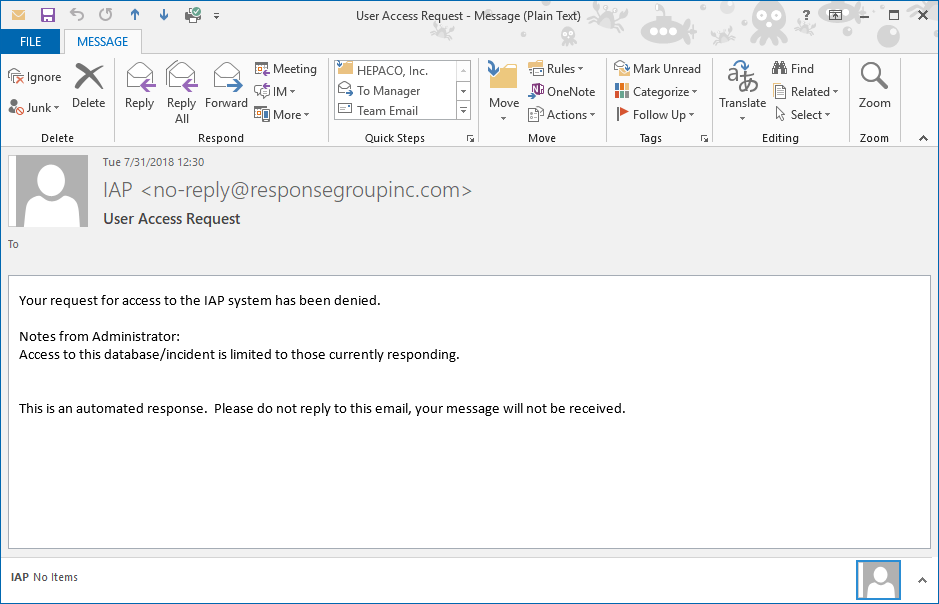
The user will be sent an email notification that the request has been denied.
© 2024, TRG The Response Group LLC., All rights are reserved.
No part of this web site, and the information which it contains, may be reproduced, stored in a retrieval system or transmitted in any form or by any means, electronic, mechanical, photocopying, recording or otherwise, without prior written permission of TRG.