| IAP Software ™ |  |
| IAP Software ™ | |
Areas of Operation
Areas of Operation are determined by the Operations Section Chief. It is important to establish areas of operation so resources can be assigned when activated to an incident. This form/feature does not utilize versions as there is only one version of the Areas of Operation per period. Access to the Areas of Operation form can also be found in many other forms (e.g. ICS 201-4 Resources Summary, ICS 213RR Resource Request).
Contents
Click the Add button  to add an area.
The Set Parent/Child dialog box will appear to select where to add the GRP in relation to an adjacent area. Select Same Level, Sub-Level or Cancel.
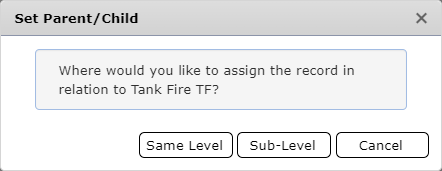
Same Level  option will add the record at the same level as the selected area when the Add button is selected.
Sub-Level  option will add the record as a “child” record to the selected area when the Add button is selected.
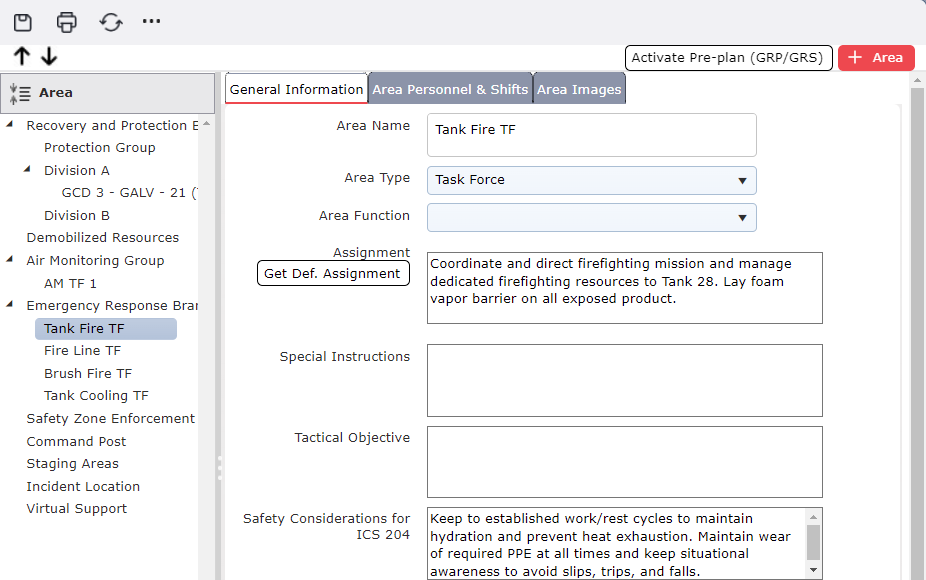
Detailed information related to an area is captured under the General Information tab. Free type or use the dropdown lists to complete each of the provided fields. This information is a direct tie to the information found on the ICS 204 – Assignment List (Assignment, Special Instructions, Tactical - Objective, Safety Considerations, Environmental Considerations, Special Equipment, Work Location, Notes, and Address). To learn more, see ICS 204 – Assignment List.
NOTE: The area window is set to auto save once you move from one area to another.
Predefined Default Assignments can be pulled into the Assignment field. To utilize a predefined assignment:
Click the Get Default Assignment button  . The Select Default Assignments dialog box will appear.
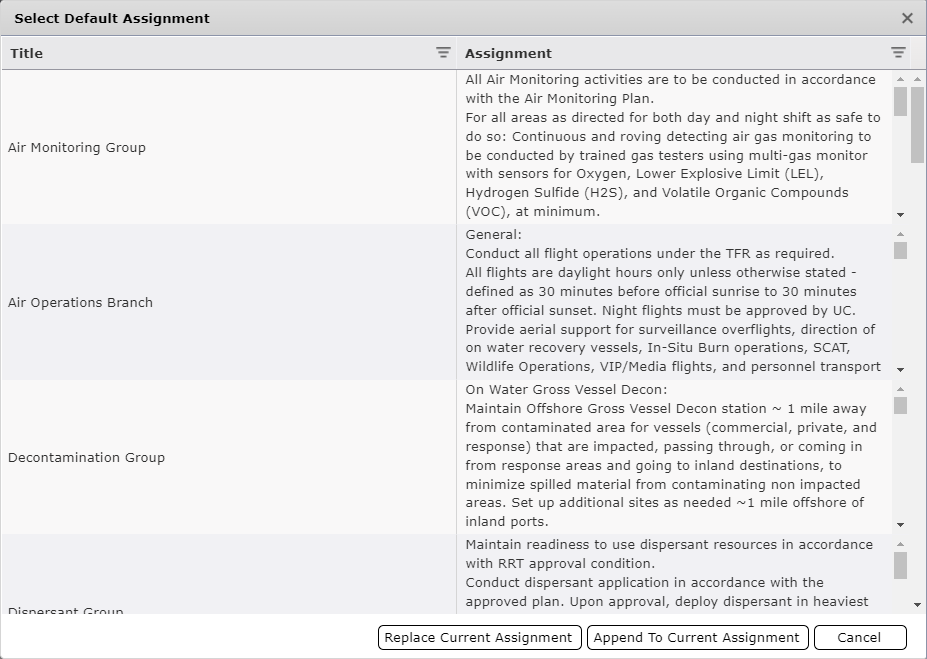
Select the desired Assignment.
Click either the Replace Current Assignment or Append to Current Assignment button  . The selected assignment will be brought into the Assignment field.
Personnel can be assigned to each Area of Operation.
Click the Add button  to add a position.
Select a position from the dropdown list.
Select a name from the list of personnel or free type a name.
Enter in Affiliation, Contact Number, and Work Shift Information.
The Area Leaders assignment can be made once and will be carried throughout all Areas of Operation.
Click on the tab Area Personnel & Shifts.
Click the Area Leaders button 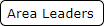 .
.
Select the appropriate position form the provided list.
Select a name from the list of personnel.
Select a shift from the list of provided Work Shifts.
Click OK  to save and apply changes.
Click the Get Data button  to pull in personnel data from another version or form. For more information on using the Get Data feature, refer to the Get Personnel Data page.
Images can be added to each Area of Operation.
Under the Area Images tab, click the Add button  to add a new image. Two options will pop up.
Choose between the Upload File and Create a map options 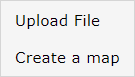 .
.
If Upload file is chosen, find the location of the image, click on the image, and click  .
.
If Create a map is chosen, the Add Area Image window will appear:
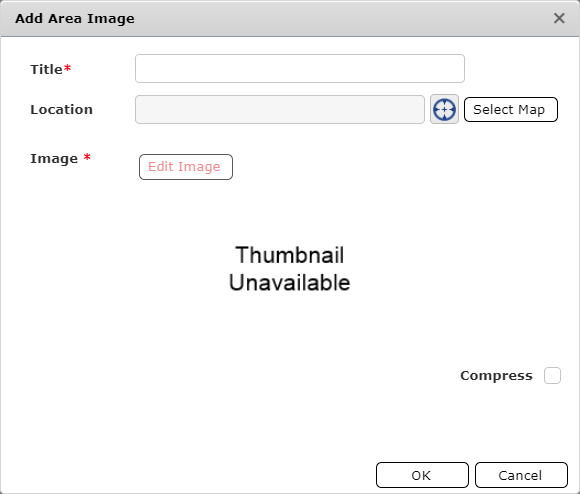
Enter a Title for the image.
Use the Edit Location button  to add GPS Coordinates for the image.
Once the location has been edited, click  , to see the image.
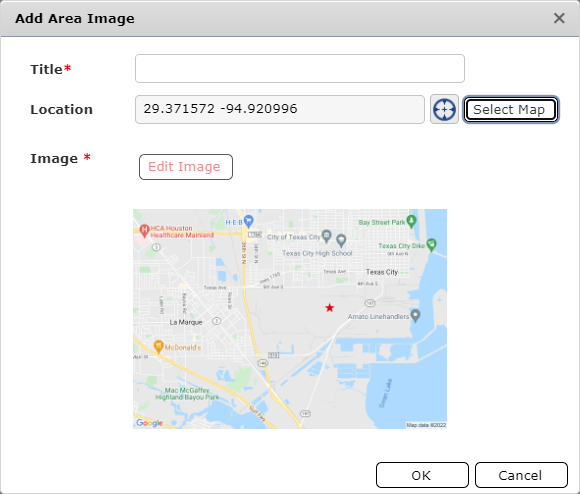
Click OK  to add the new image.
Click the Get Data button  to select a preloaded image or image from another incident to import. A new window will open to select images.
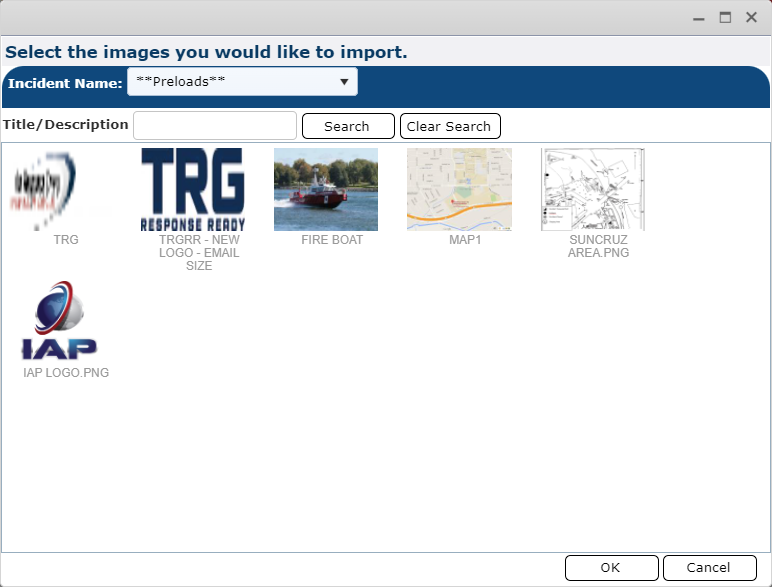
Use the Incident Name dropdown  to select the incident from which to get images.
Select an image and click  .
.
Select an image and click the View button  to view that image full screen.
Select an image and click the Edit button  to replace that image.
Geographic response plans can be prepopulated with information necessary to protect those areas. Click the Activate Pre-plan (GRP/GRS) button  to bring the related information into the incident. For more information see the Activate GRP page.
NOTE: After a GRP Area has been pulled over and activated, it can be renamed by simply clicking in the name field in the Area column and typing the desired text.
© 2024, TRG The Response Group LLC., All rights are reserved.
No part of this web site, and the information which it contains, may be reproduced, stored in a retrieval system or transmitted in any form or by any means, electronic, mechanical, photocopying, recording or otherwise, without prior written permission of TRG.