| IAP Software ™ |  |
| IAP Software ™ | |
Find Resources
Resource tracking forms (All Resources, Resources Summary, ICS 201-4) have a Find Resources button which allows the user to easily add resources from an equipment database of contractor companies, such as oil spill removal organizations.
Contents
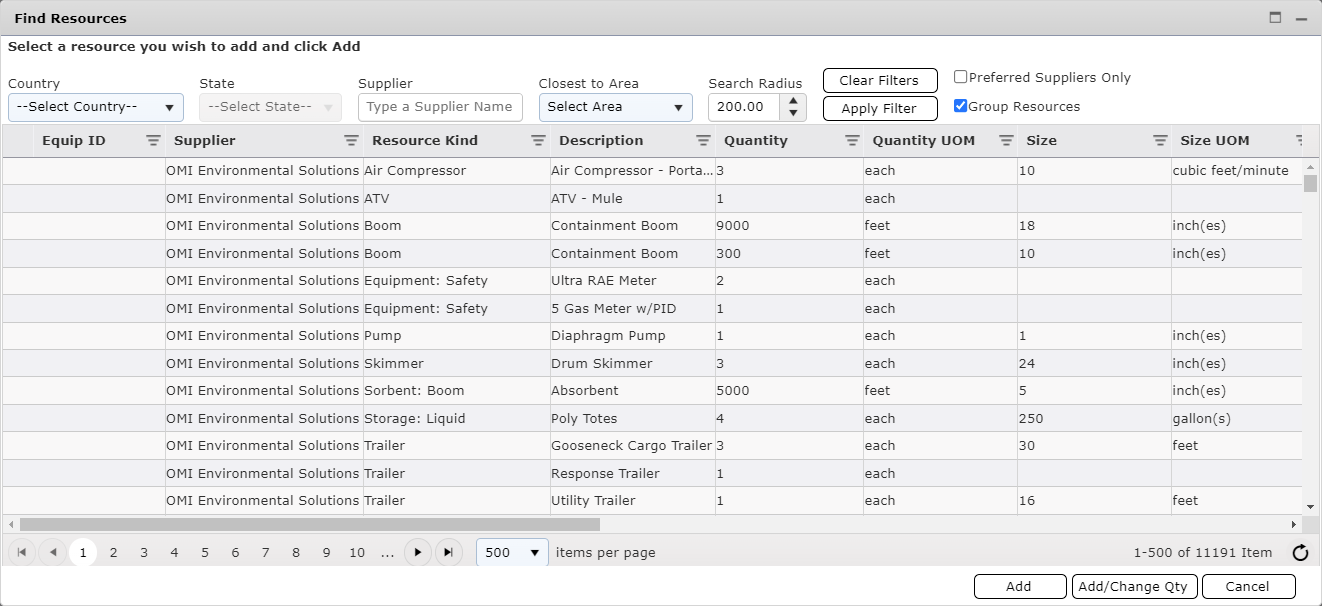
Click the Find Resources button  near the top of the Resources Summary form to locate specific contractor owned equipment. A window will appear with a list of resources to choose from.
NOTE: If no location is set, the user will receive a message stating “No Incident Location has been set to find nearby resources. Please update the Incident Location on Incident Details.” More information on setting the incident location can be found on the Incident Details page.
Use one of the many search and filter options to narrow the list of search results. The Filter options are shown by default. To narrow down the search to a more defined location use the drop-down list fields provided and then click the Apply Filter button  .
.

When the Preferred Suppliers Only checkbox  is selected, the list of results will be limited to show only those organizations which have been designated as preferred in the database. For more information see the Organizations page.
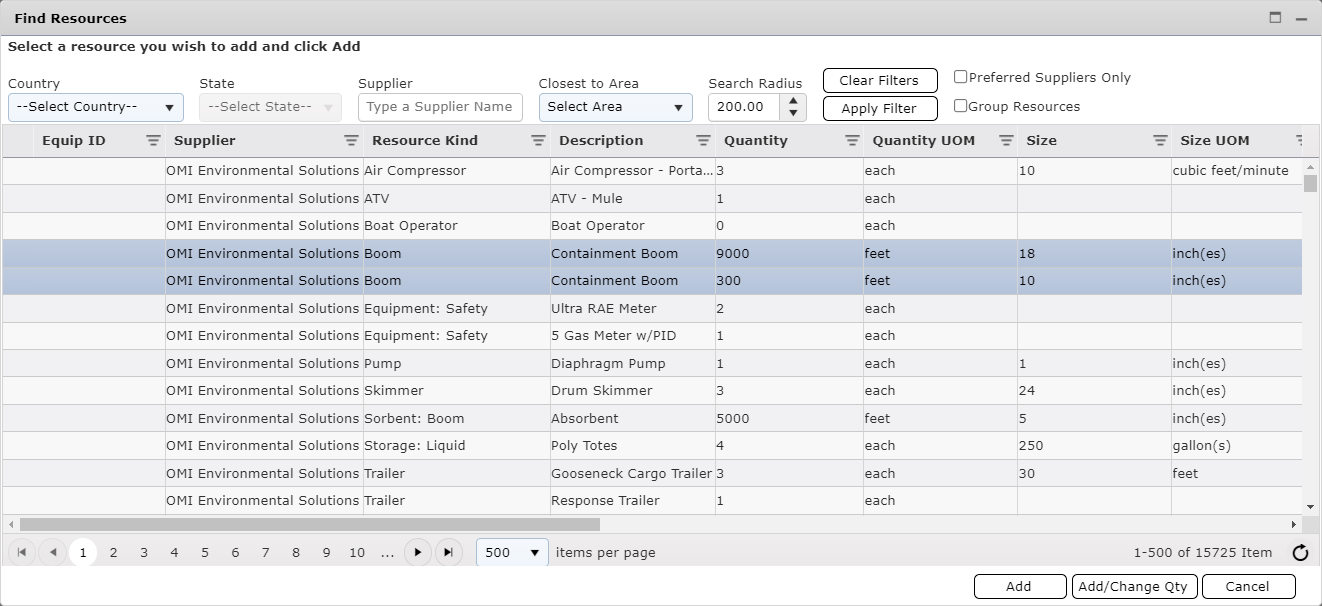
By default, the Group Resources checkbox  is selected, and packaged resources will be shown with a parent/child relationship. Unchecking the box will show all resources as separate line items.
Use the Clear Filters button  , to clear out the entered data.
Select the resources to be added by clicking on the desired resource line items and clicking the Add  , or Add/Change Qty button
  .
.
Use the Add button  to add the full quantity of the resource listed. Select the Area of Operation and assign a Status and Status Date then click OK.
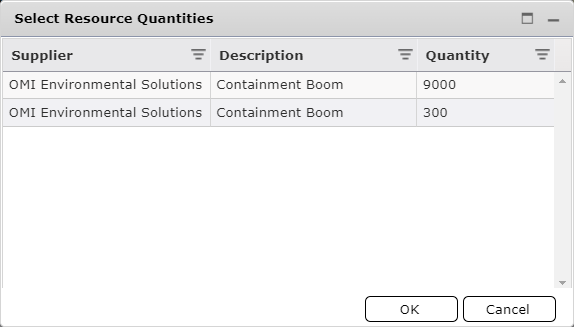
Use the Add/Change Qty button  to add a partial quantity of a selected resource. Select the Area of Operation and assign a Status and Status Date then click OK.
Assign the Area of Operation, Status, and Status Date/Time for those resources. To add new areas of operation, see the Areas of Operation page.
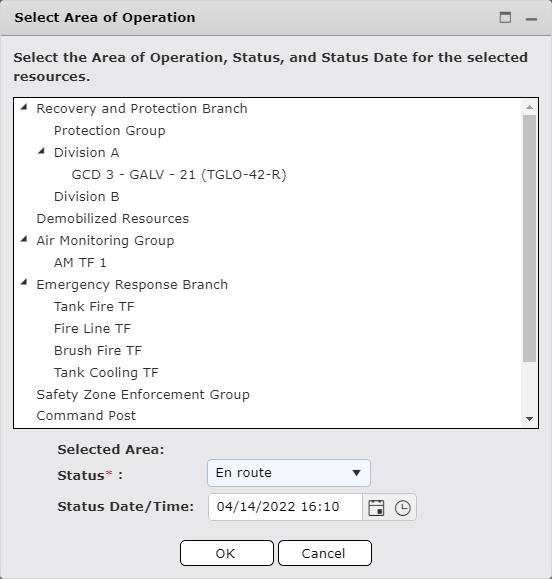
NOTE: To change the Status Date/Time use the Calendar Control button  or free type in the Date/Time field. To learn more, see the Calendar Control page. The Status Date/Time represents the selected resource(s) ETA when the Status is set to En route.
If using the Add/Change Qt option, adjust the quantity to be added and click OK.
© 2024, TRG The Response Group LLC., All rights are reserved.
No part of this web site, and the information which it contains, may be reproduced, stored in a retrieval system or transmitted in any form or by any means, electronic, mechanical, photocopying, recording or otherwise, without prior written permission of TRG.