| IAP Software ™ |  |
| IAP Software ™ | |
Resources Summary
The ICS 201-4 Resource Summary becomes the Resources Summary once the incident moves into the Proactive phase. It continues to provide a detailed list of the resources activated and involved in an incident. It displays the status, supplier, resource description, quantity, area of operation in which the resource is assigned with its status date, and ETA, as well as delivery and final location. The Resource Summary allows the user to add/delete, edit, split, copy, filter, and manage the information in many other ways. There are several other forms that link to the Resource Summary in the IAP Software, such as the ICS 213RR – Resource Request, ICS 210 – Change Status, and ICS 221 – Demobilization Check Out. For help on using general form functions (e.g. Create/Open Version, Save, etc.) and accessing preloaded versions, see the General Form Functions page.
Contents
Viewing and Navigating Resources
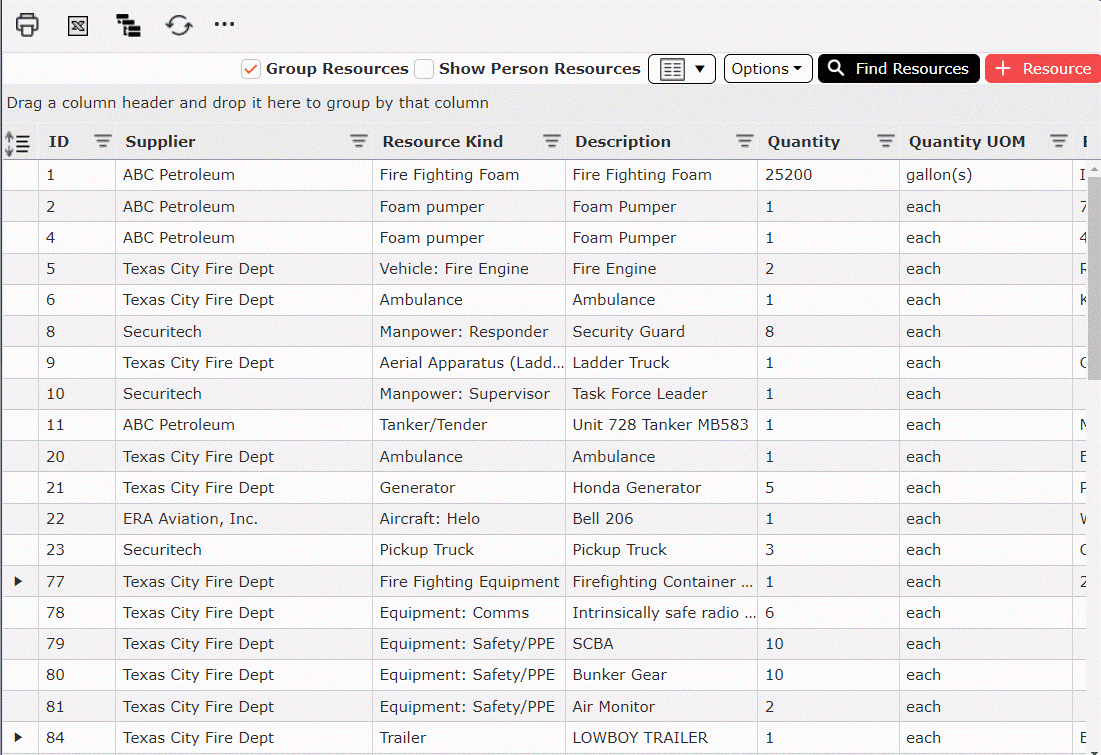
Resources can be manually added on the fly with basic resource information. Using the Find Resources feature users can search for prepopulated resources from known suppliers within a designated radius.
A resource can be quickly added to or deleted from the Resource Summary once activated.
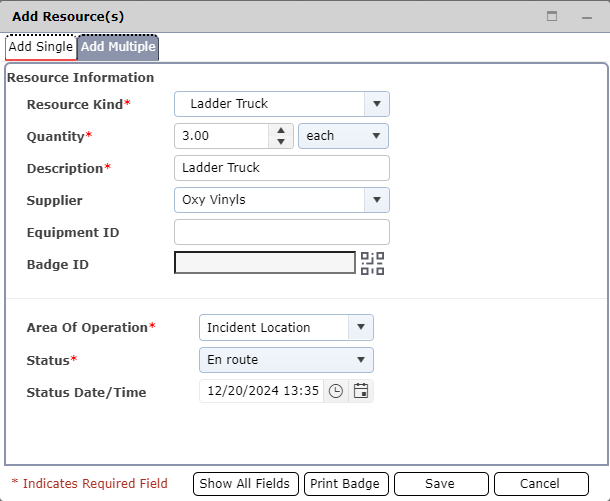
Click the Add button  to add a resource. A window will appear containing the fields related to resources.
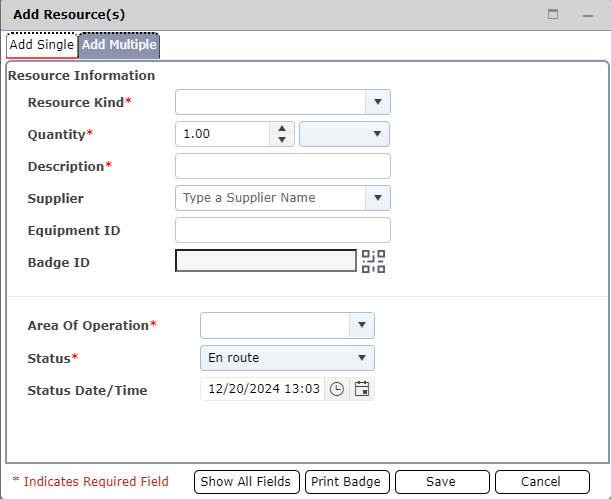
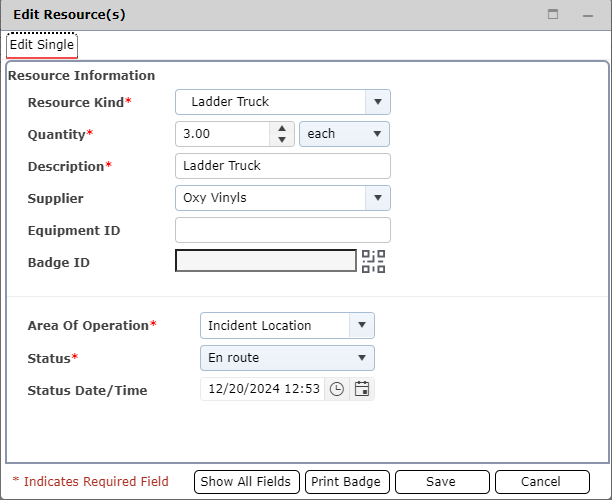
Enter at least the required information and click the Save button  . Fields with an asterisk
 are required. The five required fields are: Quantity, Resource Kind, Description, Area of Operation, and Status.
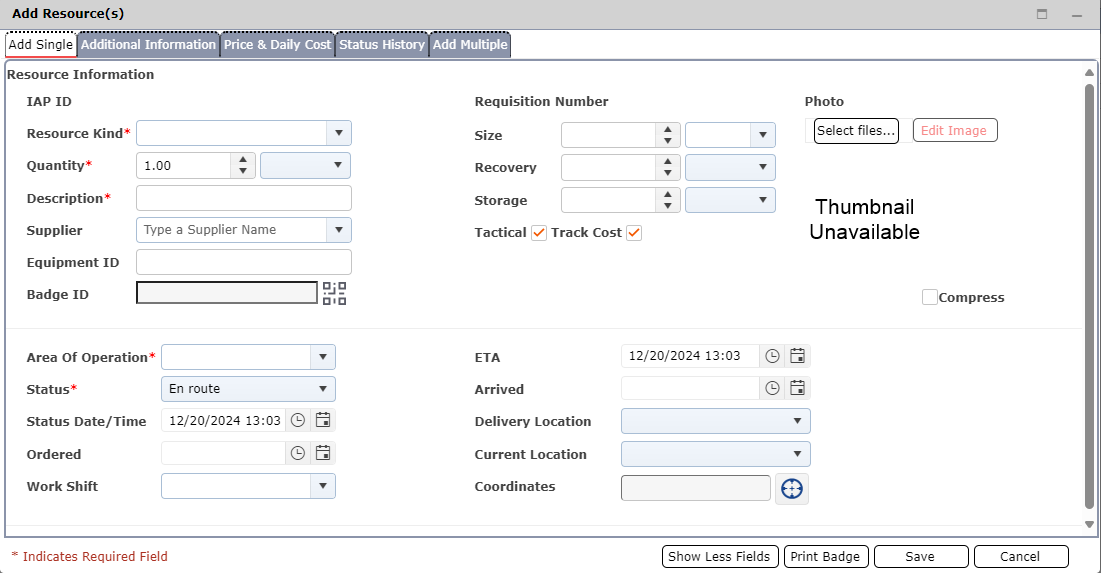
Additional resource details can be displayed and populated by clicking the Show All Fields button  .
.
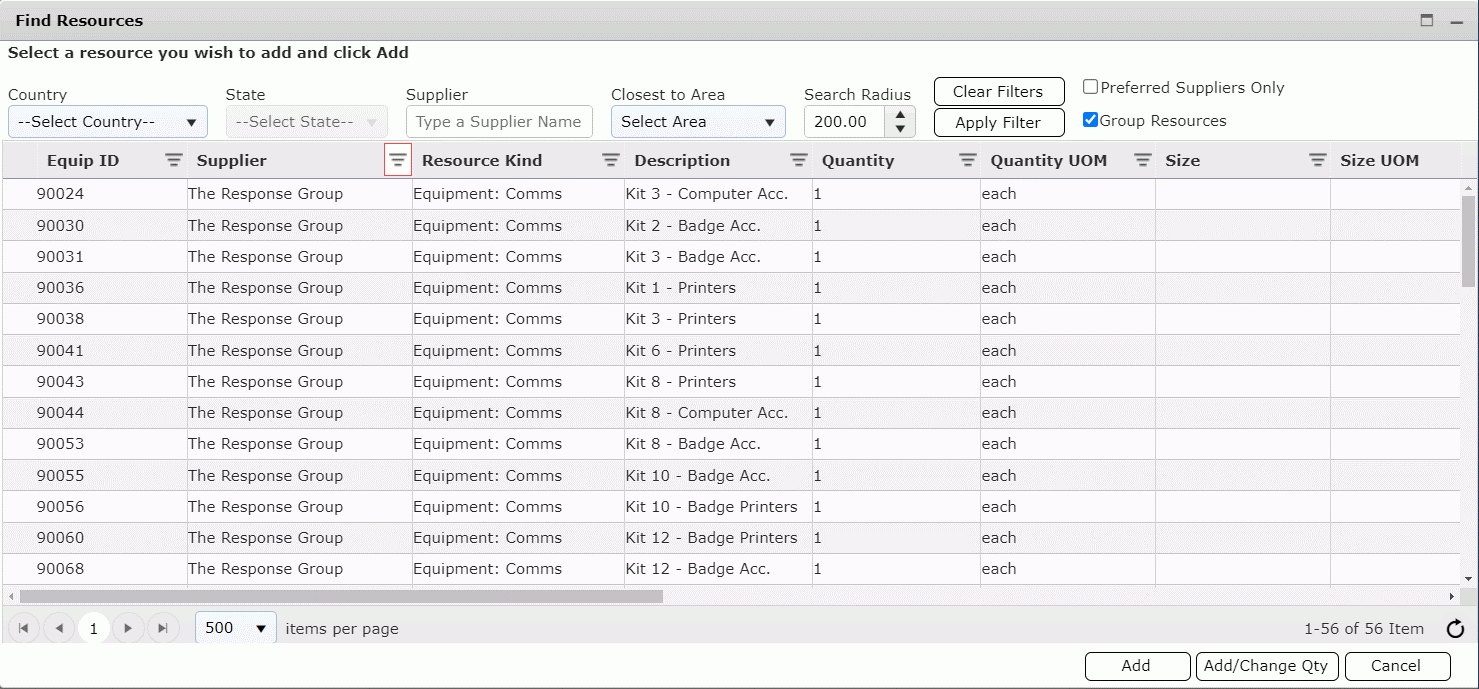
The IAP Software houses a database of tactical equipment from Oil Spill Removal Organizations which can be brought into the incident and listed in the Resource Summary. Use the Find Resources button  to locate specific resource to add to the Resources Summary. For more information on using this function, see the Find Resources page.
Click on a specific resource, then click the Edit button under the Options dropdown menu 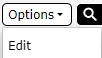 to view/edit detailed information about the selected resource. Fields within the any of the tabs described below can be updated a variety of ways.
Free type or use the increase/decrease buttons  to update numerical fields.
Use the provided drop-down fields  to select from populated lists. Users can type to search the list for the required result.
Free type to enter text fields.
Click the Scan Badge button  to enter or scan a badge and associate it to the resource. For more information on associating badges see the Check In/Out page.
Use the checkboxes  provided to select available options.
Use the Calendar Control buttons  to update the Date/Time fields.
The current location of a resource can be updated using the Get Location button  .
.
When on the information tab the Show Less Fields button will reduce the size of the Add/Edit window and will show only the most commonly used fields.
Use the Print Badge button  to print a badge for the selected resource. For more information on badges, see the Check In/Out page.
Click the Save button  to save all changes made withing the Add/Edit Resource window.
Click the Cancel button  to exit the Add/Edit Resource window without saving any changes.
For more information on using buttons and features see the General Form Functions page.
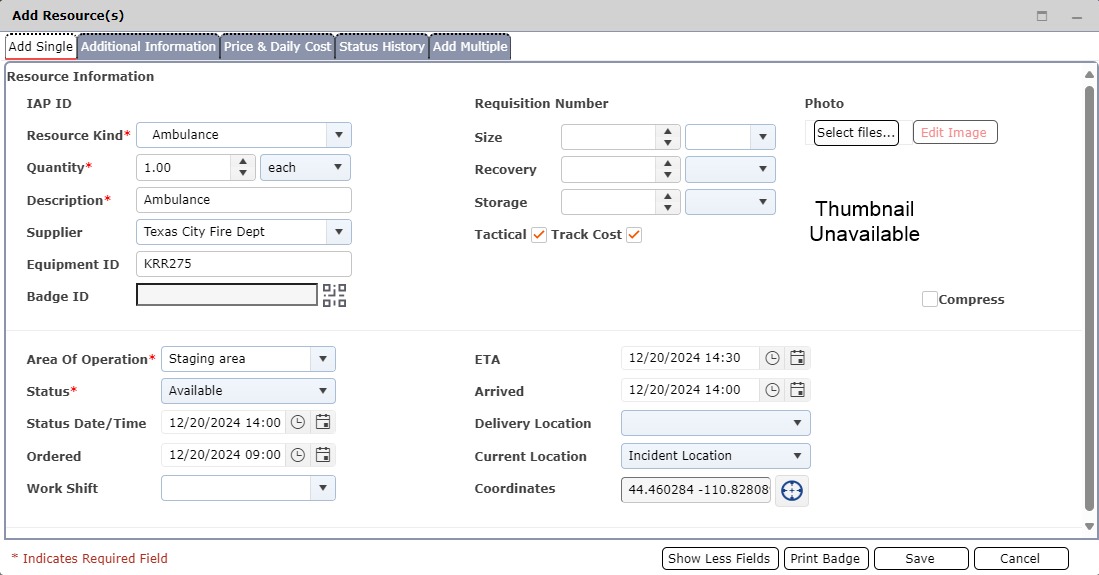
The information on the Add Single tab provides a detailed overview of resource attributes. Most of the information on the screen is captured when the resource is requested on the ICS 213RR for or as resources arrive at the response and are checked in.
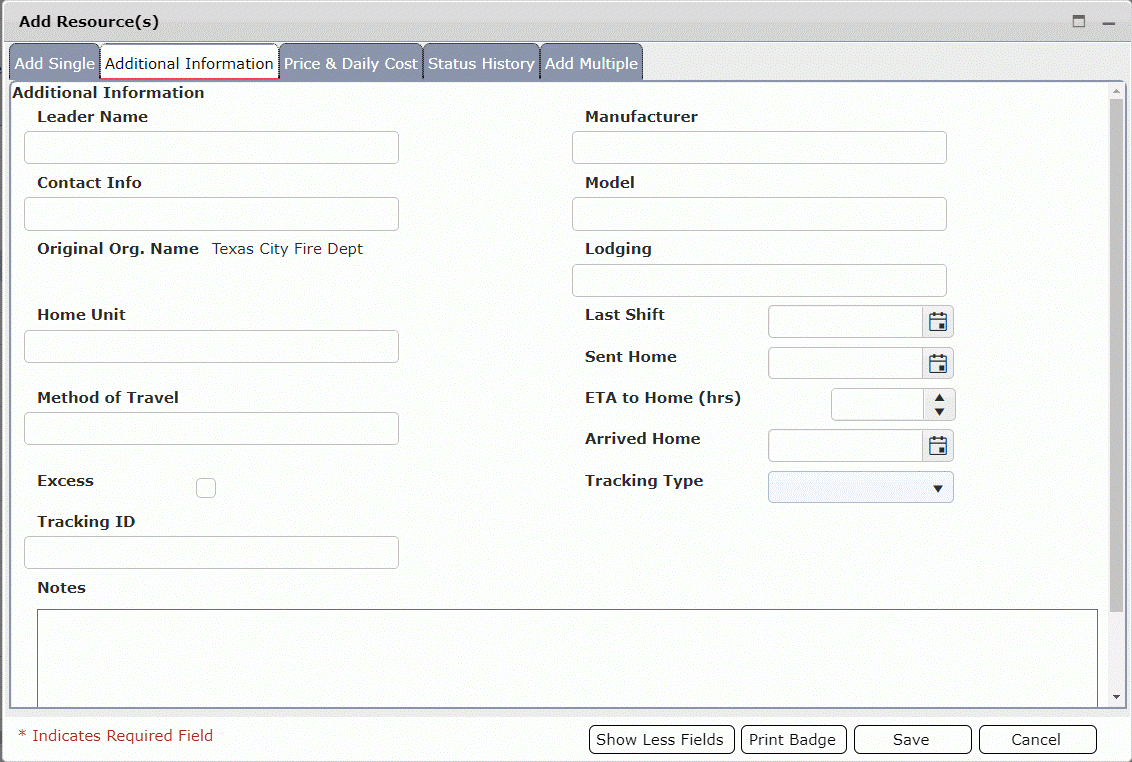
The Additional Information tab is used to capture and update logistical information and notes associated with each resource.
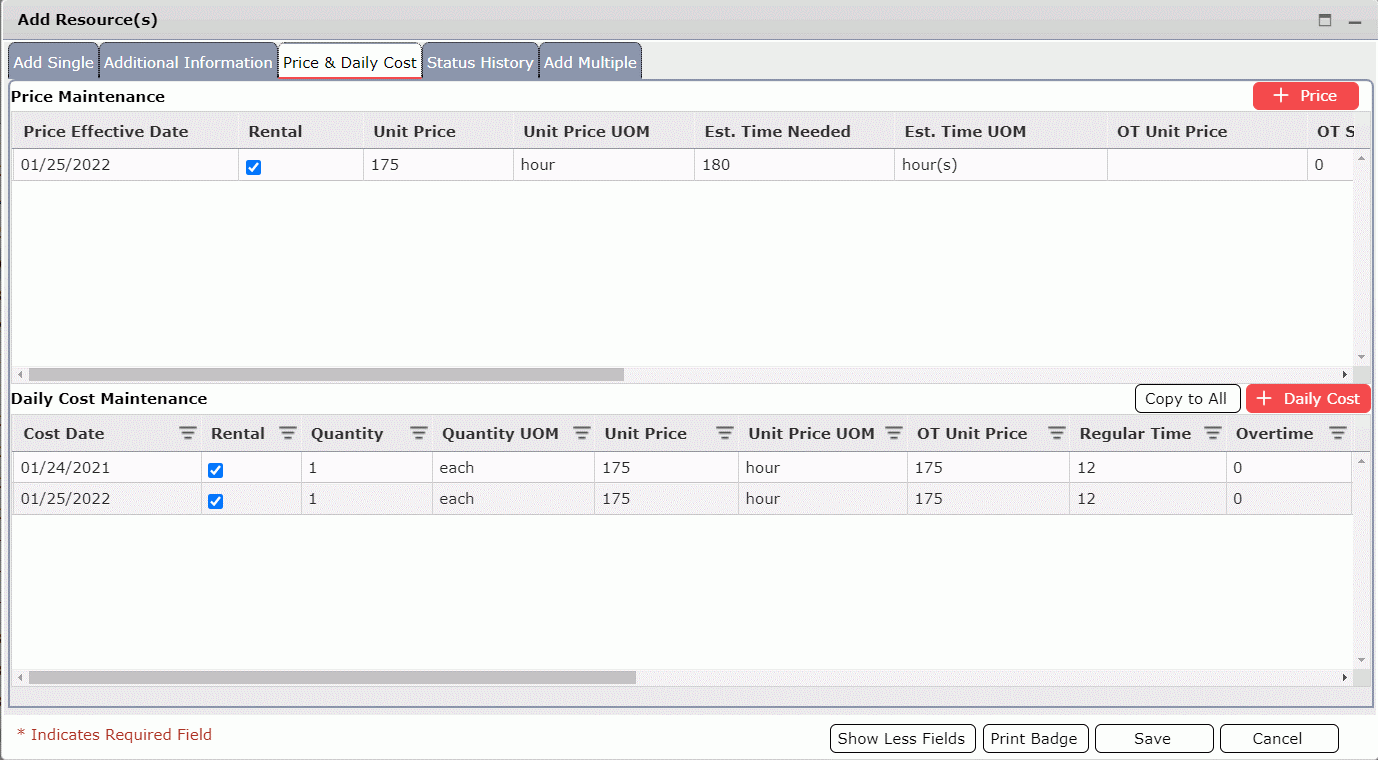
Price and Daily Cost information can be captured and updated. This information will be applied to the resource within the finance tracking screens of the software.
The Status History tab will display all status changes made to the resource.

The split function is used when multiple units of a resource need to be subdivided into smaller quantities, moved to different Areas of Operation, or have different statuses.
Select the line item for the resource to be split.
Click the Split button under the Options dropdown menu  to split the selected resource into separate resources. The split resource window will open with the resource quantity automatically split in half. To further split the resource, click the Add button
  .
.
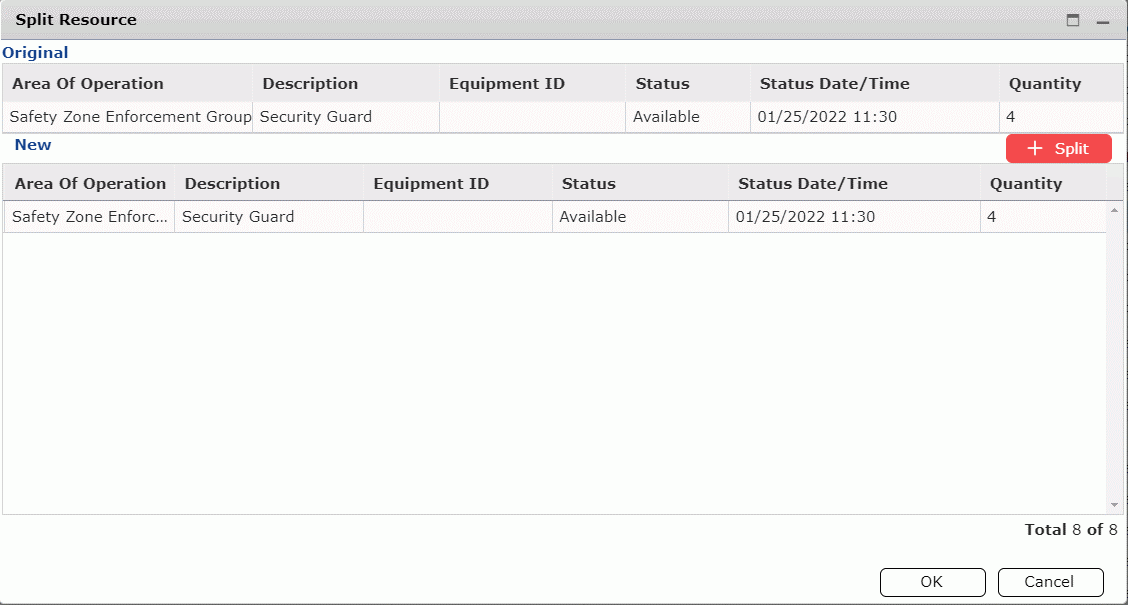
Click within any of the available fields to adjust, as necessary.
Click OK to save changes and split the resource.
An exact copy of a resource can be created using the Copy button  . Copying resources allows users to quickly and easily add new resources that are like existing resources.
Select the line item for the resource to be copied.
Click the button under the Options dropdown menu  to copy the selected resource. This will open the Add/Edit Resource window with the information copied from the selected resource.
Make adjustments to reflect the new resource’s attributes. Then click the Save button  .
.
A resource can be grouped under another resource to become a set.
To group resources, select a resource and drag it onto another one. A window will appear with a question to confirm that action.
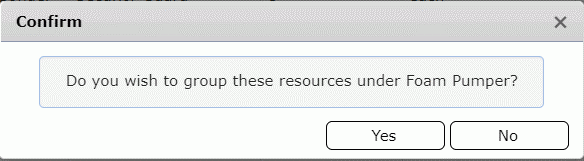
Click Yes to group or No to exit without grouping. An arrow  will appear to the left of the parent resource when it has resources listed under it. Click on the arrow to expand the parent child relationship and to see all of the grouped resources. The Collapse/Expand button
  will also show all resources grouped.

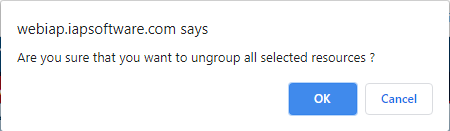
To ungroup a resource, expand the parent/child listing. Click on the child item to be ungrouped and then click the Ungroup button under the Options dropdown menu  . A window will appear with a question to confirm that action.
When viewing the form there are several options which can be used to customize the resource grid view.
Clear Filter button under the Options dropdown menu  will clear any filters applied to columns within the grid view. For more information on using filters see the General Form Functions Page.
Areas  will display the Areas of Operation window for review or update. For more information on editing areas see the Areas of Operation page.
Show Person Resources  will either show or hide resources that are designated as personnel equipment kinds. For more information see the Incident Resource Kind Maintenance page.
The list of resources, by default, will display grouped resources. To view the list without grouping uncheck the Group Resources checkbox  .
.
Show/Hide Columns  allows the user to edit which columns are displayed within the grid.
Navigating through resources is done through pages. In the footer of the form, there are navigation tools.

To change the number of items per page, utilize the drop-down 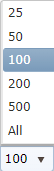 to pick between 25, 50, 100, 200, 500 or All items per page.
To switch between pages, use the navigation arrows  .
.
On the right side of the footer, the range of items listed as well as how many resources there are will be noted.  .
.
Manual refresh can be activated by using the Refresh button  .
.
The Bulk Edit feature can be used to edit a single field with the same value for multiple resources at one time.
Use the column header filter options to filter the list to show only the items to be edited.
NOTE: All items displayed in the grid will be bulk edited.
Click the Bulk Edit within  to open the Bulk Edit window.
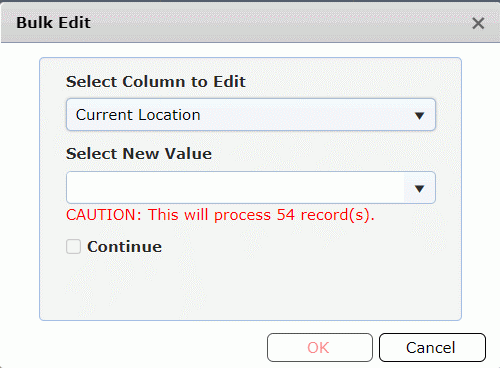
Use the Select Column to Edit drop-down  provided to select the field to be edited.
Use the Select New Value field to select or enter the updated value. Then click OK to apply the updates.
© 2024, TRG The Response Group LLC., All rights are reserved.
No part of this web site, and the information which it contains, may be reproduced, stored in a retrieval system or transmitted in any form or by any means, electronic, mechanical, photocopying, recording or otherwise, without prior written permission of TRG.