| IAP Software ™ |  |
| IAP Software ™ | |
ICS 233 – Open Action Tracker
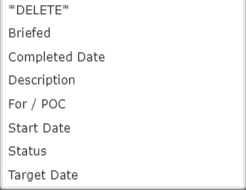
The ICS 233 – Open Action Tracker is used throughout the incident to maintain information about the status of action items for the response organization. The form contains a description of the action item, persons responsible, start date/time, target and actual completion dates, current status, and a section for additional notes. For help on using general form functions (e.g. Create/Open Version, Save, etc.) and accessing preloaded versions, see the General Form Functions page.
Contents
Action Items may be added to the ICS 233 in a few different ways.
Use the Add button  to add a blank line item.
To select a preloaded version of the ICS 233 – Open Action Tracker, click on the Open a Preload button  . Select the preloaded ICS 233 desired and click Open
  . The ICS 233 – Open Action Tracker selected will open.
Use the Get Data button 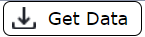 to pull in data from another form (such as another version of the ICS 233). Select the version of the form to open and click Open
  . Then select the Open Actions to copy and click OK.
If any filters are applied and the user wants to clean them all at once, they can click  . The original information display will come back to screen.
NOTE: The Open Action Item Number field auto populates with each added line item.
Enter a description of the Action Item. This will be the primary text by which the action item is known.
Type in the name and/or position of the Responsible Party or use the drop-down options  in the For/POC field.
Click in the Status field to activate the Drop-Down Menu  . Use the dropdown list to select the Status of the Action Item.
Enter any notes associated with the Action Item.
Click in the Start Date field to activate the Calendar Control button. Use the Calendar Control button  or type in the Date/Time field to select the Start Date for the Open Action item. For more information, see the Calendar Control page.
Use the Calendar Control feature  to update the Target Date and Completed Date fields, as appropriate.
Send an ICS 213 General Message to the POC for the action item by click the blue envelope icon  on the line associated with the action item. A new ICS 213 General Message tab will open, with details of the action item prepopulated in the message field. For more information see the ICS 213 General Message page.
If appropriate person has been informed, use the Briefed Checkbox  to indicate that the Responsible Party has been briefed on the Action Item.
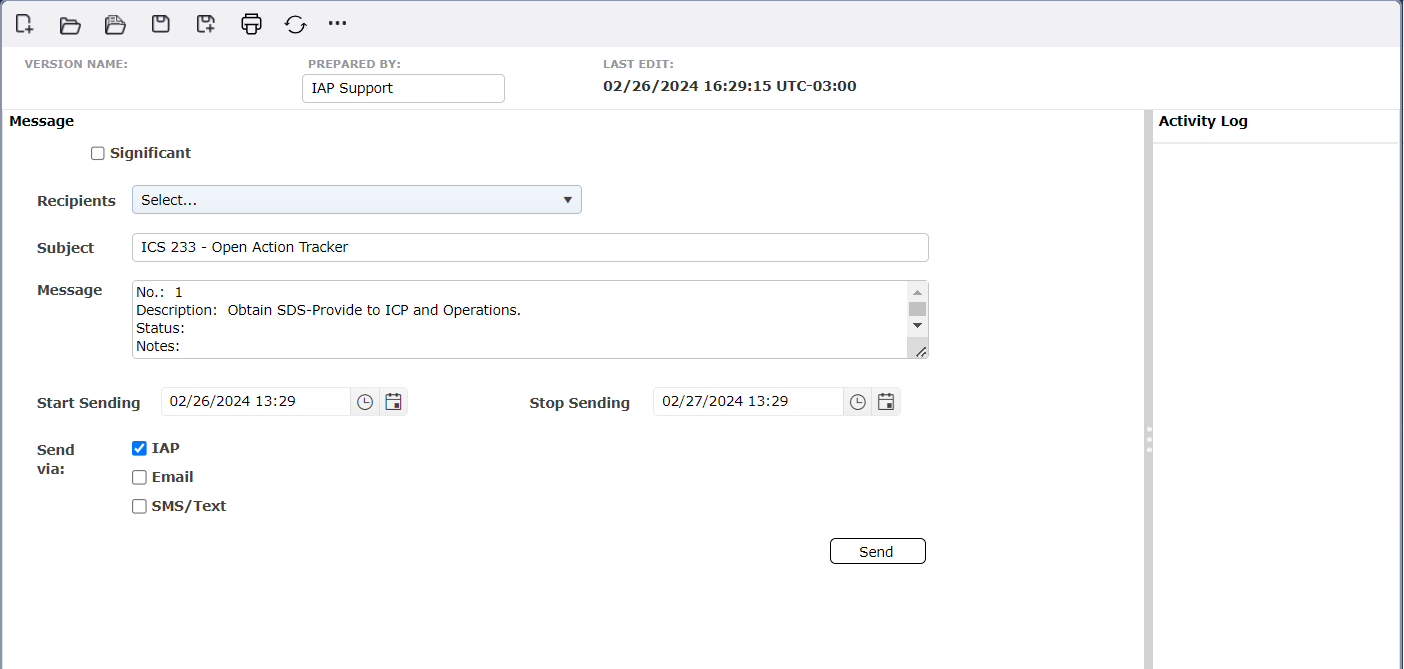
NOTE: If the Target Date entered is due within 24 hours from the current time the Target Date field for that item will be highlighted in yellow. If the Target Date entered is past due the Target Date field for that item will be highlighted in Red.
Action Items may be added to the ICS 233 from other sources.
From Form  can be used to pull in actions from another form (such as another version of the ICS 233).
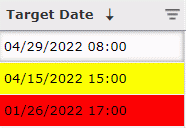
From Preloads  can be used to pull in actions from the Action Item Maintenance.
NOTE: For more information on preloaded actions, see Action Item Maintenance.
Select which source to pull actions from with the Form drop down.
Select the version or versions of the form using the Version area.
Clicking in the open area will bring up a drop down with all available versions.
Checking the box next to the version will populate the area with available actions.
Check the boxes next to the actions to select them.
The Select All button  can be used to select all the actions.
The Clear All button  can be used to clear the selection and start over.
Click OK to bring the actions into the ICS 233.
Click Cancel to close the window without bringing in actions.
NOTE: When selecting from form, if there are actions from another incident to be brought in, clicking the Show All Fields button  will add additional dropdowns at the top for selecting Incidents and Periods.

Action Items with a “Status” of Complete can be filtered out and only those that remain open are displayed during the meetings in a Command Post. Because the list has been filtered, the numbering gets out of order. The user may desire to renumber action items after they have been reordered. Click the Renumber button  to renumber the Action Items according to their placement on the list.
Users can make updates to a group of action items all at once by using the Bulk Edit feature. Click on the Bulk Edit button  to bring up the dialog box.
Filter down the list to those that need a change.  The filtered list of action items on the screen (current view) are those that will update when selecting bulk edit. Be sure the correct filter has been selected first.
Click on the Bulk Edit button.
Select which column to edit from the drop down.
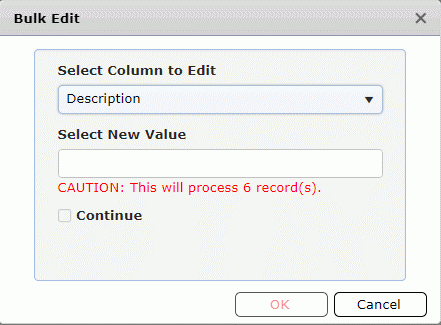
Bulk Edit drop down List
Next, select the new value and click OK. Then use the Save button  to update the form.
© 2024, TRG The Response Group LLC., All rights are reserved.
No part of this web site, and the information which it contains, may be reproduced, stored in a retrieval system or transmitted in any form or by any means, electronic, mechanical, photocopying, recording or otherwise, without prior written permission of TRG.
