| IAP Software ™ |  |
| IAP Software ™ | |
Planning P
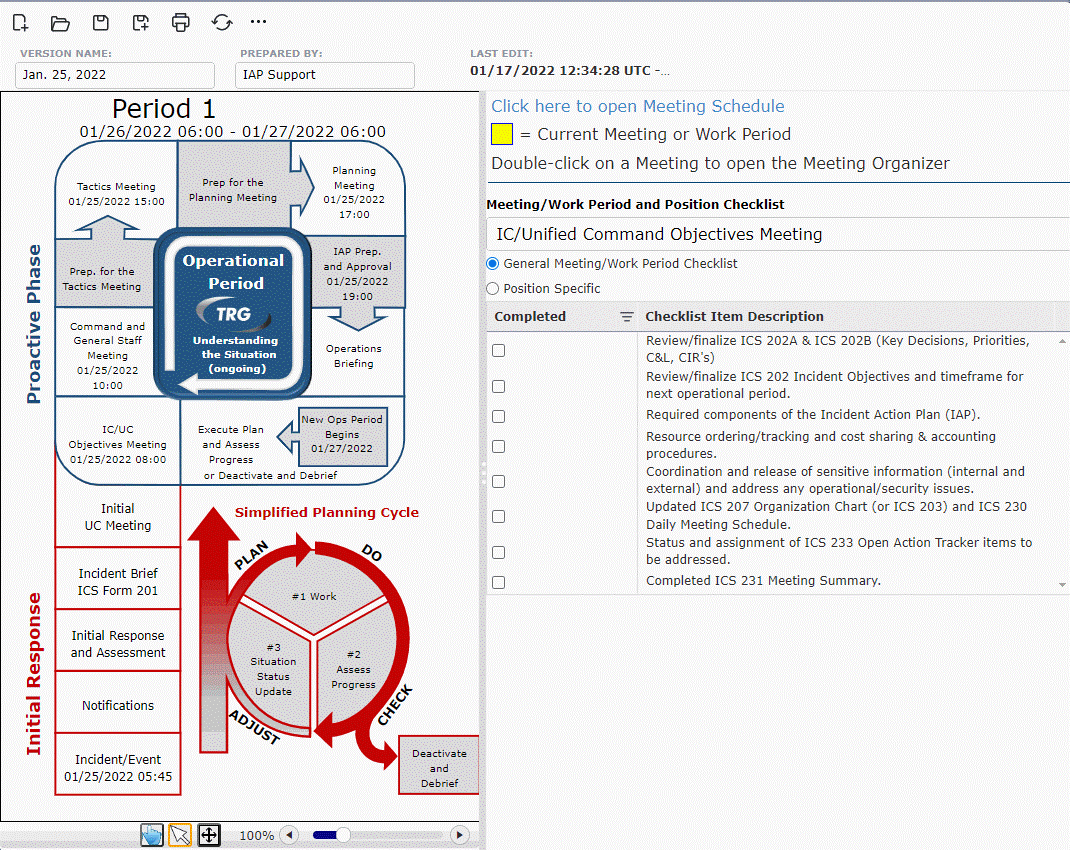
The Planning P is a guideline of the process in the life of an incident. It provides a visual layout of what meetings are to take place during an incident. It covers both the Initial Response and proactive phases of the incident. The Planning P is dynamically linked to the ICS 230 Meeting Schedule and the ICS 231 Meeting Summary forms. For help on using general form functions (e.g. Create/Open Version, Save, etc.) see the General Form Functions page.
Contents
View a Meeting/Work Period Checklist
View a Position Specific Checklist
Meetings can be scheduled from the ICS 230 Meeting Schedule or directly from the Planning P. Once a meeting has been added the date and time will show on the Planning P. To add a meeting from the Planning P use the following steps:
Click on the Name of the meeting to be added. The Add Meeting dialog box will appear.
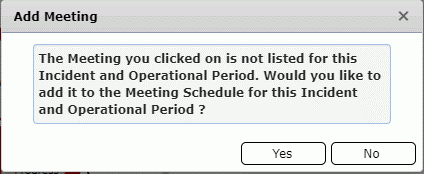
Click Yes. The Add Meeting to Meeting Schedule window will appear.
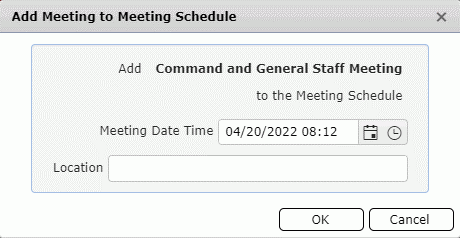
Select the Meeting Date/Time using the Calendar Control button  or free type in the Date/Time field. Free type to add the meeting location. Click OK. The meeting will be added to the ICS 230 Meeting schedule and the Date and Time will populate on the Planning P. To learn more about Calendar Control, see the Calendar Control page.
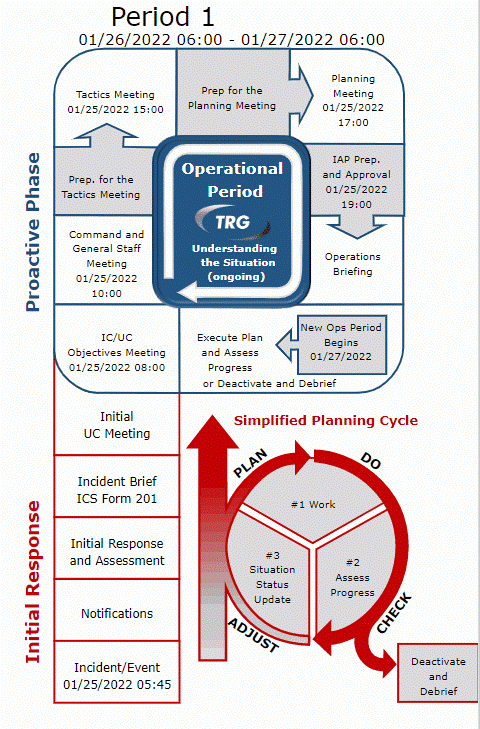
NOTE: Meetings in progress will be highlighted on the Planning P page. 
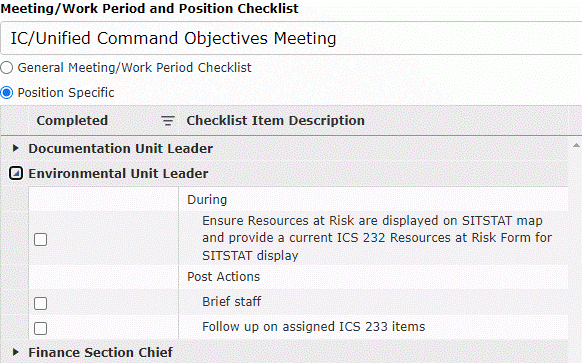
On the right side of the Planning P screen, when a meeting is selected, a checklist can be viewed to ensure that everything is in place and everyone knows their responsibility. This checklist can show a Meeting/Work Period checklist or a Position Specific checklist.
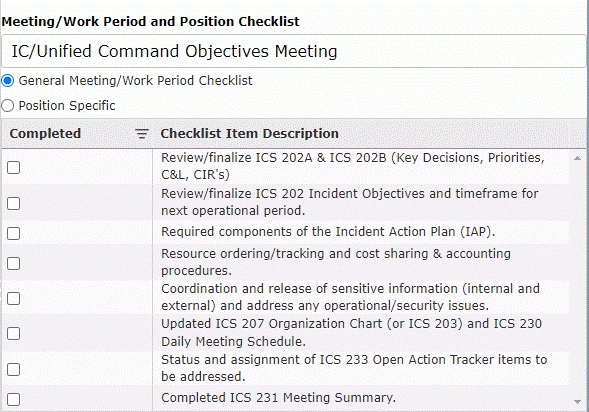
To view a Meeting/Work Period checklist click on the meeting name from the Planning P. The checklist, if available for the selected meeting, will populate on the right side of the screen. The checkboxes  in the completed column can be utilized to mark each task as it is completed.
To view a Position Specific checklist, click on the meeting name from the Planning P. Use the radio button  to select the Position Specific option. The position specific checklists, if available for the selected meeting, will populate. Use the arrows
  next to each position to expand the list to see tasks assigned. The checkboxes
  in the completed column can be utilized to mark each task as it is completed.
The Meeting Schedule can be accessed directly from the Planning P by clicking the Click here to open Meeting Schedule link. To learn more about the Meeting Schedule, see the ICS 230 Meeting Schedule page.
The Meeting Organizer can be accessed directly from the Planning P by double clicking on the meeting name once the meeting has been scheduled. To learn more about the Meeting Organizer, see the Meeting Organizer page.
© 2024, TRG The Response Group LLC., All rights are reserved.
No part of this web site, and the information which it contains, may be reproduced, stored in a retrieval system or transmitted in any form or by any means, electronic, mechanical, photocopying, recording or otherwise, without prior written permission of TRG.