| IAP Software ™ |  |
| IAP Software ™ | |
The ICS 209 – Incident Status Summary is used to provide a snapshot of the overall incident status. The form captures information on Current Status, Resources and Personnel, and Shoreline/Wildlife/Approvals. In addition, this form contains all the general form functions. For more information, see the General Form Functions page.
Contents
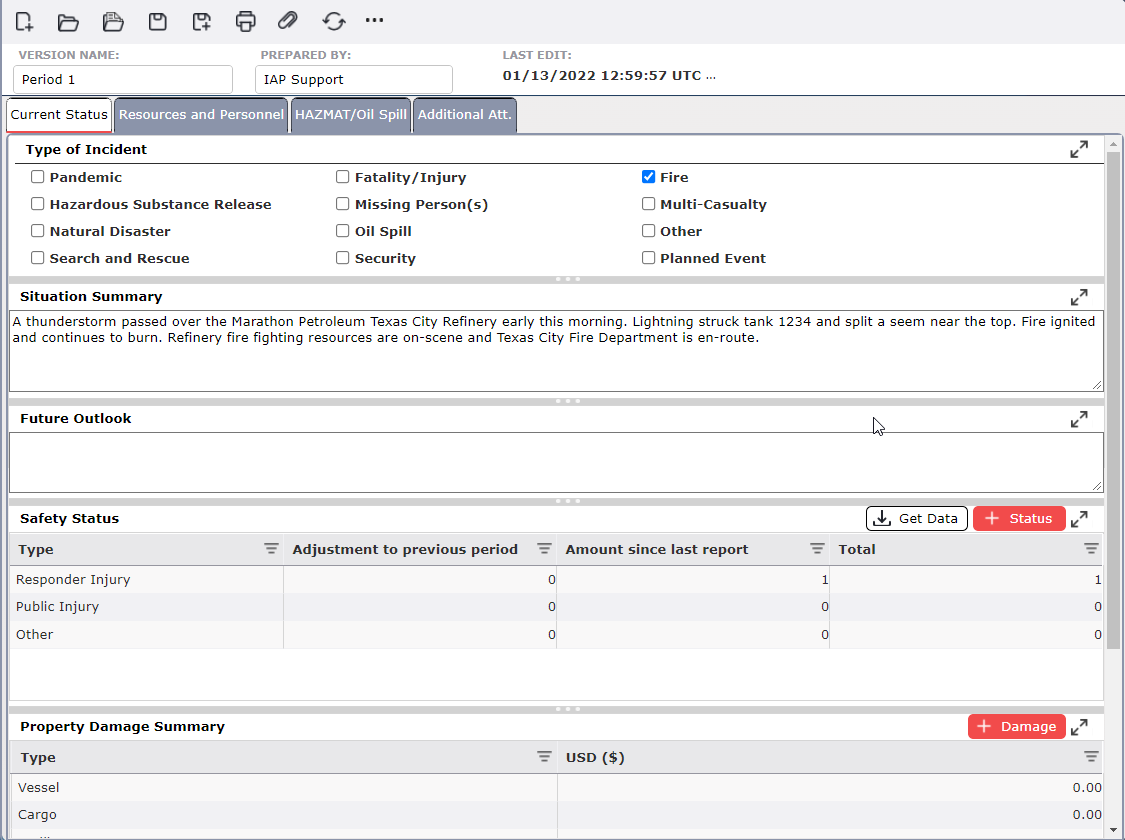
The Current Status tab provides a high-level overview of the current situation and outlook. This includes information on Type of Incident, Situation Summary, Future Outlook, Safety Status, and Property Damage Summary.
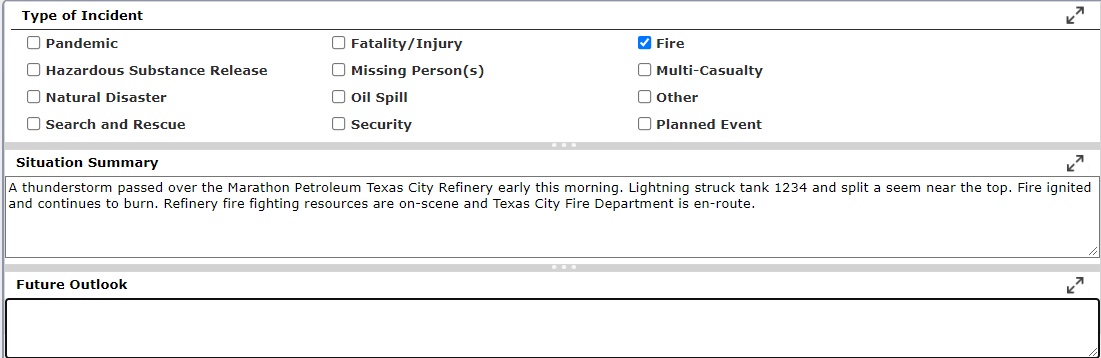
The Type of Incident is indicated in this section. The type of incident selected when creating the incident in the software will be checked by default but can be changed using the check boxes provided.

The Situation Status provides a detailed incident description. Free type to update the Situation Summary field.

The Future Outlook describes potential issues or concerns that may arise as the incident progresses. Free-type to update the Future Outlook field.

The Safety Status section tracks personnel safety statistics for the response.

To add categories and quantities to the Safety Status section:
Click on the Add button  to add a new row.
Type the name of the type of Safety Status in the Type column.
Enter the appropriate quantity in the Adjustment to previous period, Amount Since Last Report, and Total columns using the free-type option.
To delete a row, hover over the desired row for a moment and the delete button will appear, then click on the Delete button  to remove the item. If you remain hovering over the row, the delete button will disappear after a couple of seconds.
Safety Status data can be pulled into the ICS 209 form from the Safety Status Form or the ICS 237 Incident Mishap form form using the Get Data button. Click the Get Data button  . The Confim Import dialog box will appear.
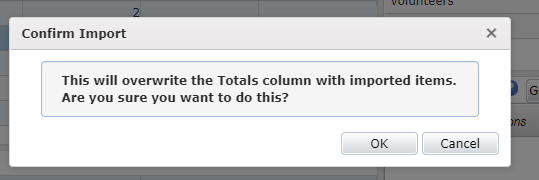
Click Ok. The Get Safety Data dialog box will appear.
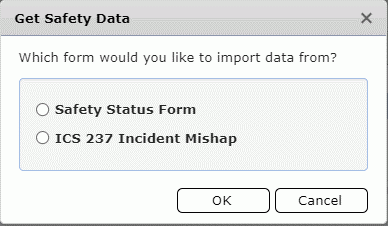
Select the desired form from which to pull Safety data. Click Ok. The Select the version of the form to open dialog box will appear.

Select the version of the form from which to pull data.
Click Open and the data will populate the Safety Status section.
The Property Damage Summary section is used to provide a quick estimate of the costs associated with damage to the Vessel, Cargo, Facility, or other assets associated with the incident. Dollar values can be added by free typing in the amount.

The Resources and Personnel tab is used to provide a snapshot of the resources and personnel currently assigned to the incident.
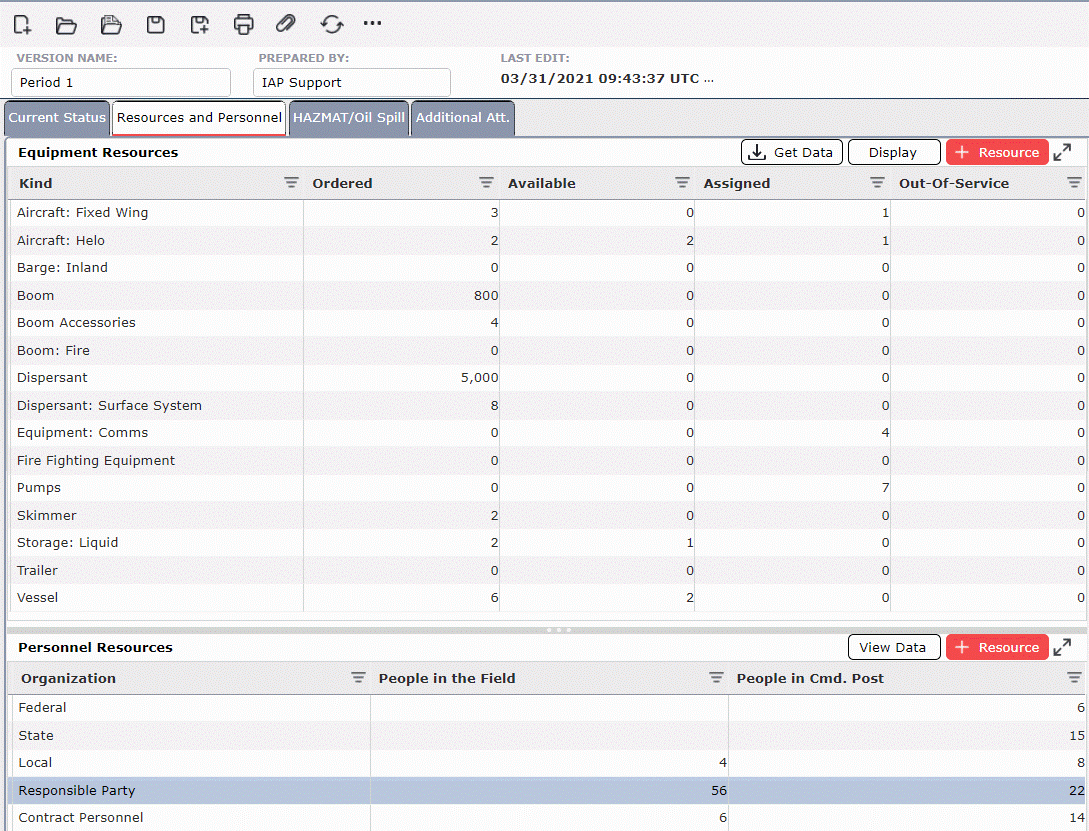
To add categories and quantities to Equipment Resources:
Click on the Add button  to add a new row.
Type the name of the Equipment Kind in the Kind column or select from available options in the dropdown box.
Enter the appropriate quantities in the Ordered, Available/Staged, Assigned, and Out-Of-Service columns using free type.
To delete a row, hover over the desired row for a moment and the delete button will appear, then click on the Delete button  to remove the item. If you remain hovering over the row, the delete button will disappear after a couple of seconds.
Equipment Resources data can be pulled into the ICS 209 form from the Resouces Summary form using the Get Data button.
Click the Get Data button 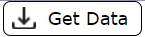 . The Get Resource Data dialog box will appear.
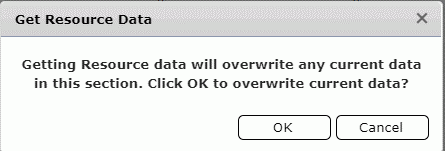
Click OK. The List of Resource Kinds dialog box will appear.
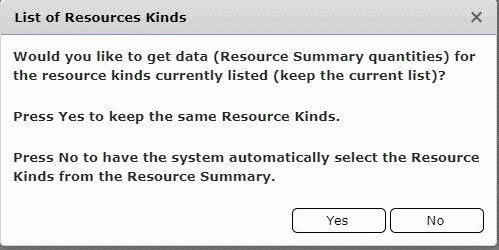
To keep the current list of resource types click Yes, to have the system automatically select the resouce types click No. The Select Area dialog box will appear.

Select the Areas of Operations from which to pull resouce information.
Click Ok. The resource kind and quanitiy fields will update.

To add categories and quantities to Personnel Resources:
Click on the Add button  to add a new row.
Type the name of the Organization Type in the Organization column.
Enter the appropriate quantities in the People in the Field and People in the Cmd. Post columns using the free-type option.
To delete a row, hover over the desired row for a moment and the delete button will appear, then click on the Delete button  to remove the item. If you remain hovering over the row, the delete button will disappear after a couple of seconds.
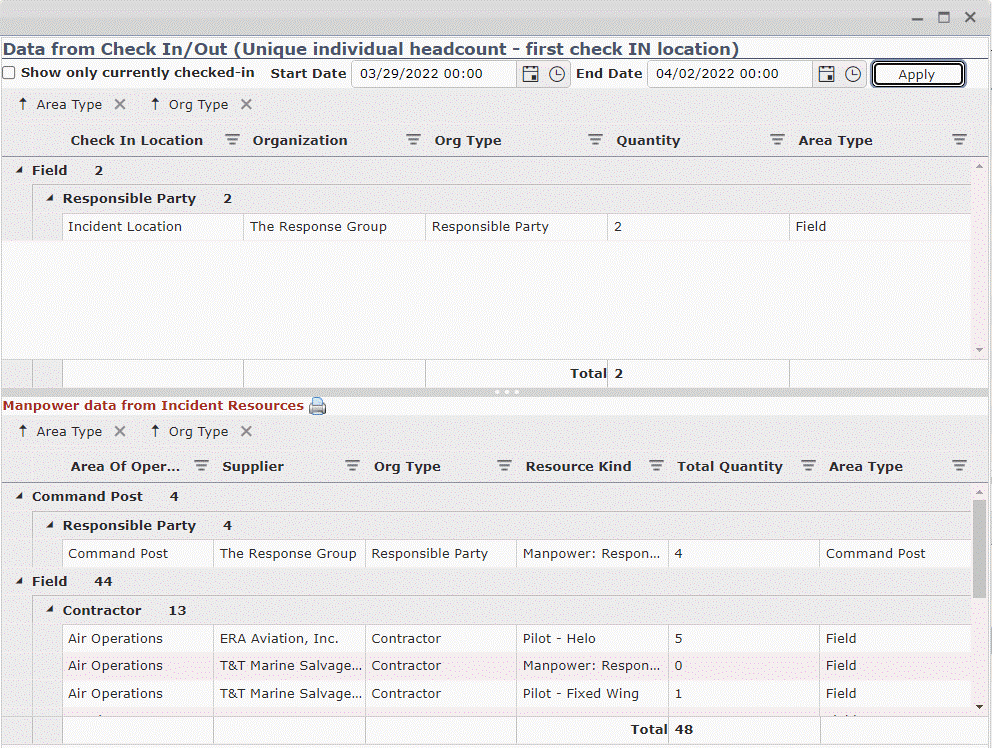
Personnel data can be viewed to help get an accurate count of personnel working the incident. To view personnel data:
Click the View Data button  . The Personnel Data dialog box will appear.
Select the Start Date and End Date desired using the Calendar Control button  or free type in the Date/Time field. To learn more, see the Calendar Control page.
Click the Apply button  . The selected checkin data will appear on the top portion of the screen.
Manpower data from Incident Resouces can be viewed on the bottom portion of the screen. Users can toggle between the Resource Type and Manpower tabs to view information.
The HAZMAT/Oil Spill tab is to be used only when applicable to the incident and tracks information such as Spill Status, Mass Balance, Waste, Shoreline Impacts, and Wildlife Impacts.
The Spill Status (Estimated) section provides a quick view showing if the source has been secured, spill rate, and the how much remains to be potentially spilled.
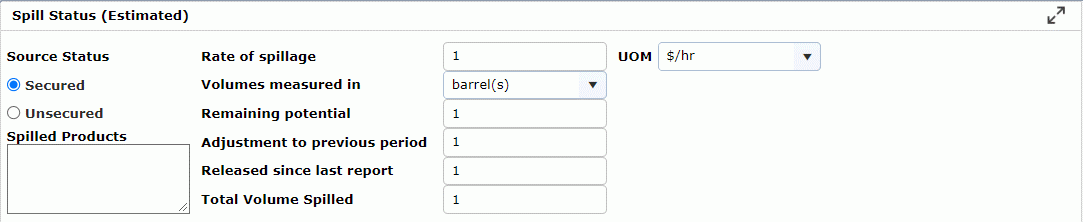
Update the Source Status by using the radio buttons  .
.
Free type the name(s) of the product(s) spilled.
Update the Rate of Spillage, UOM, Volumes measured, Remaining Potential, Adjustment to previous period, Released since last report, and Total Volume Spilled in fields using the free type option or selecting from the Drop-down menus  .
.
The Mass Balance (Estimated) tracks material categories that are managed within the response, as well as the specific volumes that are being reported.
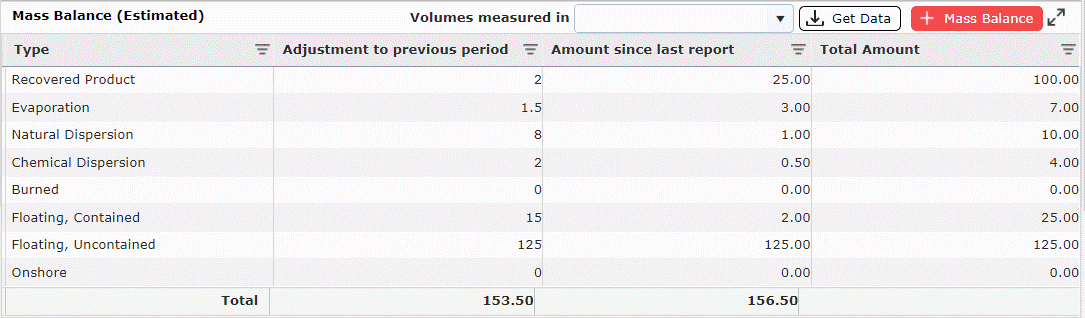
To add categories and quantities to the Mass Balance (Estimated):
Click on the Add button  to add a new row.
Type the name of the material category in the Type column.
Enter the appropriate volume numbers in the Adjustment to previous period, Amount Since Last Report, and Total Amount columns using the free-type option.
Select the desired Unit of Measure in the Volumes Measured In drop down menu  .
.
To delete a row, hover over the desired row for a moment and the delete button will appear, then click on the Delete button  to remove the item. If you remain hovering over the row, the delete button will disappear after a couple of seconds.
Mass Balance data can be pulled into the ICS 209 form from the Mass Balance form using the Get Data button.
Click the Get Data button  . The Select the version of the form to open dialog box will appear.
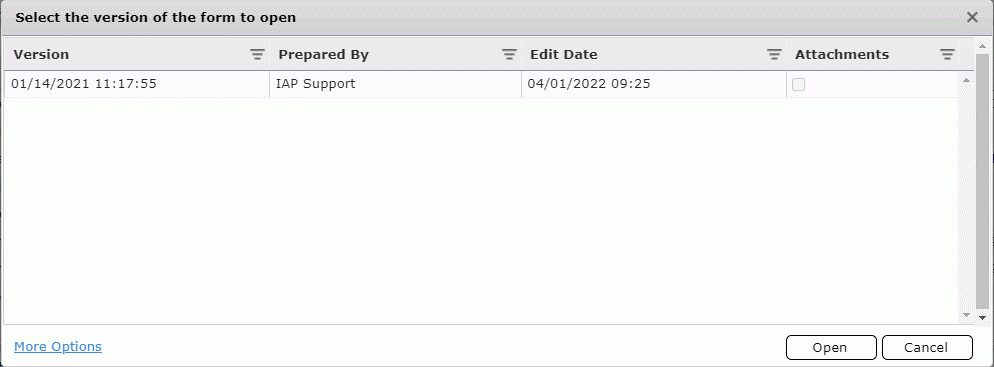
Select the version of the Mass Balance form from which to pull data.
Click Ok and the data will populate the Mass Balance section.
The Waste Management form tracks types and quantities of waste generated by response efforts.
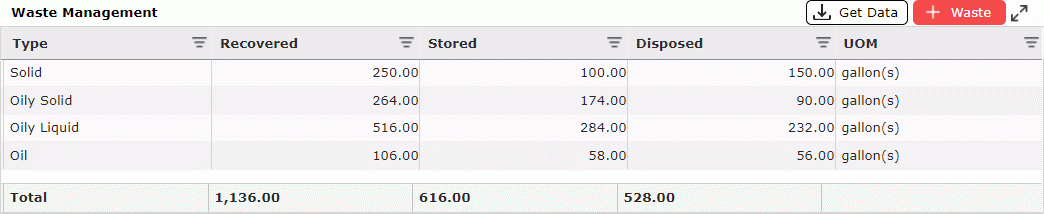
To add categories and quantities to the Waste (Estimated):
Click on the Add button  to add a new row.
Type the name of the Waste category in the Type column.
Enter the appropriate volume numbers in the Recovered, Stored, and Disposed columns using the free type option.
Select the desired Unit Of Measure (UOM).
To delete a row, hover over the desired row for a moment and the delete button will appear, then click on the Delete button  to remove the item. If you remain hovering over the row, the delete button will disappear after a couple of seconds.
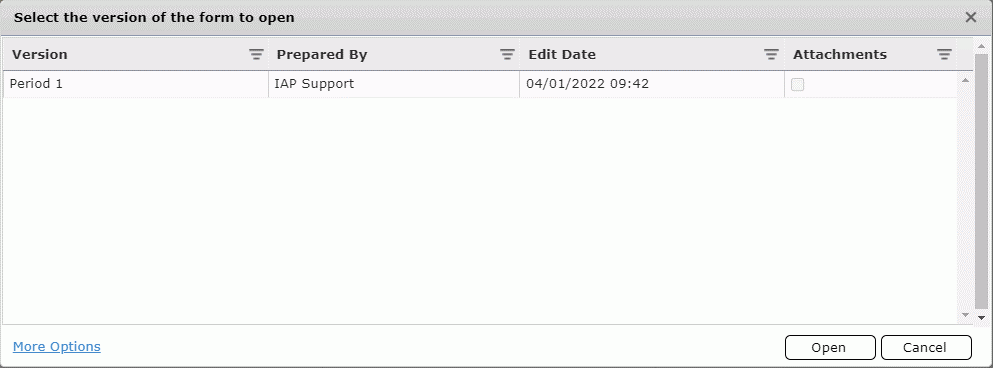
Waste data can be pulled into the ICS 209 form from the Waste Management form using the Get Data button.
Click the Get Data button  . The Select the version of the form to open dialog box will appear.
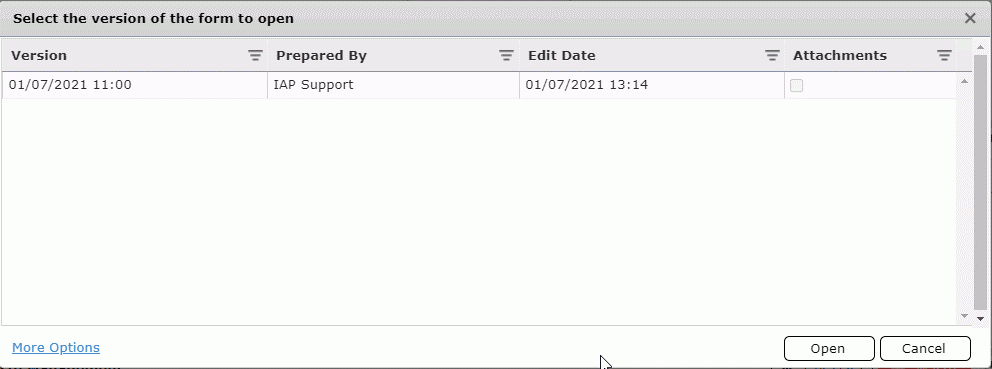
Select the version of the Waste Management form from which to pull data.
Click Open. The Get Waste data dialog box will populate. Select the Waste data line items to to pull into the ICS 209.

Click either the Add to existing or Replacing existing  button to pull in the desired Waste data. The data will update in the Waste Management section.
The Shoreline Impacts portion of this section provides users the ability to document the overall status of affected shorelines.

To add categories and quantities to the Shoreline Impacts section:
Click on the Add button  to add a new row.
Type the name of the Degree of Oiling category in the Degree of Oiling column.
Enter the appropriate measurements in the Affected and Cleaned columns using the free type option.
Select the desired Unit Of Measure in the Volumes Measured In drop down menu  .
.
To delete a row, hover over the desired row for a moment and the delete button will appear, then click on the Delete button  to remove the item. If you remain hovering over the row, the delete button will disappear after a couple of seconds.
Shoreline Impacts data can be pulled into the ICS 209 form from the Shoreline Impact form using the Get Data button.
Click the Get Data button  . The Select the version of the form to open dialog box will appear.
Select the version of the Shoreline Impact form from which to pull data.
Click Open and the data will populate the Shoreline Impacts section.
Use the Wildlife Impacts portion to record data pertaining to any affected wildlife. This includes categories for Captured, Cleaned, Released, DOA, Euthanized, and Other.
To add categories and quantities to the Wildlife Impacts section:
Click on the Add button  to add a new row.
Type the name of the wildlife category in the Type column.
Enter the appropriate quantity numbers in the Captured, Cleaned, Released, DOA, Euthanized, and Other columns using the free type option.
To delete a row, hover over the desired row for a moment and the delete button will appear, then click on the Delete button  to remove the item. If you remain hovering over the row, the delete button will disappear after a couple of seconds.
The Notes section provides a place to document important facts which are not captured elsewhere on the form. Notes can be added by free typing and can be formatted using the Formatting Toolbar, for more information see the General Form Functions page.

This section is used to document additional information pertaining various aspects of response which may apply to the current incident response. The available subsections should be used only as they apply and are not required to be completed. Additional information can be provided for Evacuation Status, Migrant Interdiction Status, Sorties/Patrols Summary, Use of Force Summary, and Operational Controls Summary.
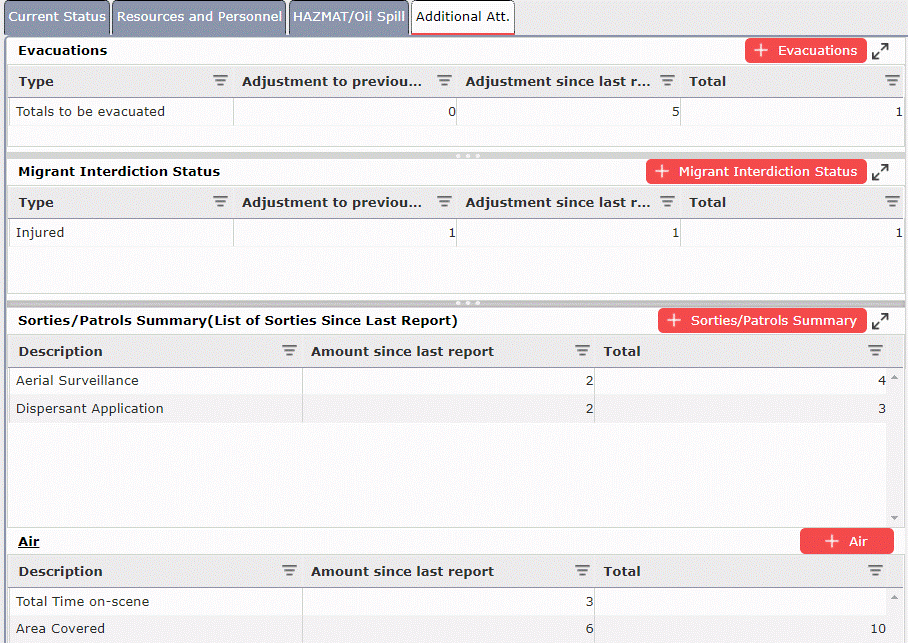
This section is used to document the number of evacuations needed and executed. Users can use the free-type option to populate the available fields.

This section is used to document the number of migrant interdiction status for the incident. Use the free-type option to populate the available fields.

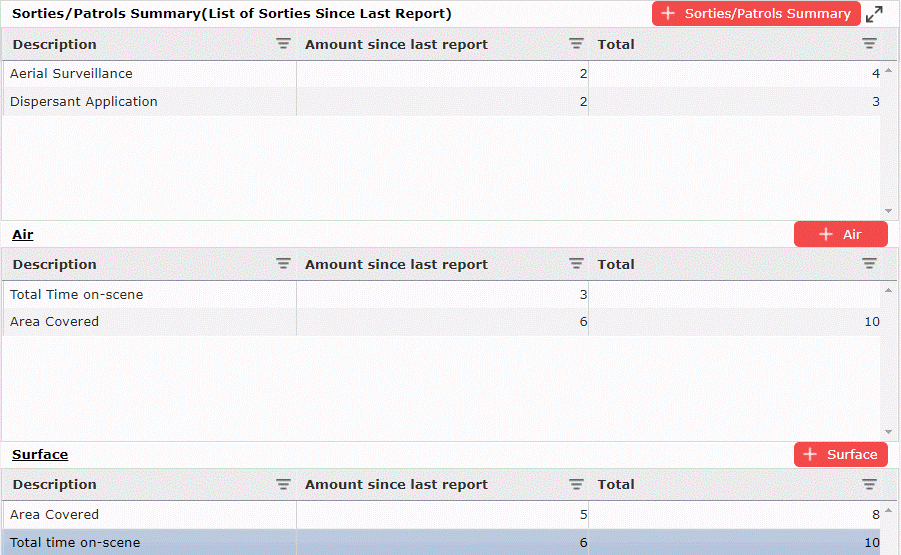
This section is used to document the number and type of sorties/patrols for the incident. Use the free type option to populate the available fields.
This section is used to document the number and type of force which has been used during response activities. Users can use the free-type option to populate the available fields.

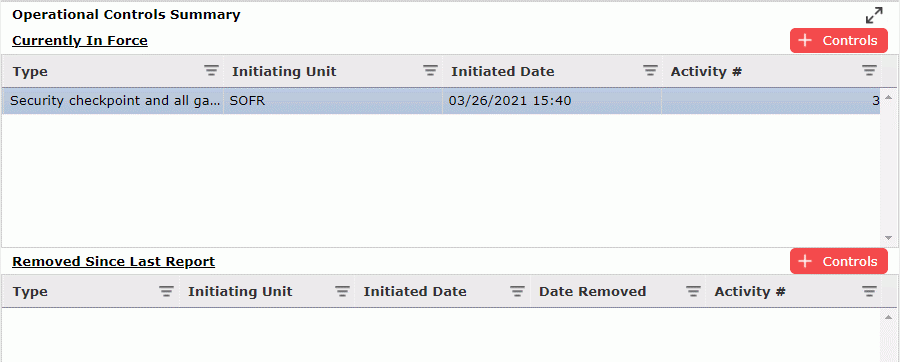
This section is used to document any operational control activities in effect, or which have been removed for the incident. Users can use the free-type option to populate the available fields.
© 2024, TRG The Response Group LLC., All rights are reserved.
No part of this web site, and the information which it contains, may be reproduced, stored in a retrieval system or transmitted in any form or by any means, electronic, mechanical, photocopying, recording or otherwise, without prior written permission of TRG.