| IAP Software ™ |  |
| IAP Software ™ | |
Application Options
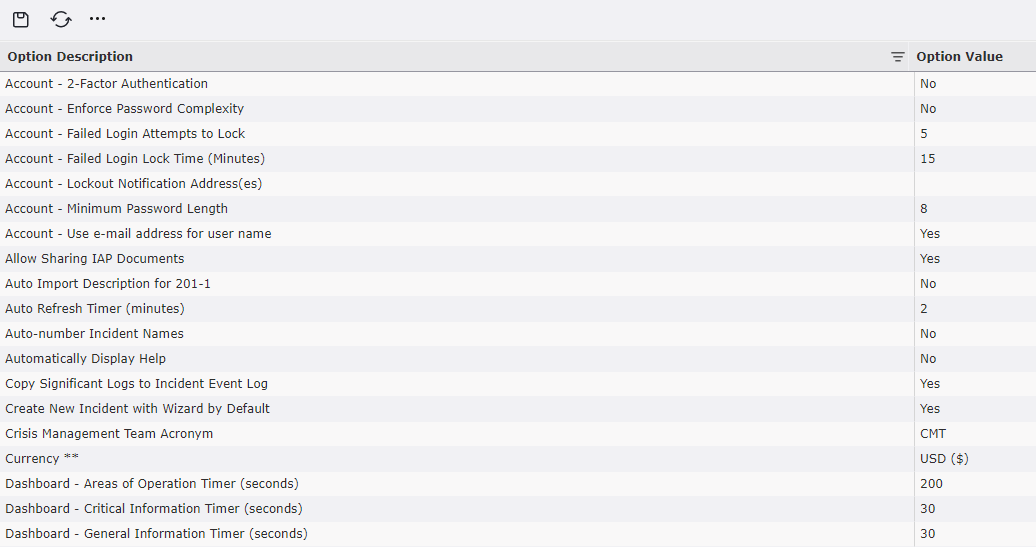
The Application Options allow the database administrators to modify the default settings for the overall IAP Software. Administrators can set the password complexity to an account, number of failed login attempts, default coordinates, state, time zone, and other imperative information. Some application options have corresponding incident specific options which are managed on an incident by incident base, these are designated by a ** symbol after the name, for more information see the Incident Specific Options page.
Contents
Account – 2-Factor Authentication
Account – Enforce Password Complexity
Account – Failed Login Attempts to Lock
Account – Failed Login Lock Time (Minutes)
Account – Lockout Notification Address(es)
Account – Minimum Password Length
Account – Use e-mail address for Username
Auto Import Description for 201-1
Copy Significant Logs to Incident Event Log
Create New Incident with Wizard by Default
Crisis Management Team Acronym
Default operational period length (hours)**
Default Regional Business Unit
Display nautical data by default
ICS 213 General Message / Broadcast Messaging
ICS 213 General Message E-mail Notifications
ICS 213 General Message Text Notifications
ICS 215 - Include Personnel Resources**
Information Management – Use Process**
Information Management – Use Sensitive Data Opt**
Plan Approvals – Require Security PIN **
Reassign Resources on Check In**
Requisition Internal Reference Label
Resource Search Radius (mi) **
Send Meeting Reminders ## Minutes Before Start
Situation Status Board Carousel Interval (sec)
Use Default Resource Rates/Prices
Use Requisition Internal Reference #
User/Incident Category Security
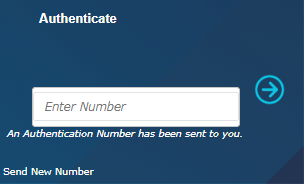
Two factor authentication provides an additional level of security verification when logging in to the software. After entering the username, client code and password combination to login the user will be emailed a numeric code to be entered before access to the IAP Software will be granted.

NOTE: It is recommended that Two Factor Authentication only be used when Individual logins are utilized.
Enforce Password Complexity forces the user to make a more secured password. When enforced the password must contain three of the following: Upper Case Letter, Lower Case Letter, Number, and Special Character.

This option sets the number of attempted logins a user may enter before the account is disabled.

After repeated failed login attempts that exceed the Failed Login Attempts to Lock option set the associated user’s account will be locked for the time frame designated. After the timeframe set has passed the user’s account will be unlocked.

Users can enter the email address to receive notification in the event the account is locked out.

This value sets the minimum password character length that must be met when creating an account password.

When creating new user accounts, if this option is enabled, the username for the account will automatically use the email associated to the selected personnel record.

This allows for incidents to be created that are not a part of the database organization’s responsibility.
Note: This option is not available in all databases.

When this option is enabled, users have the ability to associate a QR code to documents which can then be shared.

When enabled, this feature will automatically import the incident description from the incident details screen to the Current Situation section of a new ICS 201-1 Incident Briefing Map/Sketch form.

The value set for this option will determine the time interval at which forms will be refreshed when the Auto Refresh option is turned on for the form. This value will be applied to all forms with the Auto Refresh option.

This feature, when enabled, will assign a number instead of an incident name to each new incident created.


The IAP Software has quick links integrated into sections of the forms. When the Automatically Display Help option is turned on the quick links will be displayed within each section of the form with this icon:  .
.

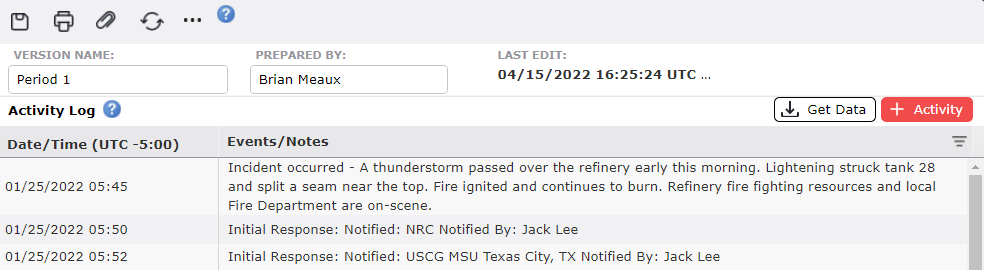
When this option is enabled, items marked as Significant on either the ICS 214 or ICS 214a form will be automatically copied over to the Incident Event Log.

When creating a new incident within the IAP Software users can choose between two default options: Create Incident (without Wizard) or Create Incident (with Wizard). When this option is enabled the default selection will use the Wizard.

The Crisis Management Team Acronym can be modified to be client specific. Changing the acronym within Application Options will also change the acronym on the Navigation tab.


This option allows the user to choose a default currency to be used throughout the IAP.

NOTE: This feature is also managed as an incident specific option, for more information see the Incident Specific Options page.
This option allows the user to choose a default refresh rate to be used for each of the widgets on the Dashboard. Each widget can be set at a different refresh rate.

Users can define the appropriate default business unit.

This option provides the user the capability to select a default center point and zoom level for every new map that is created.


This option allows the user to set a default country location for the database.

This enables the user to set a default date format to MM/dd/yyyy, dd.MM.yyyy, dd/MM/yyyy, dd-MM-yyyy, MM.dd.yyyy, MM/dd/yyyy, or MM-dd-yyyy.

NOTE: This feature is also managed as an incident specific option, for more information see the Incident Specific Options page.
This option allows the user to set a default name for the first operational period. For more information on creating and naming periods see the Operational Periods page.


This enables the user to select the default view of resources on the ICS 204: Incident Resources, Required Resources, or Standard ICS 204. See the ICS 204 - Assignment List page for more information on adding and displaying resources to work assignments.


NOTE: This feature is also managed as an incident specific option, for more information see the Incident Specific Options page.
This enables the user to select the default time span for each Operational Period. For more information on creating Operational Periods see the Operational Periods page.

NOTE: This feature is also managed as an incident specific option, for more information see the Incident Specific Options page.
Users can define the appropriate default regional business unit.

As new users are added to the database, by default, they will be assigned with the Role permissions designated here. For more information on permission levels see the Role Permissions page.

This enables the user to set a default state for the database.

This allows the user to set a default time zone for their appropriate location so that forms will be marked consistently.

When enabled, the fields for nautical data will be displayed by default on the Weather Report. When disabled these same fields will be hidden.


NOTE: There is a checkbox on the Weather Report which allows the nautical data to be displayed or hidden. For information see the Weather Report page.
A data security option allowing all personnel specific data to be deleted when the personnel record is deleted from the database.

Users can define the default sort order of items on event logs to be either Ascending or Descending according to the item Date/Time stamp.

This option determines how many icons can be designated as a favorite within the create map windows.

This option uses actual check in data combined with Price Maintenance to calculate costs for Daily Cost Maintenance.

NOTE: This feature is also managed as an incident specific option, for more information see the Incident Specific Options page.
This option uses shift times combined with Price Maintenance to calculate costs for Daily Cost Maintenance.

NOTE: This feature is also managed as an incident specific option, for more information see the Incident Specific Options page.
This option determines the default number of records displayed on the page for a list.


This option provides the option to change the name that is displayed within the Hurricane Planning Forms for the D-Time value.

This option provides the option to change the name that is displayed within the Hurricane Planning Forms for the T-Time value.

This option allows the user to turn on or off when ICS 213 General Messages are sent internally though the IAP Software.


This option allows the user to turn on or off when ICS 213 General Messages are sent using email messaging.


This option allows the user to turn on or off when ICS 213 General Messages are sent using text messaging.


This option allows users to determine whether the ICS 214a Individual Log can be edited by users other than the one who created it.

This option allows users to determine whether the ICS 214a Individual Log can be viewed by users other than the one who created it.

This option allows users to determine if personnel will be included in the resource calculations on the ICS 215 Operational Planning Worksheet form.

NOTE: This feature is also managed as an incident specific option, for more information see the Incident Specific Options page.
This option allows the user to set the default search radius (in miles) used to retrieve Resources at Risk data in relation to the incident location.


NOTE: This feature is also managed as an incident specific option, for more information see the Incident Specific Options page.
Activating this option will allow badges printed to be specific to the current incident rather than working for any incident within the database.

NOTE: This feature is also managed as an incident specific option, for more information see the Incident Specific Options page.
This option determines if the Information Management process is used for new incidents created.

NOTE: This feature is also managed as an incident specific option, for more information see the Incident Specific Options page.
This option determines if the Information Management process also accounts for sensitive data.

NOTE: This feature is also managed as an incident specific option, for more information see the Incident Specific Options page.
Page two of the create incident wizard has been customized for some clients. Users can select to use one of these customized pages here.

This option manages if a pin is required to verify the person who is approving plans.

When this option is enabled, all users accessing an incident will be required to check in. If the user does not check in, they will be placed back on the incident selection screen.

NOTE: This feature is also managed as an incident specific option, for more information see the Incident Specific Options page.
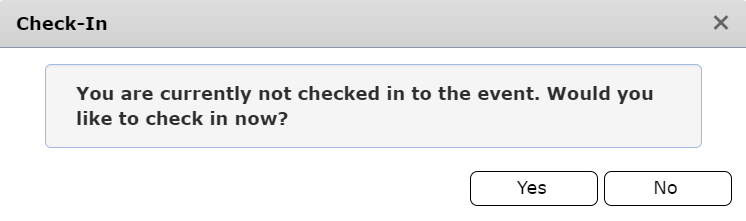
When this option is enabled, upon login, the software will check to see if the user is checked in. If the user is not currently checked-in, they will then be prompted to check-in.
NOTE: This feature is also managed as an incident specific option, for more information see the Incident Specific Options page.
When enabled, scanning a badge will change the assigned area of the associated resource.

NOTE: This feature is also managed as an incident specific option, for more information see the Incident Specific Options page.
This option determines the default report type when creating an incident. The report format can be changed within Incident Details after an incident has been created.

When enabled, upon check-in, personnel will be required to complete a series of questions before being admitted to the incident. The questions in the survey can be customized from the Check-In Survey Setup screen.
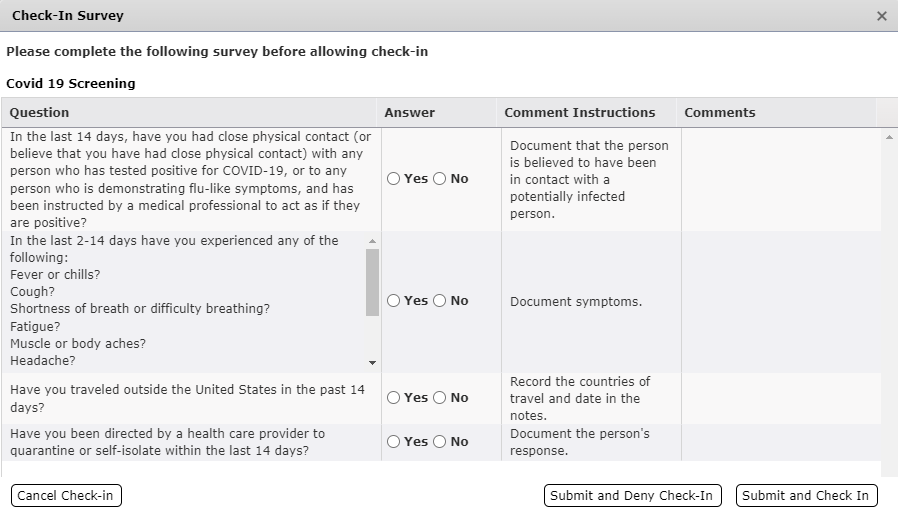
NOTE: This feature is also managed as an incident specific option, for more information see the Incident Specific Options page.
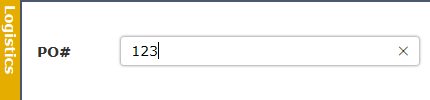
Users can define the requisition internal reference label to be displayed in the ICS 213 RR Resource Request.


This option allows the user to set the default search radius distance in mileage from the incident location to retrieve Resources data.


NOTE: This feature is also managed as an incident specific option, for more information see the Incident Specific Options page.
Users can specify the URL for the SCAT map grid.
NOTE: This feature is also managed as an incident specific option, for more information see the Incident Specific Options page.
Automatic reminders are sent for meetings scheduled on the ICS 230 Meeting Schedule. Users can adjust the time interval ahead of the meeting at which the reminder will be sent using this application option.

This option allows the user to designate a length of inactivity, after which the user will be logged out of the IAP Software.

This option establishes the interval at which the carousel within the Situation Status Board will advance to the next form.

This option, when enabled, will apply the rates for resources designated within the Default Rate Sheets screen.

When this option is enabled metric measurement will be applied instead of imperial measurements.

NOTE: This feature is also managed as an incident specific option, for more information see the Incident Specific Options page.
This option allows the user to select enable the use of the Requisition Internal Reference numbering. When disabled the Internal Reference label and field will not be shown on the ICS 213 RR Resource Request form.

When selected, this option uses the work shift assigned to calculate costs associated with each resource.

NOTE: This feature is also managed as an incident specific option, for more information see the Incident Specific Options page.
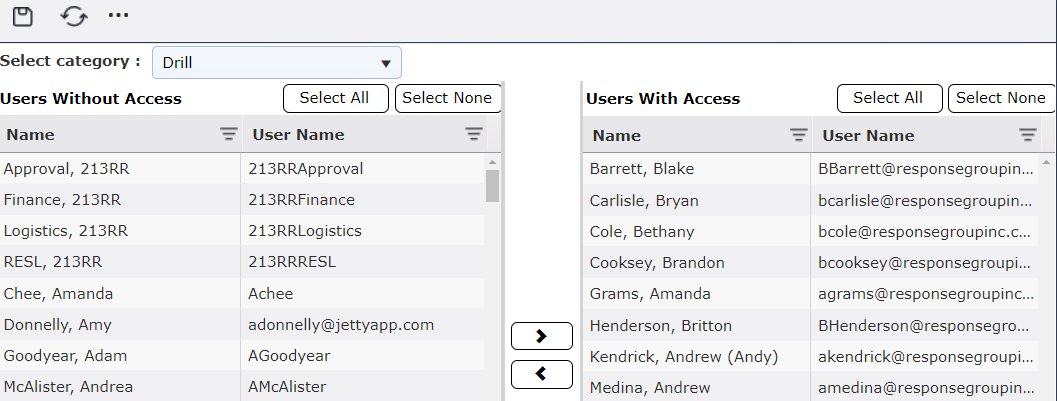
This option allows the user to enable the use of User/Incident Category Security. Using this feature the user can manage which users have access to the specified incident types in the database.

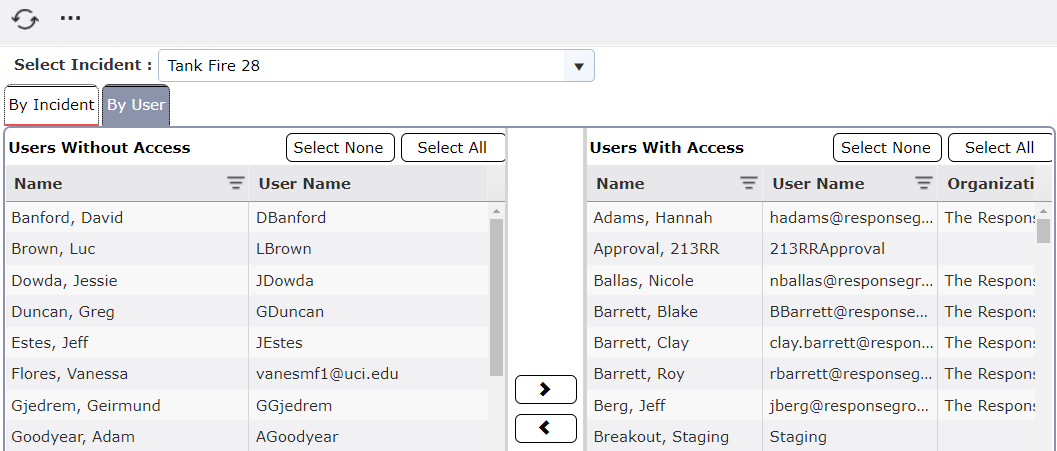
This option allows the user to enable the use of User/Incident Security. Using this feature, the user can manage which users have access to the specified incidents in the database.

© 2024, TRG The Response Group LLC., All rights are reserved.
No part of this web site, and the information which it contains, may be reproduced, stored in a retrieval system or transmitted in any form or by any means, electronic, mechanical, photocopying, recording or otherwise, without prior written permission of TRG.
